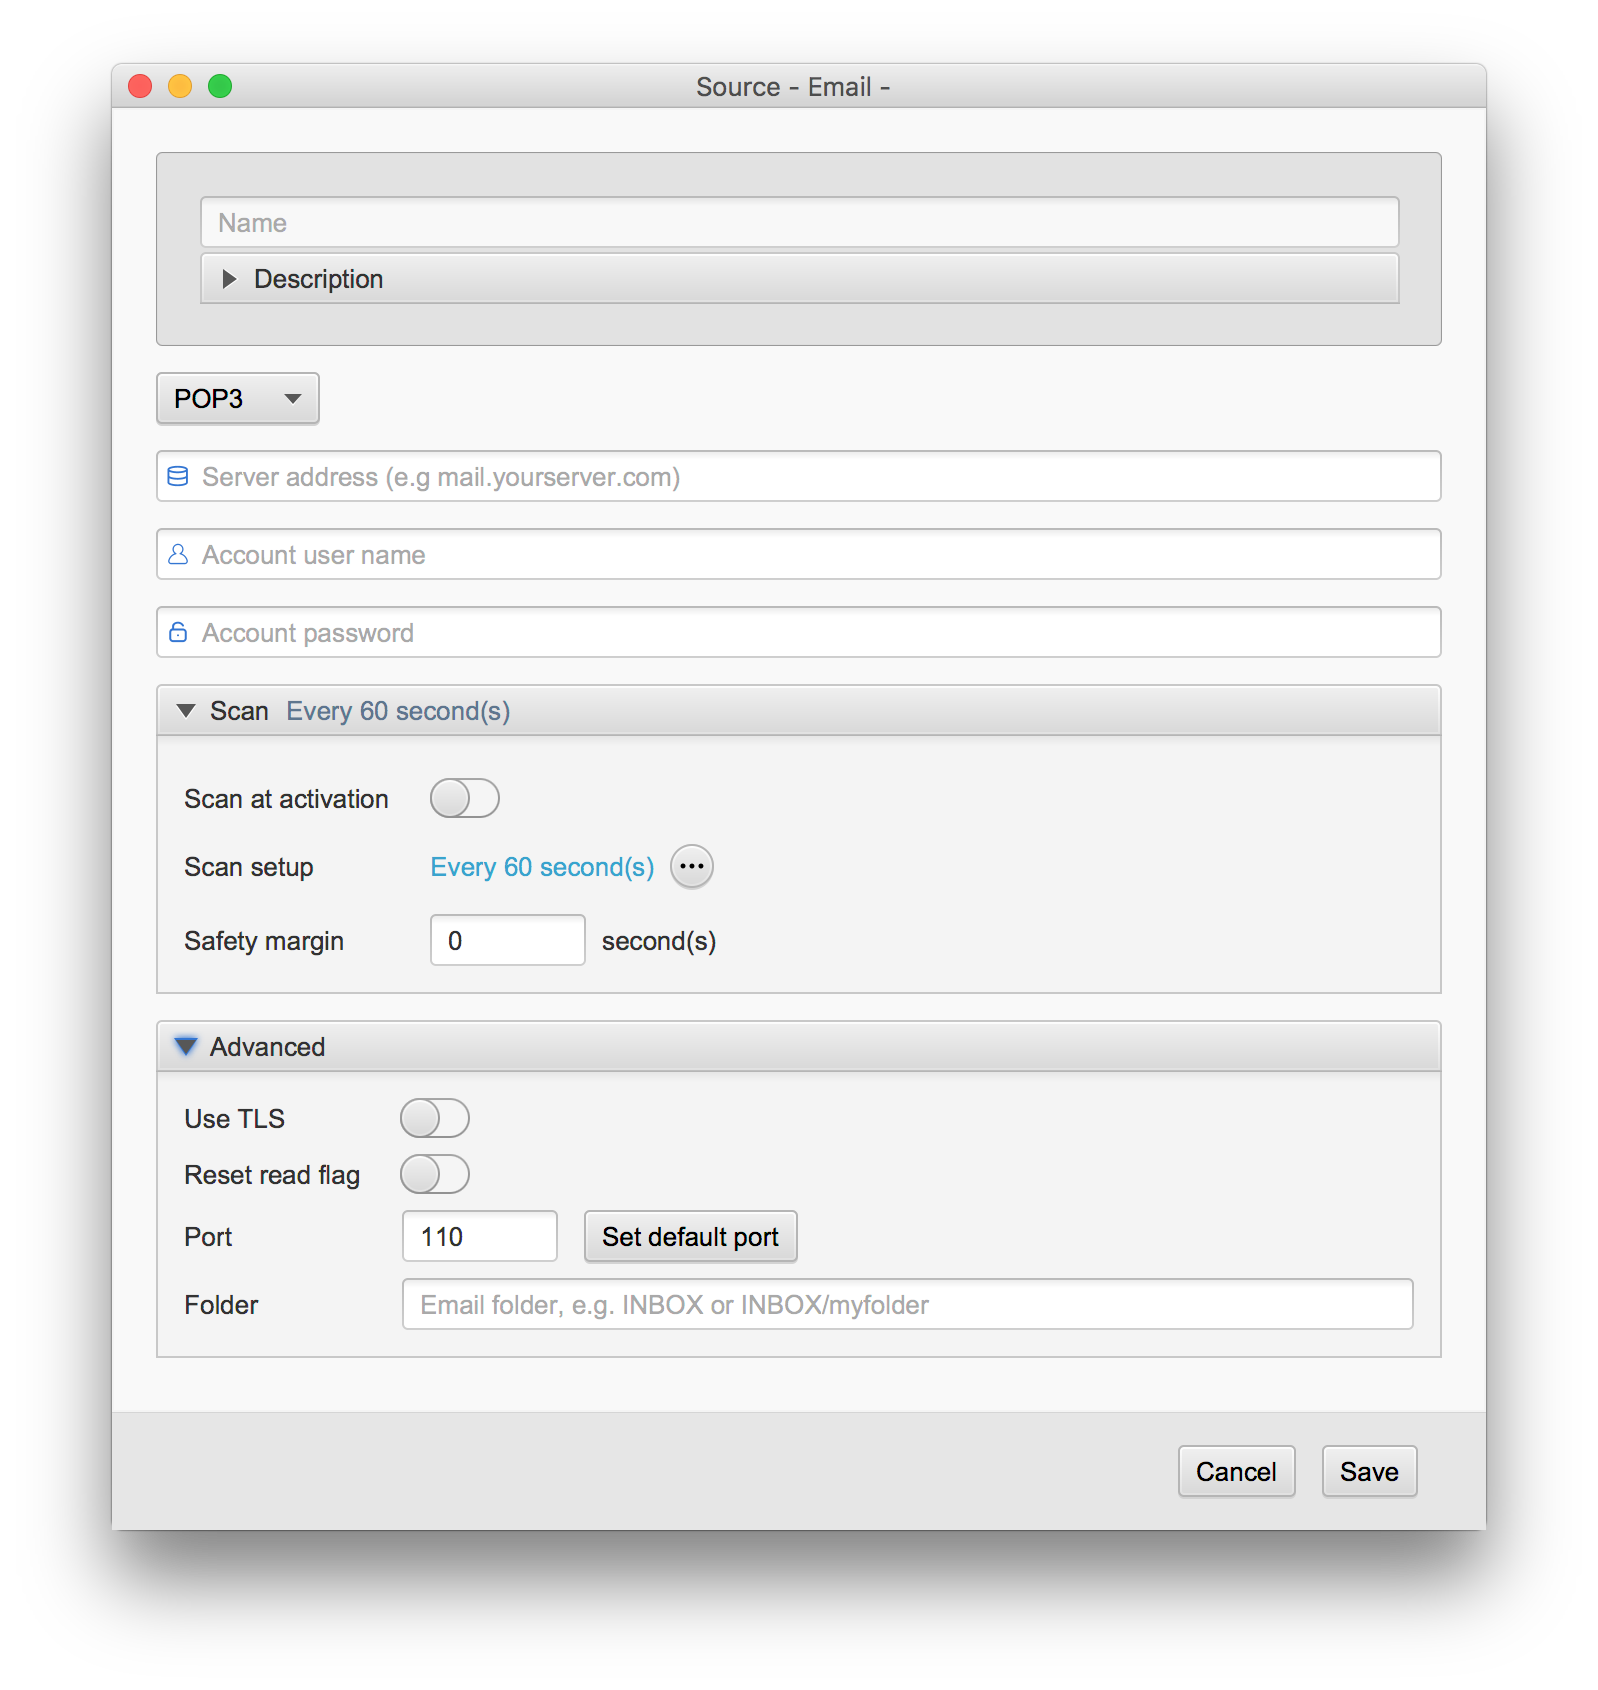
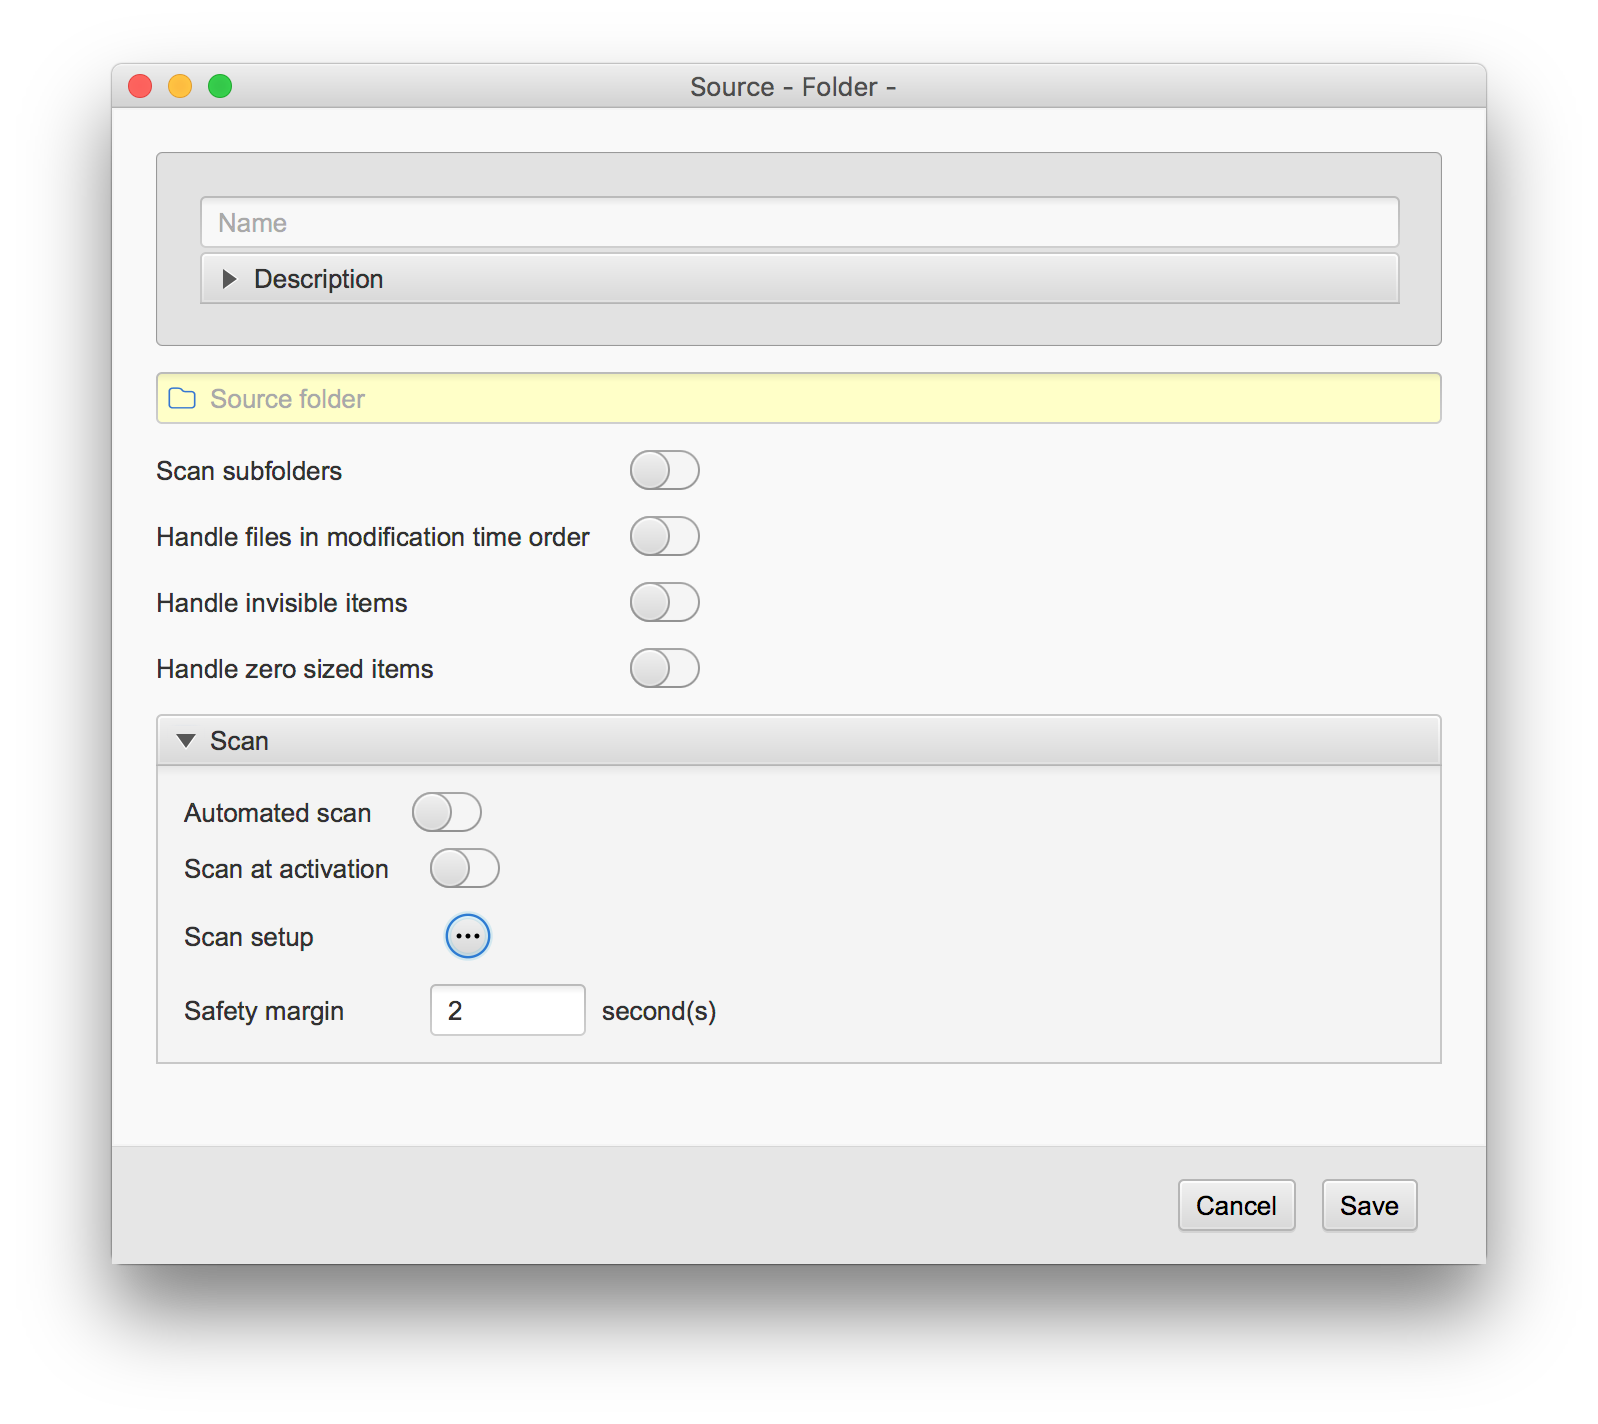
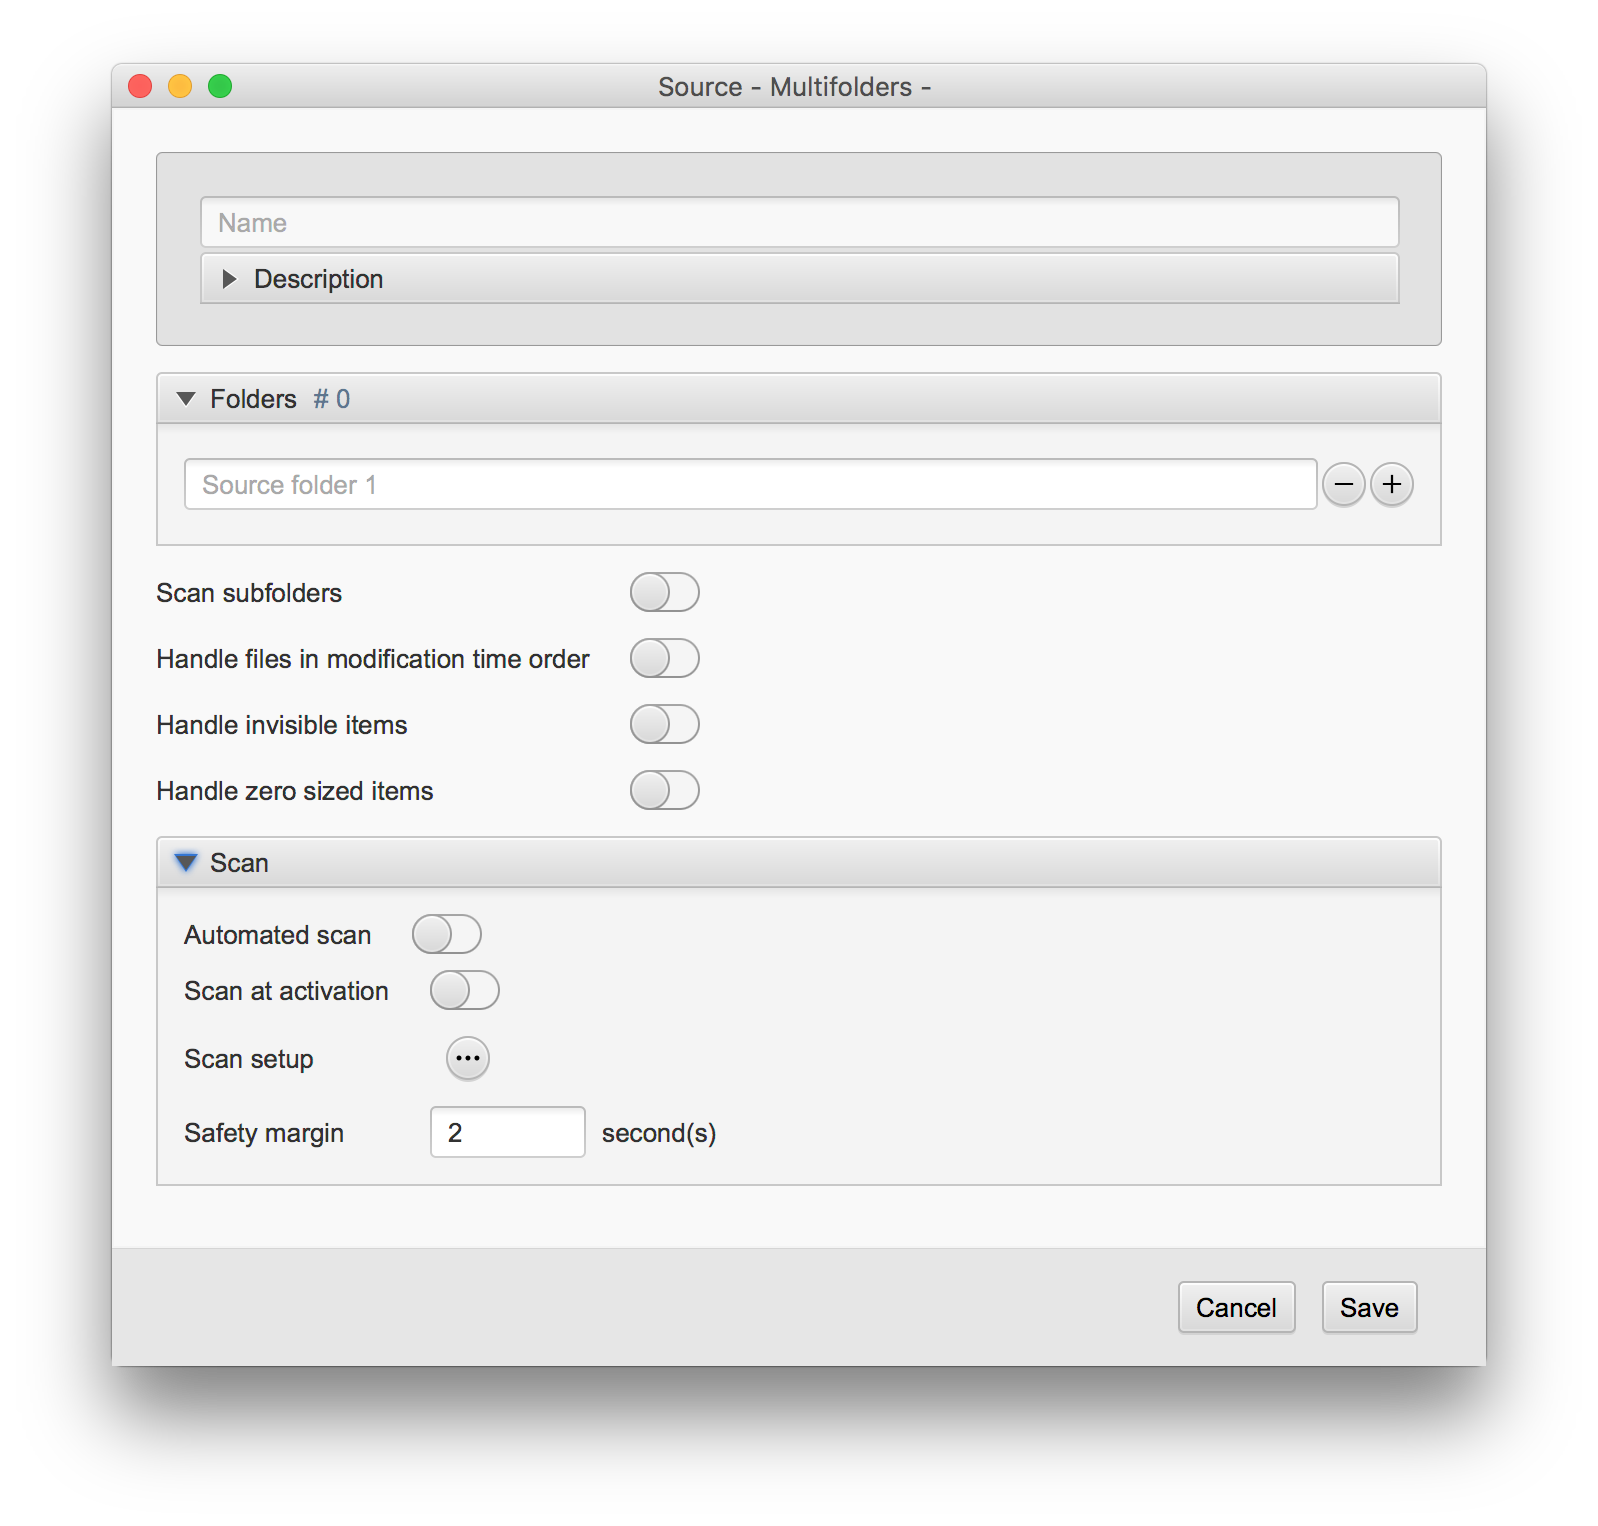
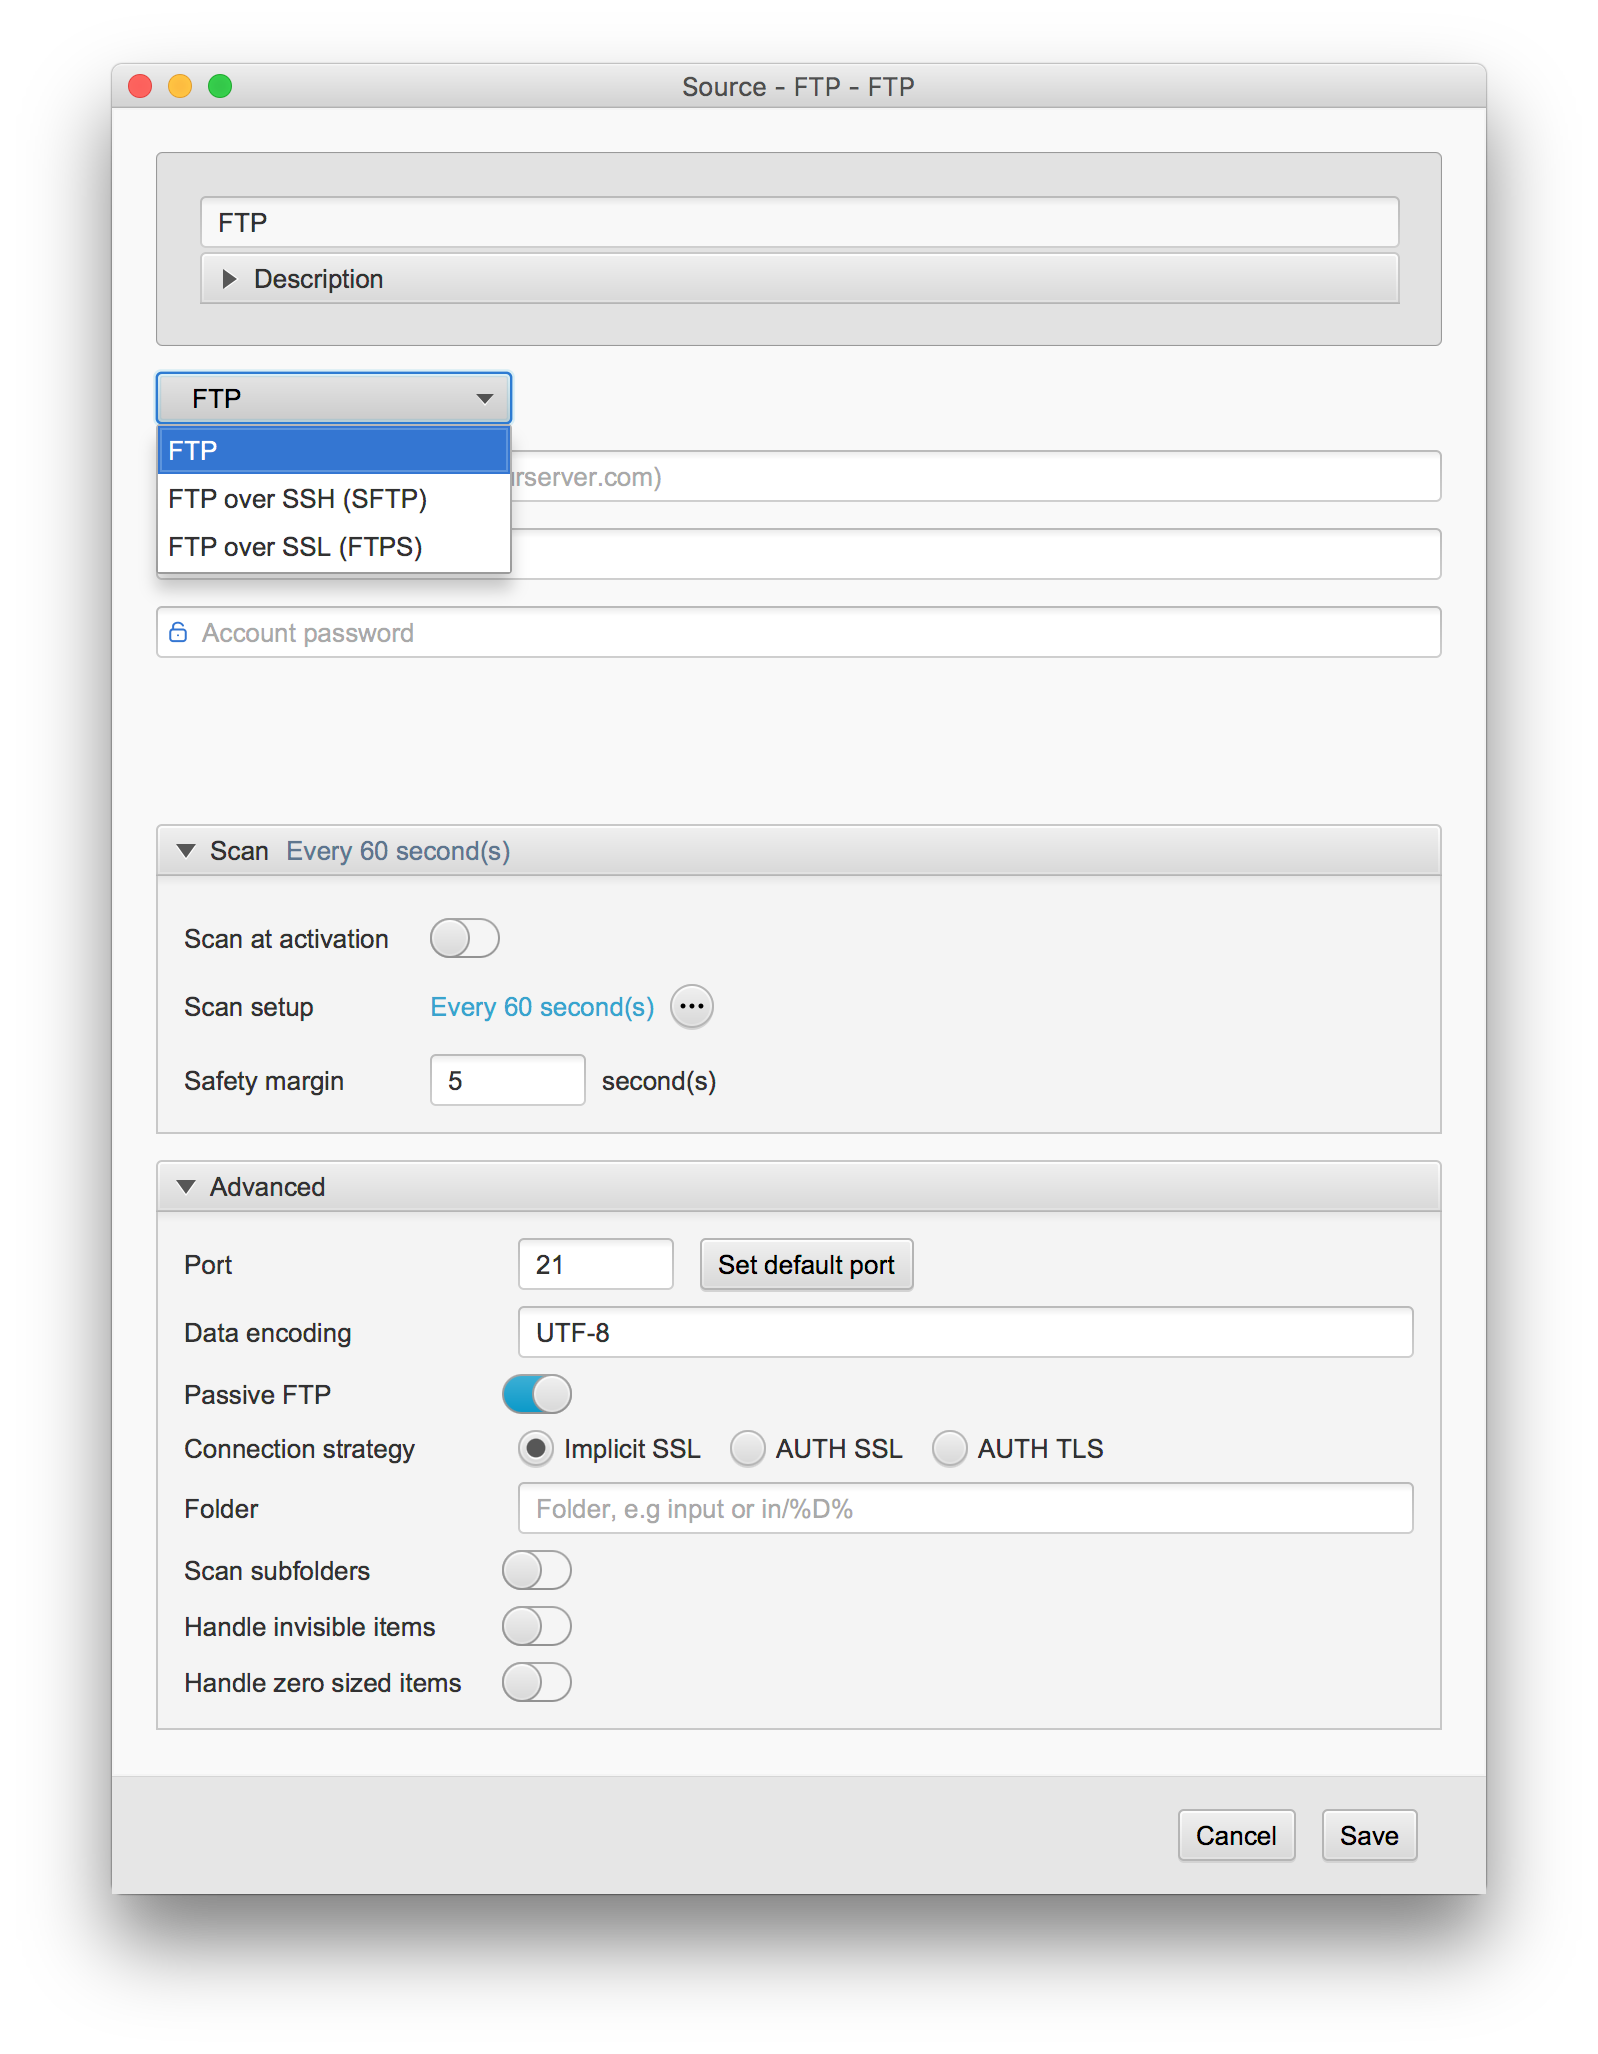
The source is set up through a portfolio server and then you select a catalog that you want to search in.
Catalogs can either be selected (current catalogs are displayed when a portfolio server is selected) or you can choose to enter a catalog with an ID via e.g. macro.
You may then do additional filtering (this becomes a source combined with a filter, to optimize traffic).
You may also select a gallery ID, a specific asset ID or select different filters based on metadata.
From such a source, “Assets” is received.You may from a asset source use %ASSET_xxx% macros.
This is similar to a folder source where you can use %F%.
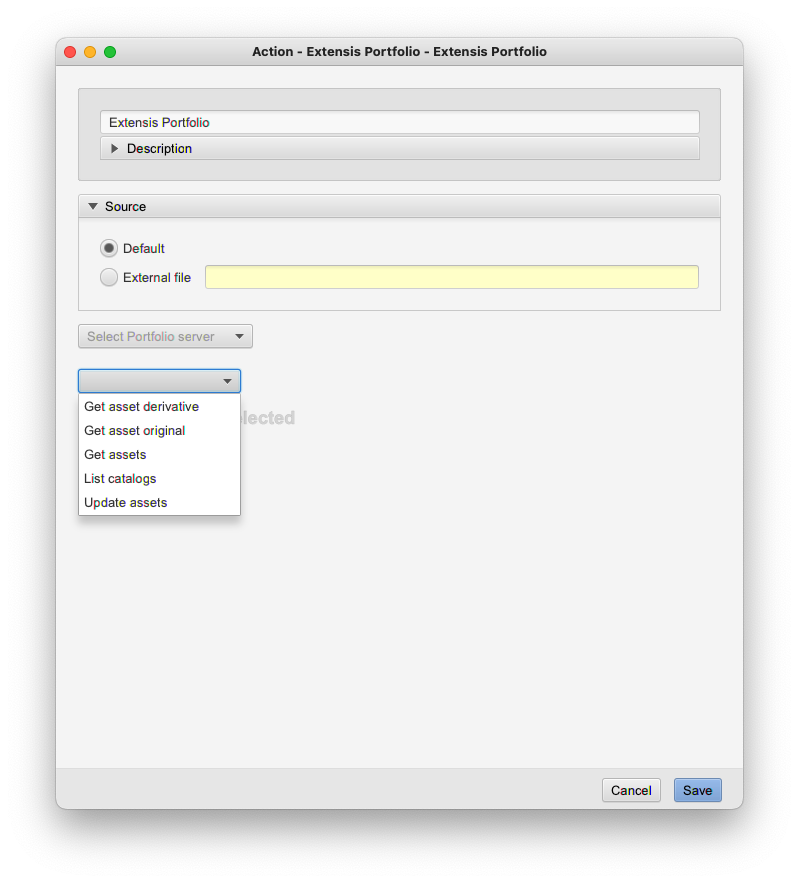
Please note that there is also an action for Portfolio, which also can function as a source.
Using this requires the special “for each asset” action to manage all assets. From a Portfolio source,
each asset is received one by one, so therefore the entire workflow becomes like a for “each asset”.
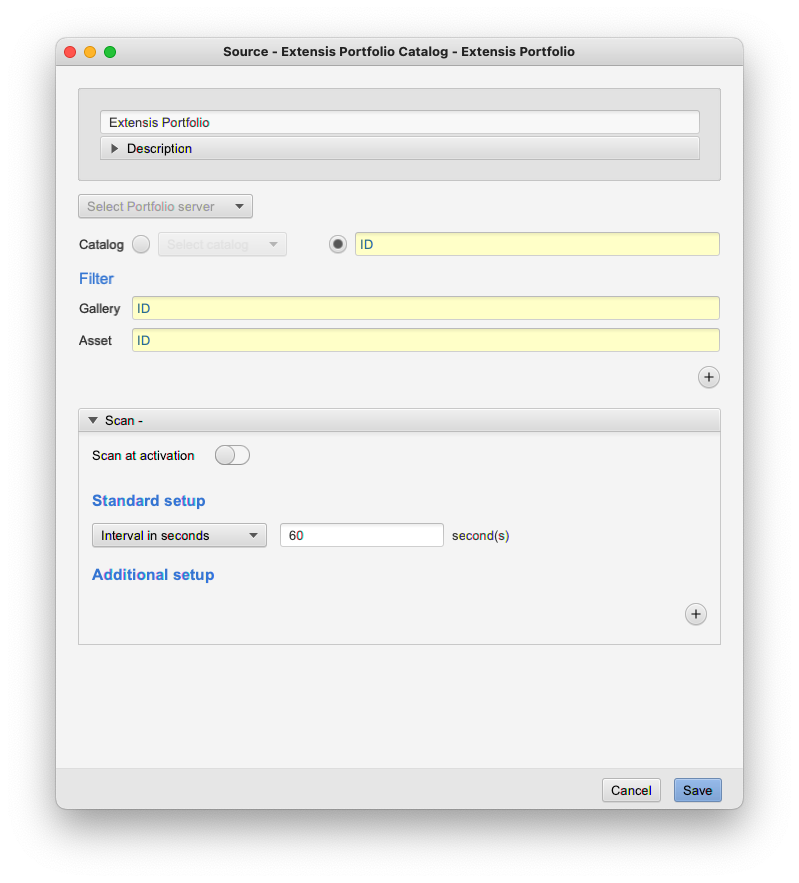
The Extensis Portfolio source settings.
The Extensis Portfolio source preferences
Filters are filtering the objects detected in the sources. This enables advanced workflow where different kind of objects may be routed to different workflows.
There are five default filter types, email, file, folder,misc and timer filter. Corbit has some default filters added. These filters has a name prefixed by three asterisks (***). The default filters are editable and may be changed by the user.
All filters have a name and a description. The name is used throughout the rest of the settings in Corbit and is acting as a human identifier for the component. The description may be used to add additional readable information for the filter. All filters have a set of restrictions. Some restrictions have a check box called 'invert'. If this invert check box is selected the restriction settings for that particular row will be inverted.
The invert check box
Using a file filter with the name restriction
*.pdf
will let any file with the file extension pdf pass the filter.
If the invert check box is selected only files that does NOT have the file extension pdf will pass.
Below the restriction set there is a selection whether one of the restrictions is sufficient or if all the restrictions must be met.
The email filter is a special filter being able to filter emails on a remote email server. An email source must have an email filter to be able to handle the email itself. If attachments of the email are to be handled, a regular file filter should be used. Even if a file filter is used, the macros to get certain email values such as subject or sender are available when actions handle the attachment file. If you use the email filter the actions for this filter will only have the email itself to work with, not the attachment files.
Attachments
To filter on individual attachments, use a file filter instead.
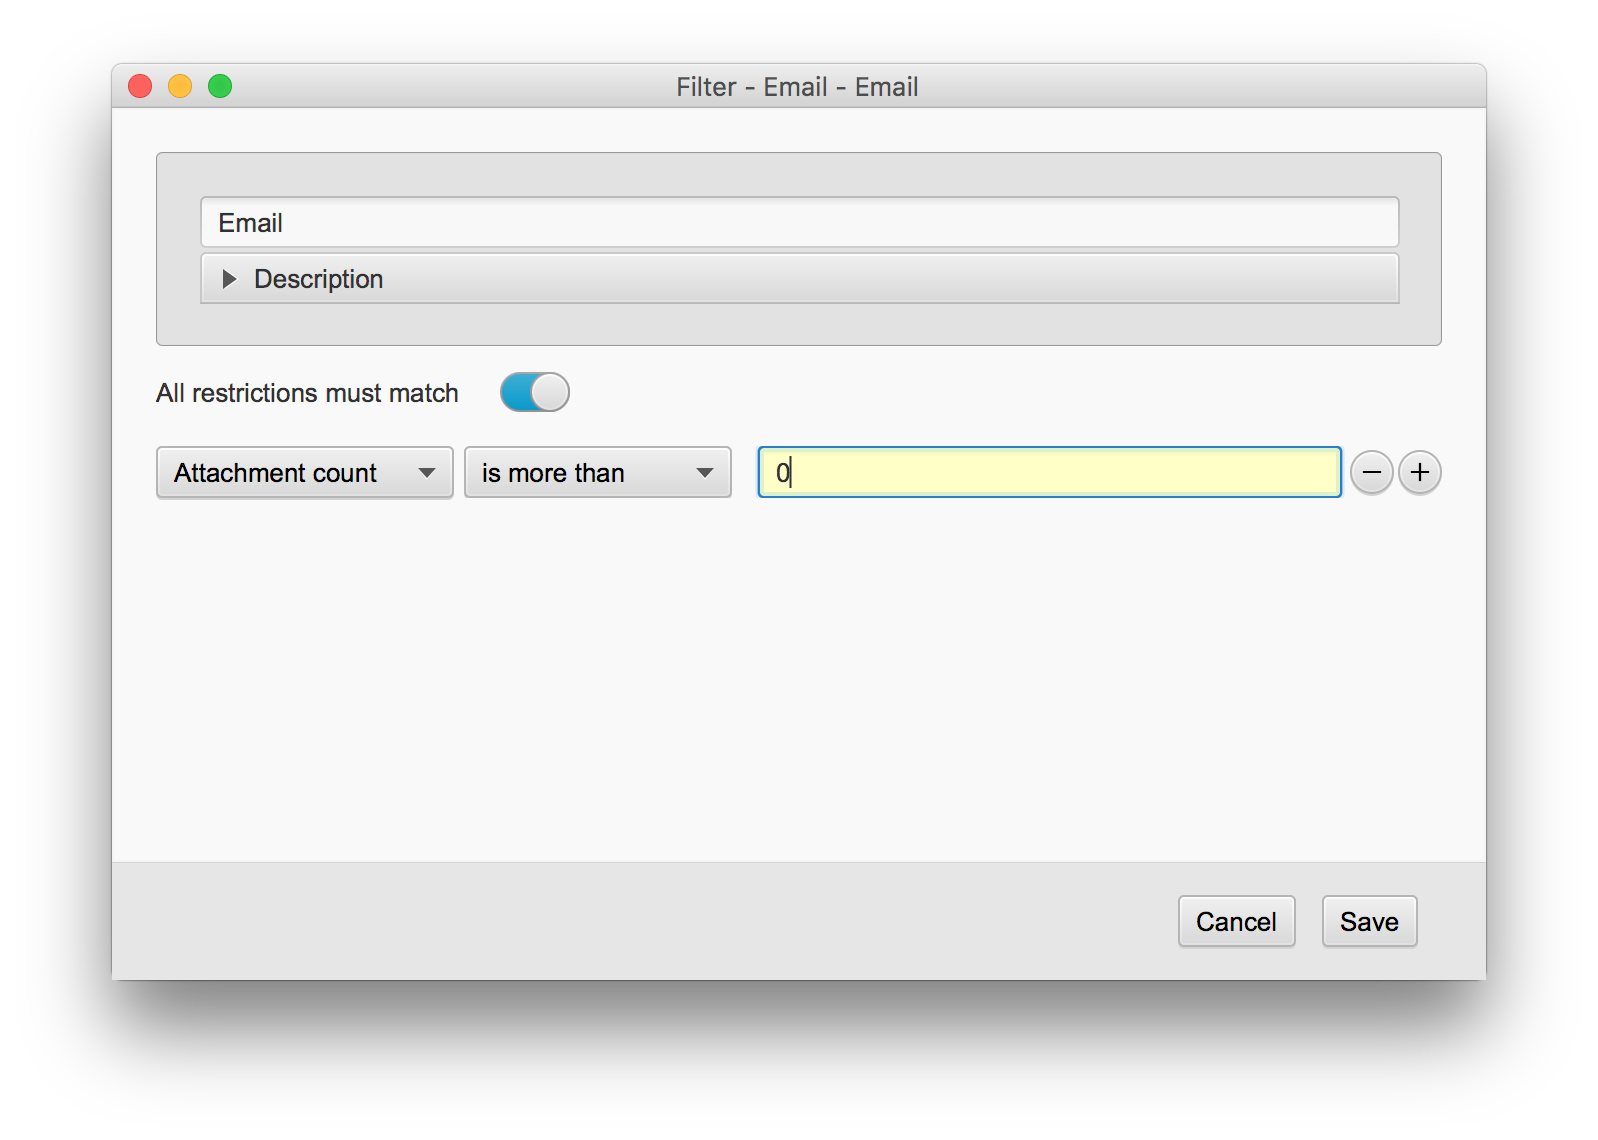
The email filter settings.
Email filter preferences
Restrictions for email filter
| Restriction |
Description |
| Attachment name |
This will filter on any of the attachment's name. Asterisk (*) may be used as a wild card meaning any character (0, 1 or more characters). Question mark (?) may be used as a wild card where there must be a character but that character may be any character.
If different names are wanted you separate them with commas. For example, if files that ends with '.eps' and files that ends with '.ps' should be filtered you enter '*.eps, *.ps' in the file name field.
Note that it is enough that one attachment is passing this filter for the email to be handled. Also note that if the attachment itself is wanted to be handled, use a regular file filter instead. |
| Attachment count |
This will compare the email's attachment count and if equal, less than or greater than the specified number the email will be handled. |
| Email sender |
This will compare the email sender with the text entered. The same rules with asterisk, question marks and commas applies as for attachment name and email body. |
| Email subject |
This will compare the email subject with the text entered. The same rules with asterisk, question marks and commas applies as for attachment name and email body. |
| Email body |
This will compare the email body with the text entered. The same rules with asterisk, question marks and commas applies as for attachment name and email sender. |
| Email send time |
This is the time when the email was sent. If the send time compared to current time is larger than the specified time, the email is handled. |
| Time from discovery |
This is the time from the moment Corbit detects the object. When the specified time has elapsed the object is handled. |
| Bucket |
This filter will check a specific bucket key. The filtering may check if the bucket value is equal to a certain value or if the bucket value contains a text or if the bucket value at all exists.
You must select if the bucket key that is checked is from a Workflow bucket or object bucket, read more about the different buckets in chapter 2. |
| File exists |
This filter may check if an external file with the path specified exists or not. |
The file filter is filtering regular files as well as FTP files and attachments in emails.
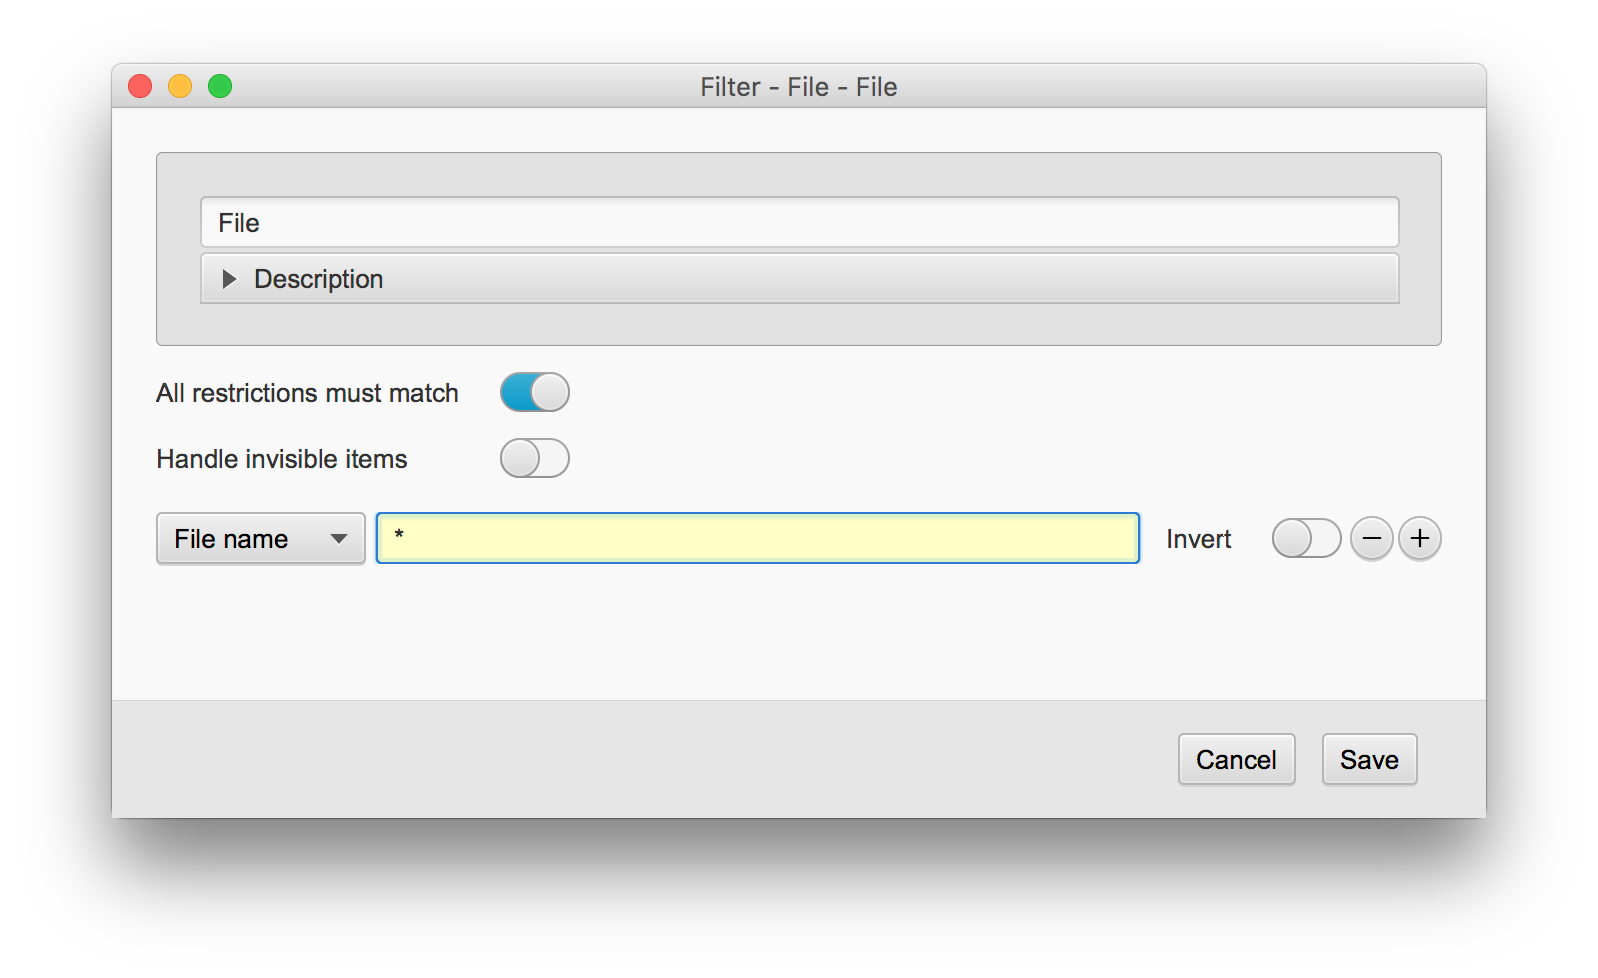
The file filter settings.
File filter preferences
Restrictions for file filter
| Restriction |
Description |
| File name |
This will filter on the file name. Asterisk (*) may be used as a wild card meaning any character (0, 1 or more characters). Question mark (?) may be used as a wild card where there must be a character but that character may be any character.
If different names are wanted you separate them with commas.
Example, if files that ends with '.eps' and files that ends with '.ps' should be filtered you enter '*.eps, *.ps' in the file name field. |
| Bucket |
This filter will check a specific bucket key. The filtering may check if the bucket value is equal to a certain value or if the bucket value contains a text or if the bucket value at all exists..
You must select if the bucket key that is checked is from a Workflow bucket or object bucket, read more about the different buckets in chapter 2. |
| File size |
This denotes the file size. You may select that the file size should be equal, less than or bigger than a certain byte count. |
| Modification time |
This is the file modification time. If the modification time compared to current time is larger than the specified time, the file is handled. |
| Time from discovery |
This is the time from the moment Corbit detects the file. When the specified time has elapsed the file is handled. |
| File exists |
This filter may check if an external file with the path specified exists or not. |
| Page count |
|
| Image dimensions |
Filter on the actual dimensions of the image. |
| Image resolution |
Checks the x and/or the y resolution in DPI. |
| Image color space |
This restriction will pass files that has the specified color space. |
| PDF format |
This feature is only working on PDF files. You may choose to check any of the following boxes; Media box, Crop box, Bleed box, Trim box or Art box and you may check either width or height or both whether they are less than, bigger than or equals a certain number in millimeters. |
| PDF version |
This feature is only working on PDF files. Specify the version number, e.g. 1.3 and select whether the version on the files has to be this version, must be less than or greater than this version. |
| XMP |
This will filter the file on the XMP content. This is only applicable to JPG, PDF and TIFF files.
Select the XMP property in the popup and select one of the following;
Equals: The XMP value should be exact as specified.
Contains: The XMP value should contain the value specified.
Has value: The XMP value should be present in the file. |
| IPTC |
This feature is reading the actual IPTC information in the file (works only with jpg and tiff files).
Select the IPTC field in the popup and select one of the following;
Equals: The IPTC field value should be exact as specified.
Contains: The IPTC field should contain the value specified.
Has value: The IPTC field should contain something. |
| MP3 album |
This will look at the ID3 information of the file and filter on the album tag. (works only with MP3 files).
The same special characters as for the file name restriction can be used. |
| MP3 artist |
This will look at the ID3 information of the file and filter on the artist tag. (works only with MP3 files).
The same special characters as for the file name restriction can be used. |
| MP3 comment |
This will look at the ID3 information of the file and filter on the comment tag. (works only with MP3 files).
The same special characters as for the file name restriction can be used. |
| MP3 genre |
This will look at the ID3 information of the file and filter on the genre tag. (works only with MP3 files).
The same special characters as for the file name restriction can be used. |
| MP3 title |
This will look at the ID3 information of the file and filter on the title tag. (works only with MP3 files).
The same special characters as for the file name restriction can be used. |
| MP3 track |
This will look at the ID3 information of the file and filter on the track tag. (works only with MP3 files).
Put the number in the input area and select one of the following;
Equals: The ID3 value should be exact as specified.
Less than: The ID3 value should should be less than the value specified.
More than: The ID3 value should should be morethan the value specified. |
| MP3 track count |
This will look at the ID3 information of the file and filter on the track count tag. (works only with MP3 files).
Put the number in the input area and select one of the following;
Equals: The ID3 value should be exact as specified.
Less than: The ID3 value should should be less than the value specified.
More than: The ID3 value should should be morethan the value specified. |
| MP3 year |
This will look at the ID3 information of the file and filter on the year tag. (works only with MP3 files).
Put the year in the input area and select one of the following;
Equals: The ID3 value should be exact as specified.
Less than: The ID3 value should should be less than the value specified.
More than: The ID3 value should should be morethan the value specified. |
The folder filter handles folders. Please note that some of the restrictions may not work for remotely located folders. See table 3.3-5 for more information about the restrictions for this filter.
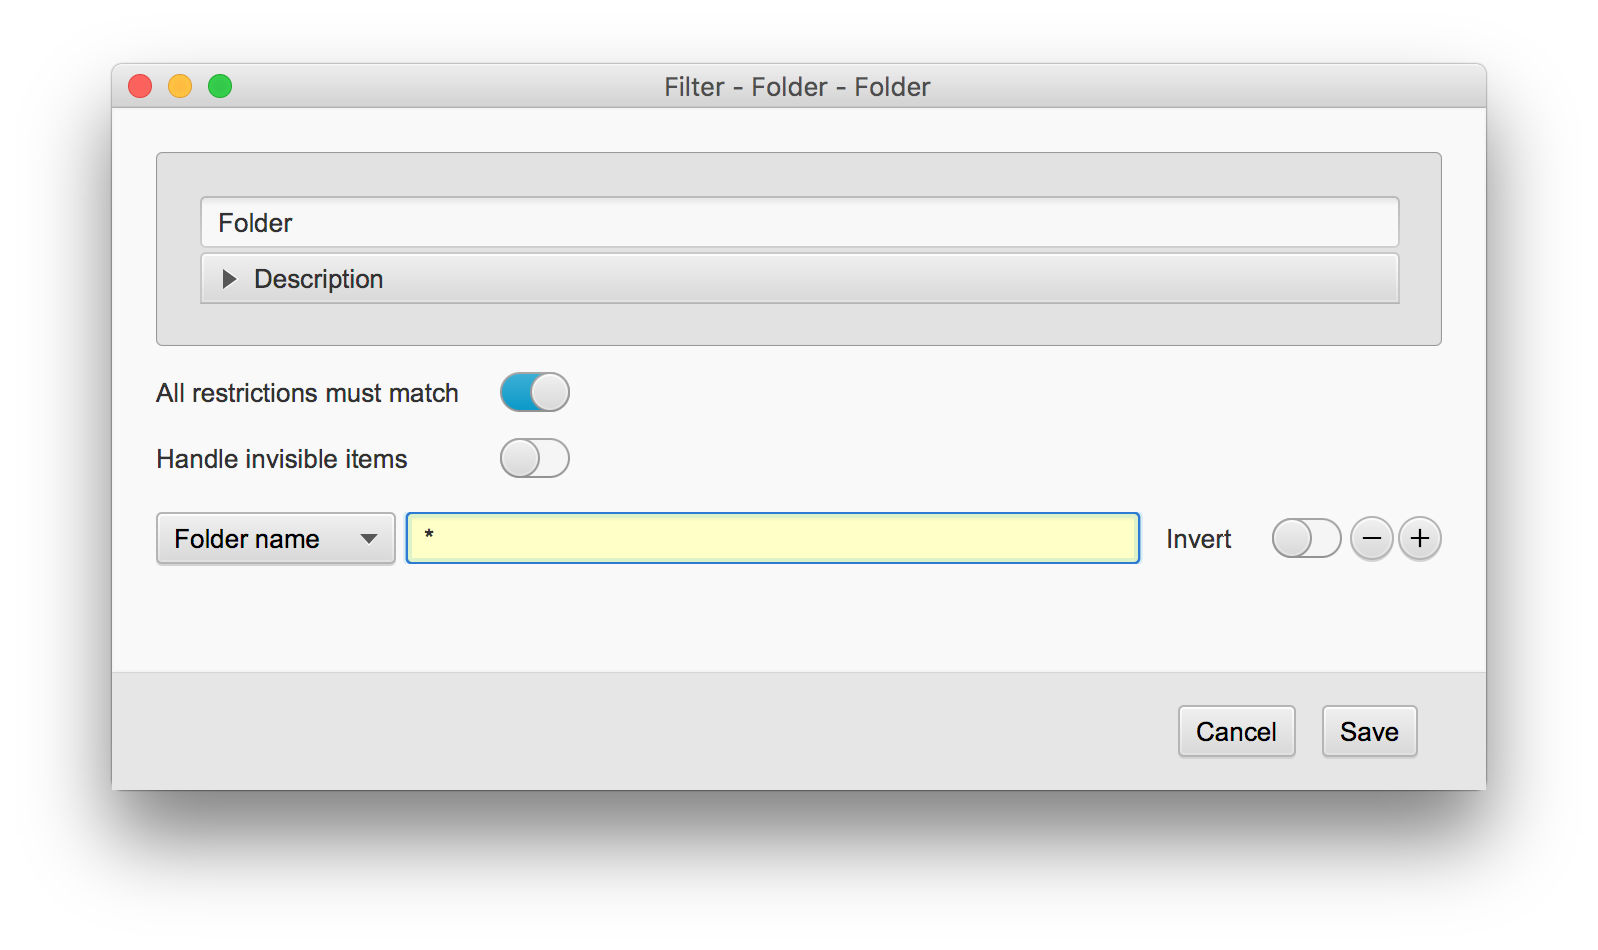
The folder filter settings.
Folder filter preferences.
Restrictions for folder filter
| Restriction |
Description |
| Folder name |
This will filter on the folder name. Asterisk (*) may be used as a wild card meaning any character (0, 1 or more characters). Question mark (?) may be used as a wild card where there must be a character but that character may be any character.
If different names are wanted you separate them with commas. |
| Bucket |
This filter will check a specific bucket key. The filtering may check if the bucket value is equal to a certain value or if the bucket value contains a text or if the bucket value at all exists.
You must select if the bucket key that is checked is from a Workflow bucket or object bucket, read more about the different buckets in chapter 2. |
| Folder size |
This denotes the number of items within the folder (both files and folders). You may select that the count should be equal, less than or bigger than a certain number. |
| File exists |
This filter may check if an external file with the path specified exists or not. |
| Modification time |
This is the folder modification time. If the modification time compared to current time is larger than the specified time, the folder is handled. |
| Time from discovery |
This is the time from the moment Corbit detects the folder. When the specified time has elapsed the folder is handled. |
The misc filter is a special filter which may be used in various situations. This filter have the special restriction 'pass all' which will allow anything through the filter.
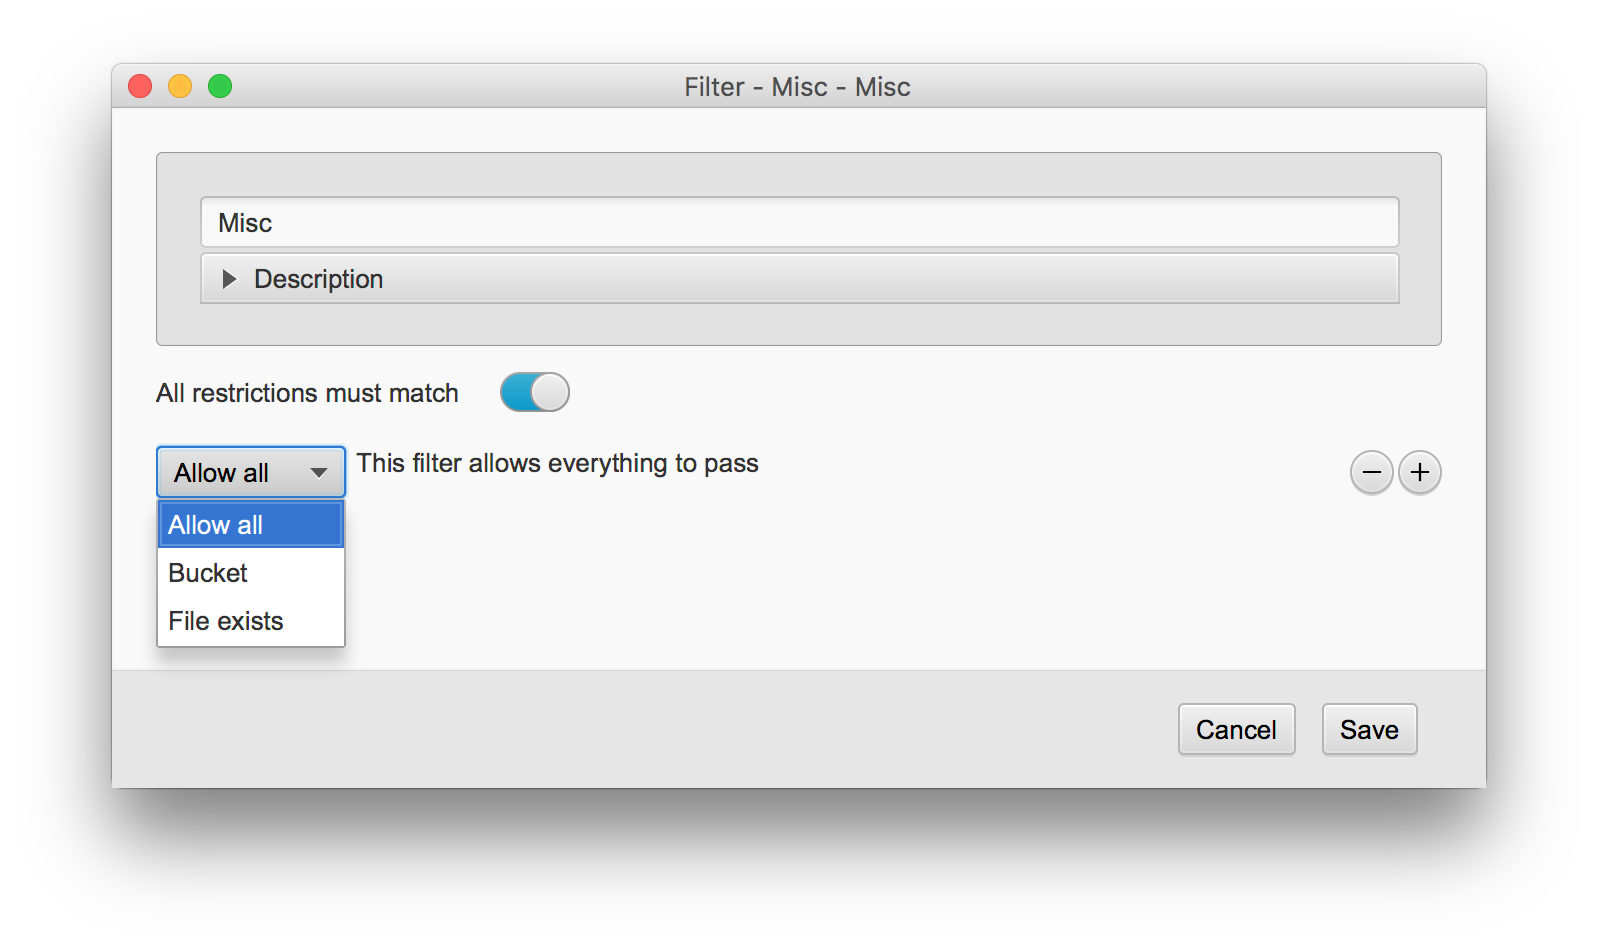
The misc filter settings.
Misc filter preferences.
Restrictions for misc filter
| Restriction |
Description |
| Allow all |
Lets all objects through. |
| Bucket |
This filter will check a specific bucket key. The filtering may check if the bucket value is equal to a certain value or if the bucket value contains a text or if the bucket value at all exists.
You must select if the bucket key that is checked is from a Workflow bucket or object bucket, read more about the different buckets in chapter 2. |
| File exists |
This filter may check if an external file with the path specified exists or not. |
Special filter used with timer sources.
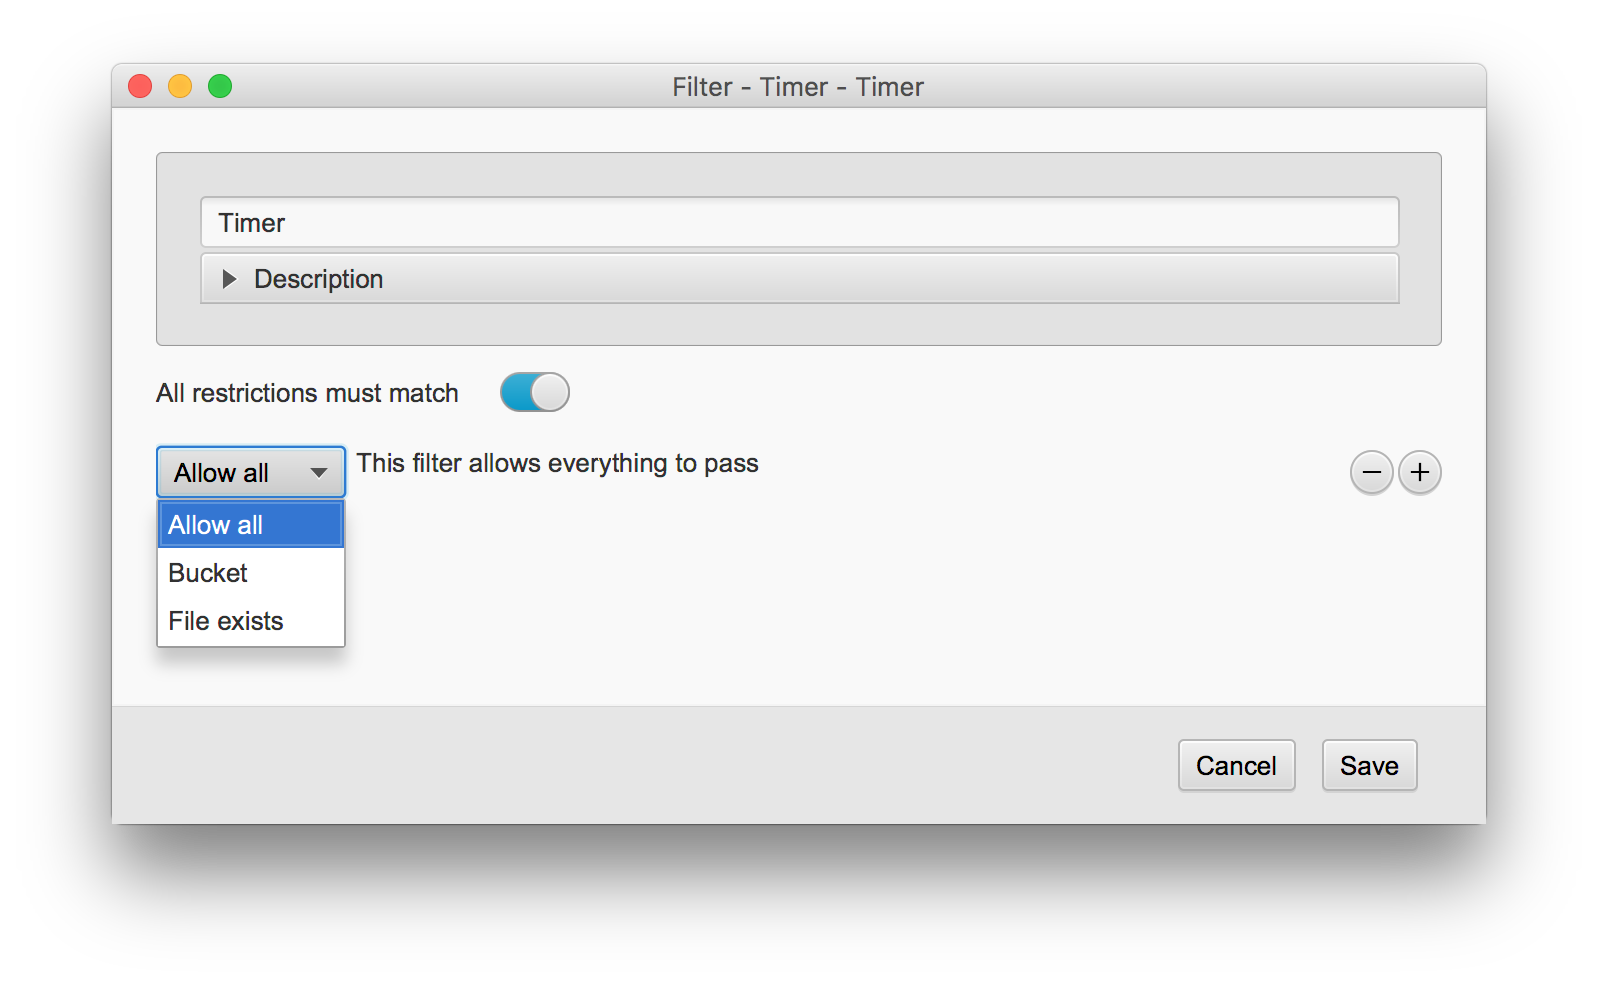
The timer filter settings.
Timer filter preferences.
Restrictions for timer filter
| Restriction |
Description |
| Allow all |
Lets all objects through. |
| Bucket |
This filter will check a specific bucket key. The filtering may check if the bucket value is equal to a certain value or if the bucket value contains a text or if the bucket value at all exists.
You must select if the bucket key that is checked is from a Workflow bucket or object bucket, read more about the different buckets in chapter 2. |
| File exists |
This filter may check if an external file with the path specified exists or not. |
Objects that have been filtered might be handled in different ways. This is where the actions are used. An action is a 'handling' invoked on an object. This handling may affect the object (for example moving the object) or it may just use the object as reference for doing some other action (for example sending an email).
Corbit comes with many default actions and special actions can be added upon request. This way very advanced actions may be invoked on an object. This may involve advanced merging of documents, updating of databases or other repositories or other integrations with existing systems and/or applications.
Each built-in action is described in more detail below where you will find information about what the action is handling. Some actions may add values in the Workflow bucket, this information is also found in each description below.
Email handling
If an email is being filtered in the special email filter (see above) the email itself is treated but not the individual attachments.
If on the other hand an email is filtered in a file filter the attachments will be treated individually.
Corbit action source setup

Source setup
The source setup is a common setup item used in many Corbit actions.
The source will determine the actual source that will be set in the scope of the action's execution.
If an action is working directly with the source item (e.g. a Move action) the source will determine what actual item that will be handled.
The source item may be the subject of the action's handling (e.g. a Move action) but the source item also has an important role
when macros within the action are calculated. If you, for example, use the macro %F%, this will get the file name from the current file in the handling scope.
If you have changed the source item to a specific file, this file will be used when calculating the macro.
Note! If the source for an action is changed from the default value, the new source item that is used will only be used in this specific action.
Following actions will have the default source passed to them.
Default
The default value will use the source item that is passed to the action. This may be a regular file, a file on a FTP server,
an email or other item (e.g. an Extensis Portfolio asset) and may even be empty (the Timer source will not pass any source item to the workflow).
External file
The external file may be used to set the source item to a regular file.
This value in the external file field is the full path to the file to be used as the source item.
Note! The macros used in the external file field are based on the current source item.
Example: The source item that is detected by a folder source is the file C:/Folder/file.jpg.
Now we do want to execute a move action but not on the jpg file itself, but rather on a xml file found in the same folder as
the source jpg and with the same file name as the jpg file. The setup for external file could in that case be%FILE_PARENT_PATH%/%F%.xml
Corbit action destination setup
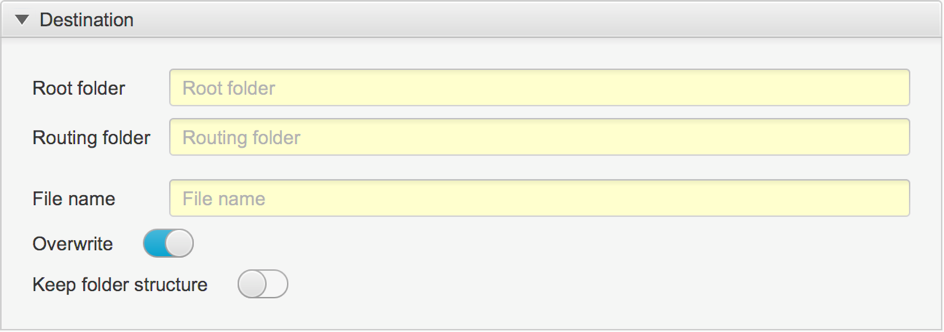
Destination setup
The destination setup is a common setup item used in many Corbit actions.
The destination is used when an output is expected from the action and the setup will determine the final output file.
Note! Some actions may have a destination but not necessarily all the setup items described below.
Root and Routing folder
When calculating the final destination both the Root and Routing will be calculated. If there is no root or routing the source items folder will be used if applicable. The final destination folder will be the root and routing added together. There reason that the two fields are separated are that the root folder must exists, or the action will not execute. The routing folder may not exist and will, if missing, be created.
Example) We want to move a file to the folder /Volumes/Data/<current date in format yyyyMMdd>. The folder /Volumes/Data should always be present, or there is an error. We use the root field to add /Volumes/Data and in the routing field we set %D[yyyyMMdd]%. For each new date the date sub folder will be created by Corbit.
File name
This field is used if the file name should be altered. If this field is empty the source item's file name will be used.
Overwrite
This switch should be selected if the result file always should overwrite any existing file.
If this switch is not selected and the final destination file exists, the action will not be executed.
Keep folder structure
The switch to keep the folder structure is relevant if the source has scanned a sub folder structure.
If the source is scanning a sub folder structure and a file within that structure is handled the folder structure
from the source's root folder will be kept and added as a sub folder structure after the root and routing values.
Apple script action
Handles:
Email
Files
Folders
This action is only available on the Macintosh platform. This action will execute an applescript.
The object that caused this action to execute is not affected by this action unless the applescript itself is having an effect on the object.
Table 3.5-1 Bucket fields affected by the applescript action
| Bucket key |
Value |
Comment |
ScriptResult-<name of action>
|
If the script that is executed returns a value this value is stored in this bucket value.
|
The <name of action> is the name of the FTP action that is given in the preferences. If you for example has a FTP action that is named 'execute script' the file list will be found in the bucket with key 'ScriptResult-execute script'. |
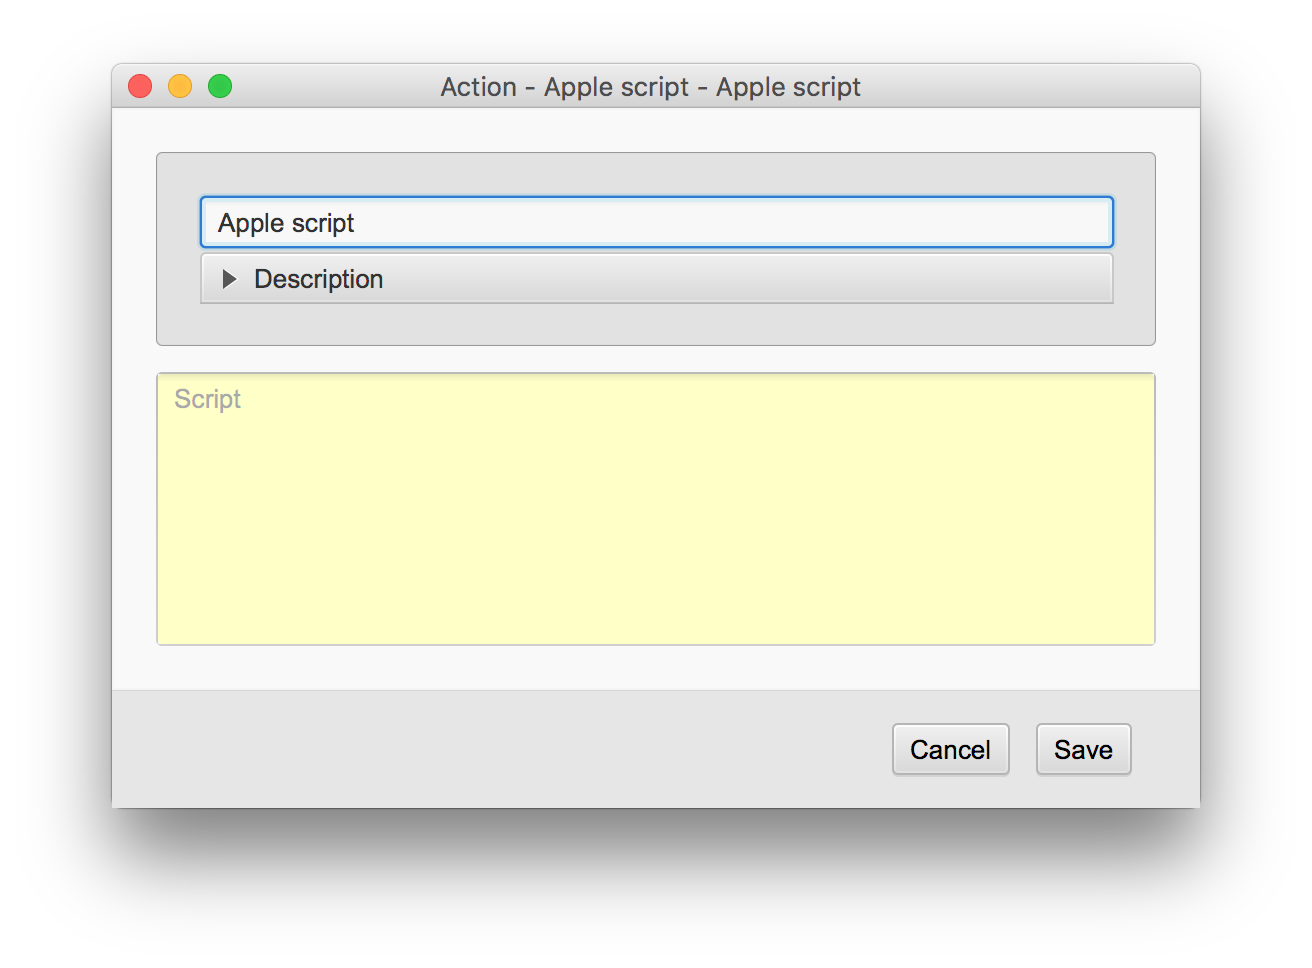
The settings for the applescript action.
Settings for the applescript action
| Setting |
Description |
| Name |
The name for this component. This name is used throughout the rest of the settings in Corbit and is acting as an identifier for the component. |
| Script |
This is the sript to execute. |
Bucket action
Handles:
Email
Files
Folders
This action may be used to set one or more values in the current Workflow's bucket. This may be very handy if you for example use the Workflow for email handling and have a filter to handle only certain type of files but later would like to move all emails where such files have been found. You may in that case set a certain bucket value after handling the file. A latter email filter may then use this bucket value to filter only those emails that contained this type of file to handle the email.
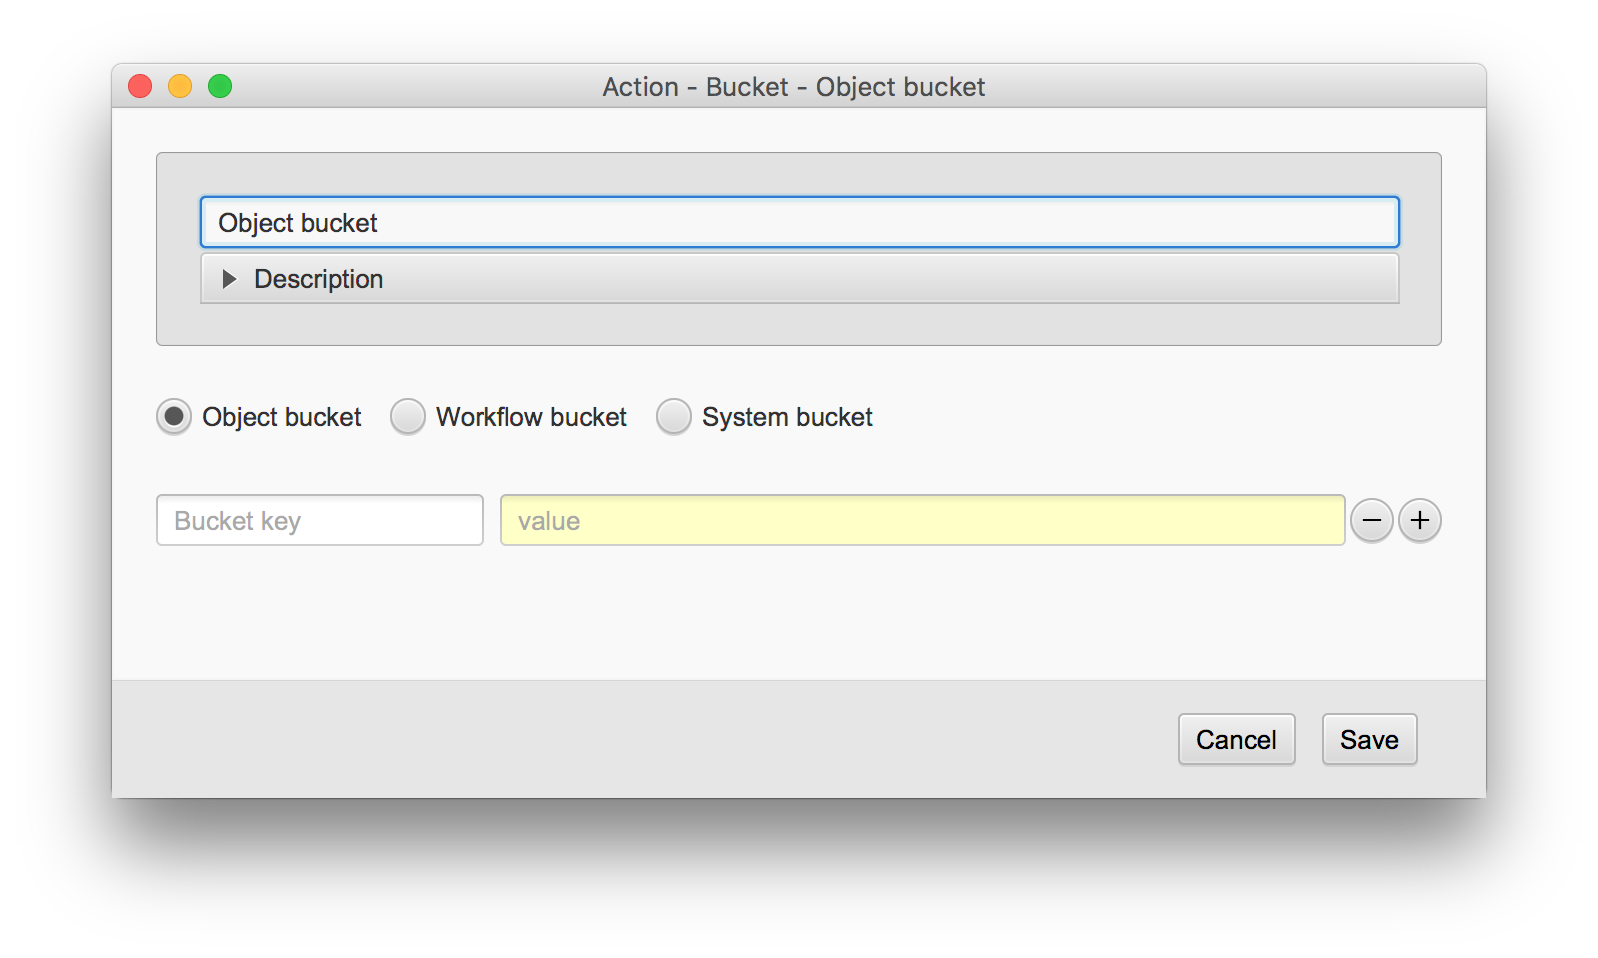
The settings for the bucket action.
Settings for the bucket action
| Setting |
Description |
| Name |
The name for this component. This name is used throughout the rest of the settings in Corbit and is acting as an identifier for the component. |
| Object bucket, Workflow bucket or System bucket |
Select whether this action will affect the Object bucket, the Workflow bucket or the System bucket
Read more about the different buckets in chapter 2. |
| Values |
Bucket setup is one or more bucket keys and values. The key is the bucket key and the value its value. |
Command line action
Handles:
Email
Files
Folders
This action will execute a command in the command shell environment on the computer.
The object that caused this action to execute is not affected by this action unless the command itself is having an effect on the object.
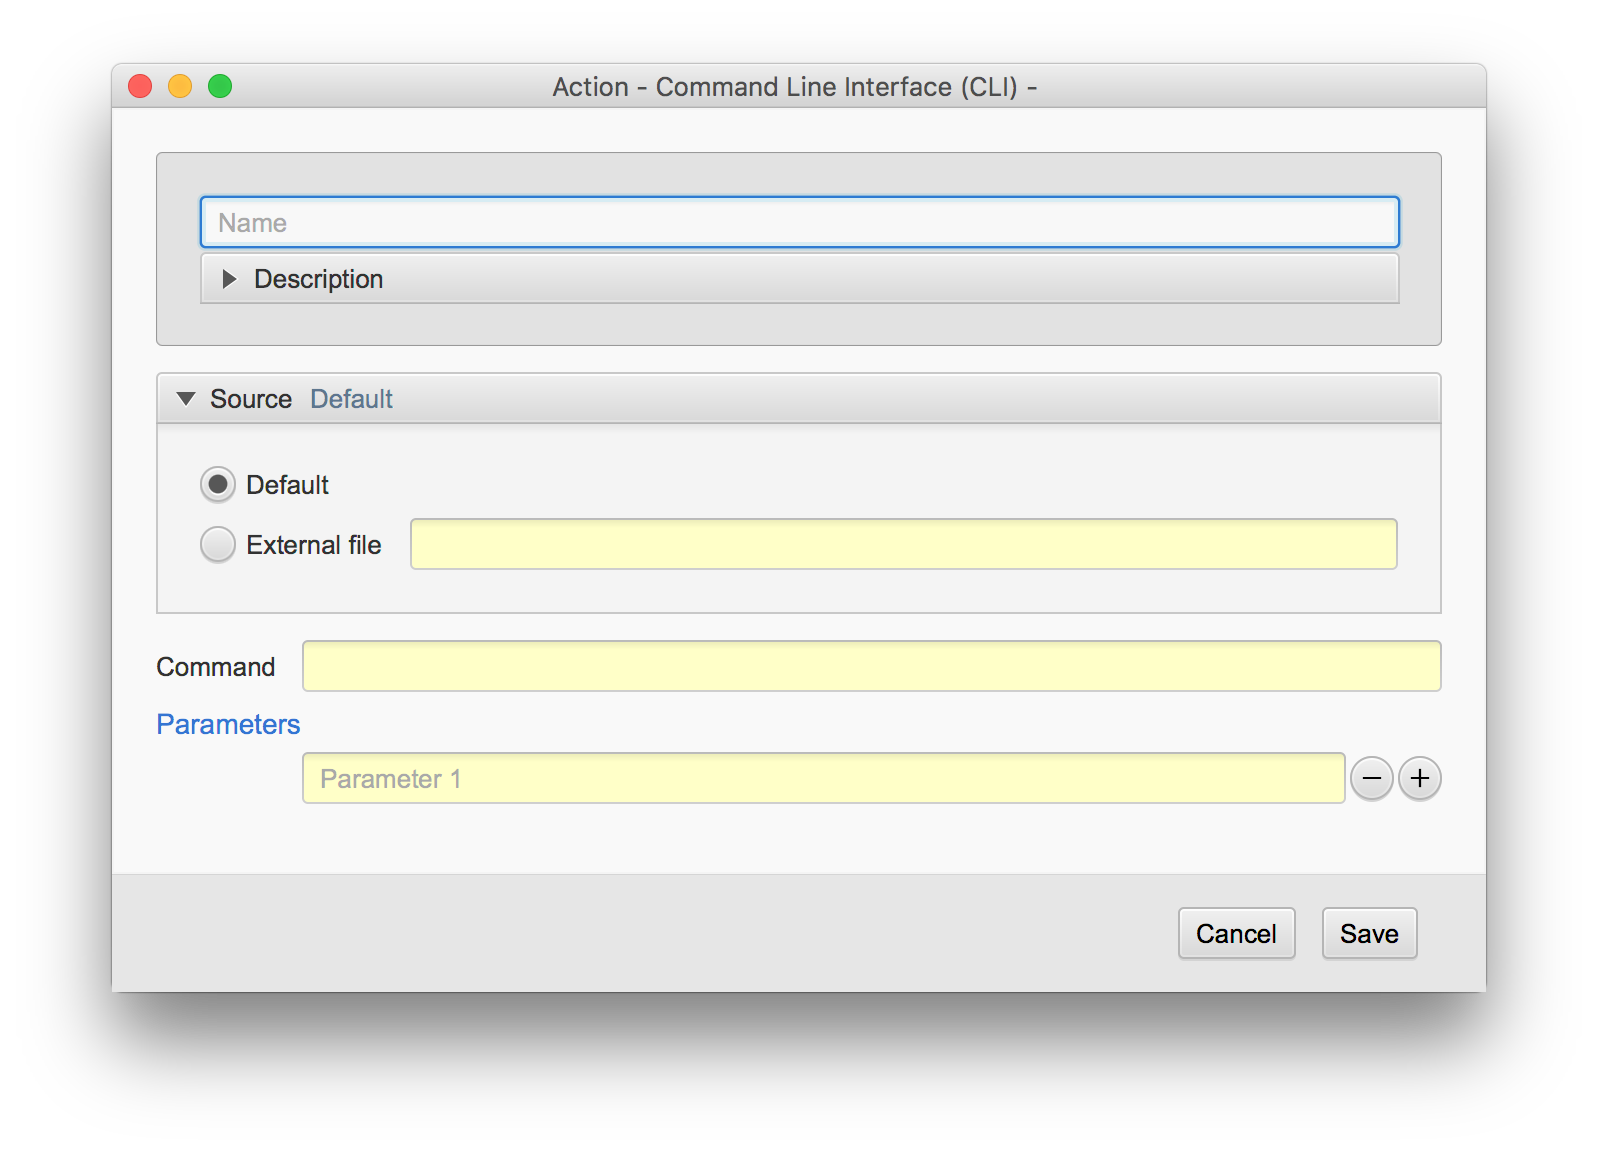
The settings for the command line action.
Settings for the command line action
| Setting |
Description |
| Name |
The name for this component. This name is used throughout the rest of the settings in Corbit and is acting as an identifier for the component. |
| Command |
This is the main command to execute in the command prompt. |
| Parameters |
This is optional parameters to the command. Each parameter must be separated with a comma (,). |
Copy action
Handles:
Email
Files
Folders
The copy action will copy a file to a new location. The original object will remain intact.
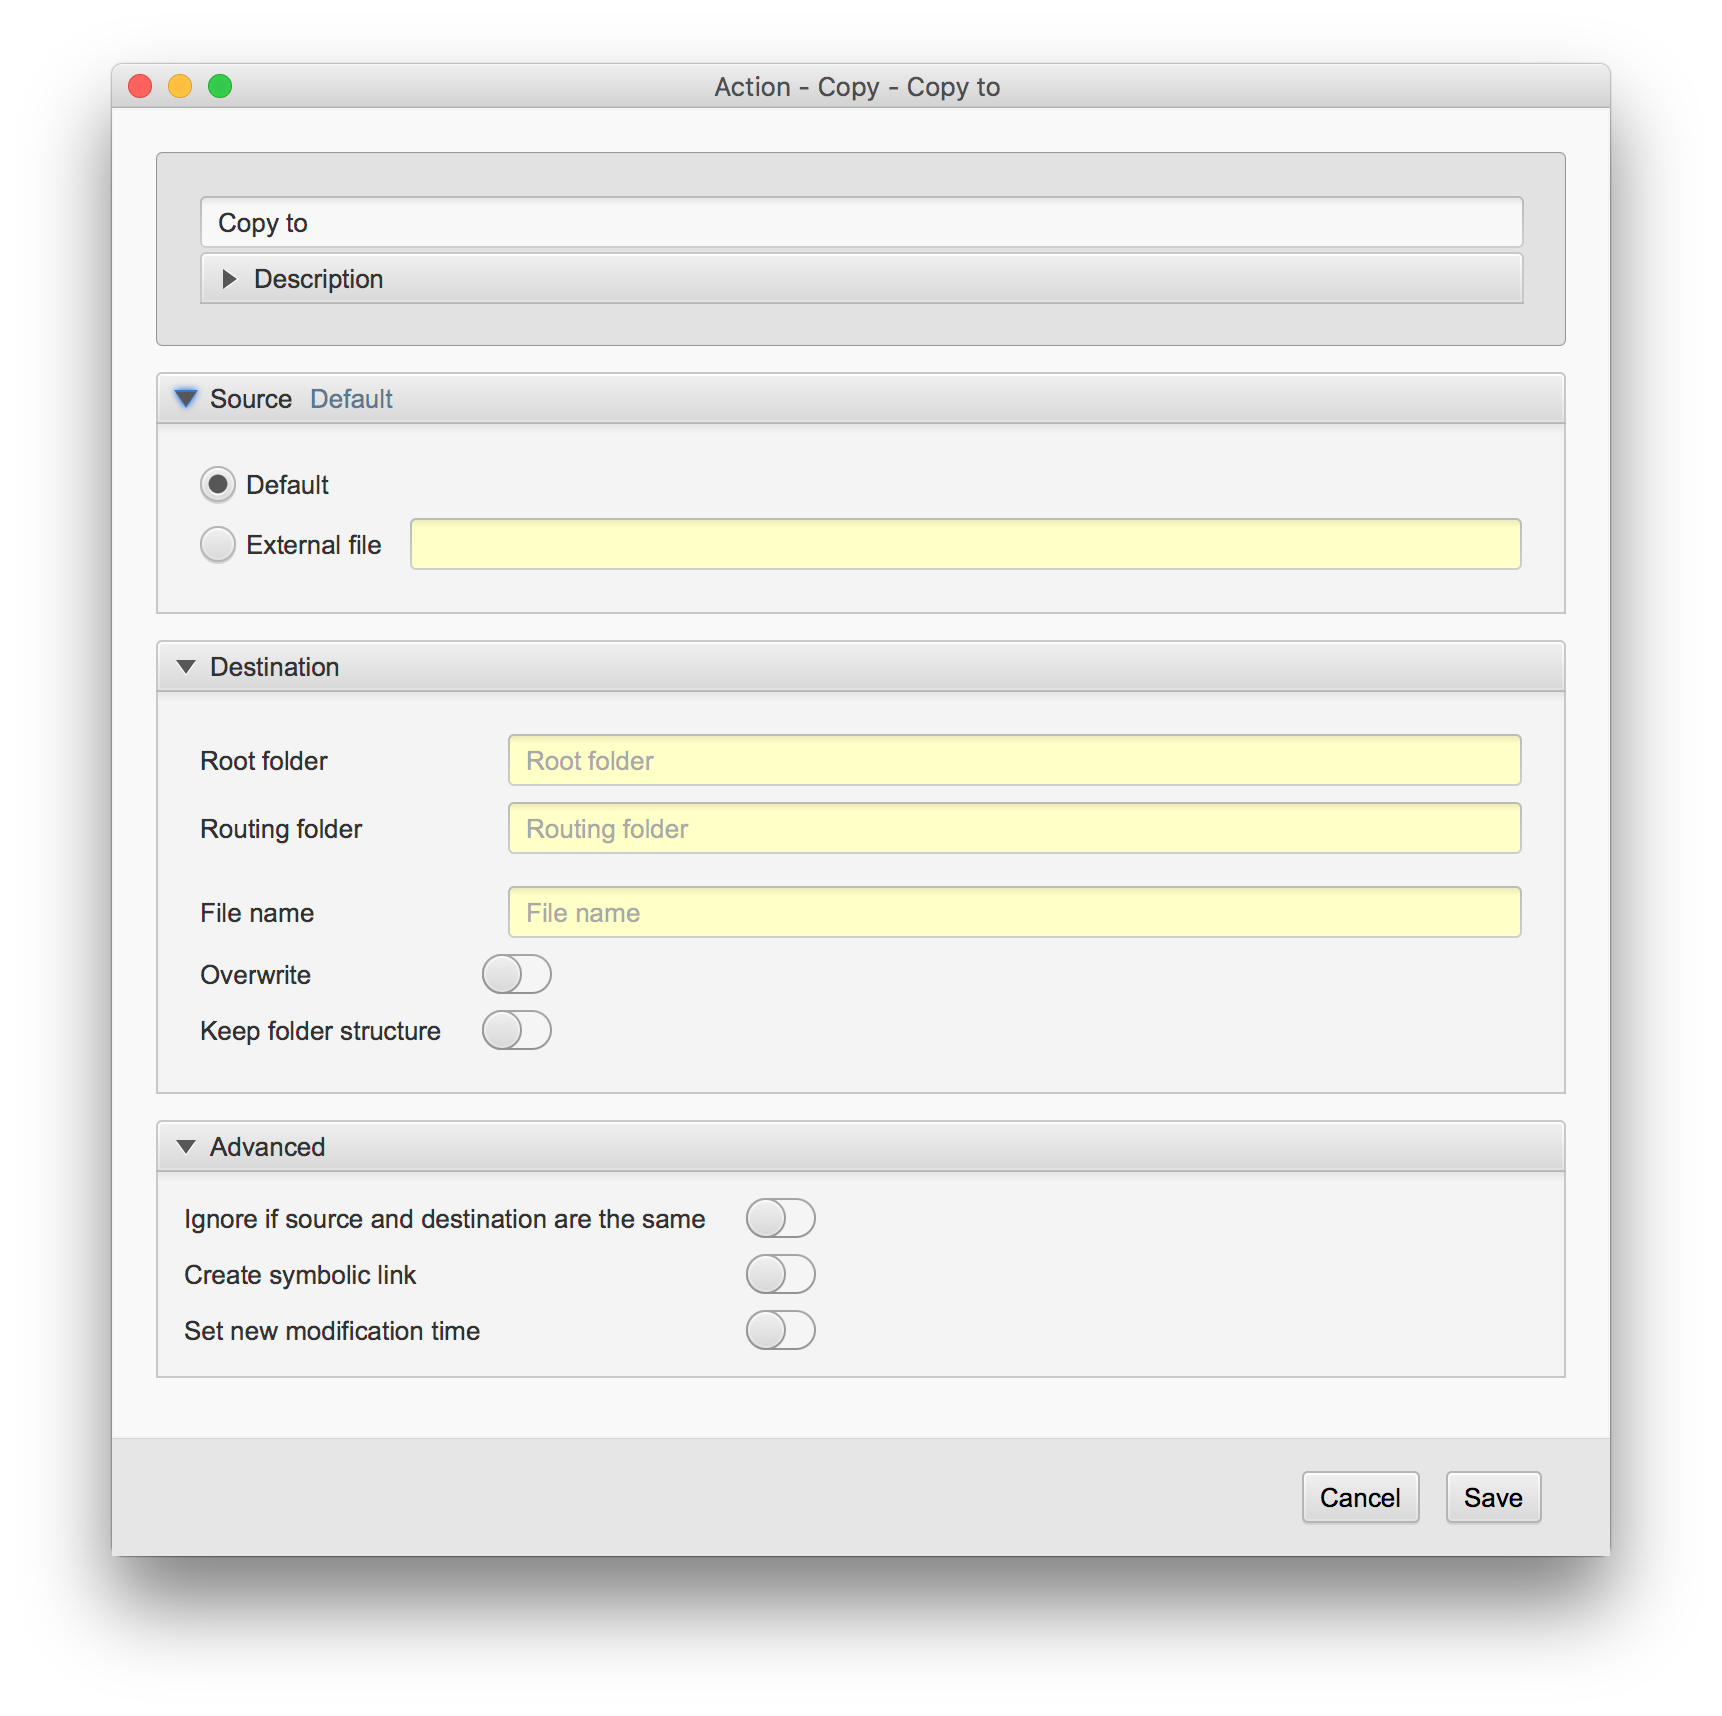
The settings for the copy action.
Settings for the copy action
| Setting |
Description |
| Name |
The name for this component. This name is used throughout the rest of the settings in Corbit and is acting as an identifier for the component. |
| Source - default |
The default source indicates that the action should be invoked on the object that is currently in scope. This is the normal way to use the action. |
| Source - external file |
This option is useful if you would like the action to be applied on another file than the one currently in scope. This is convenient for example if you have a sidecar file that needs to be handled or if the file that should be handled is referenced in a text file. |
| Root folder |
This is the root folder where the action will put the object. If the routing field (see below) is empty the object will be placed in the root destination, otherwise in a sub location
described by the routing field. The location entered in this field must exist, see note for the routing field.
|
| Routing folder |
Use this field to enter a sub location to the root destination. This field is a macro field and may contain macros. If you for example enter '%D%' in the routing field the final destination folder will be a sub folder with the current date in the root destination.
Note
The root destination must exist for the action to be executed correctly. The final destination folder created with the routing does not need to exists, it will be created if it is not present.
|
| File name |
If this field has a value the object will get this name at the final location. This can for example be used to add a special prefix on the object. If we need to add the prefix 'A-' on the object we will put 'A-%F%%E%' in the name change field (see the section about macros for more information). |
| Overwrite |
This option will first delete the duplicate, then replace it with the new one from this action.
See information of the special macro %DUPLICATE_FILE_EXTRA[...]% for more options regarding duplicate files. |
Keep folder structure |
By activating this feature, you may copy a folder structure and keep the structure from the original in the new copied location. |
| Ignore if source and destination are the same (size and modification time) |
If this option is selected the copying will not be performed if the destination file exists and is regarded to be the same (size and modification time are compared). |
| Create symbolic link |
If this option is selected the destination will be a link to the original file. |
| Set new file modification time |
If this option is selected the copied file will get the current time as modification time. |
Database action
Handles
Email
Files
Folders
This action may be used to access and perform SQL calls or procedure/function calls.
Note that if a SQL call returns multiple result rows the full list of result rows will be put in a bucket. The key of this bucket is the same key as stated in the setup but with the trailing -list, e.g. if you have the following SQL query: SELECT paperName from paper and the result column paperName with bucket key pName, there will be a bucket key pName-list which holds all the values from the query. Use for example the macro %BUCKET_LIST[...]% to get all the values from this list.
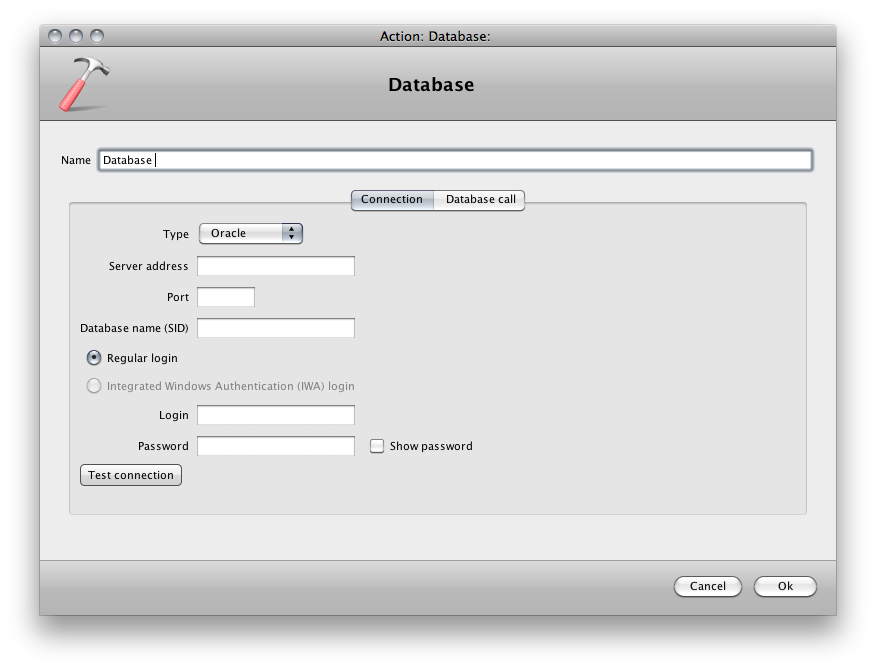
The settings for the database connection action.
Database action preferences. |
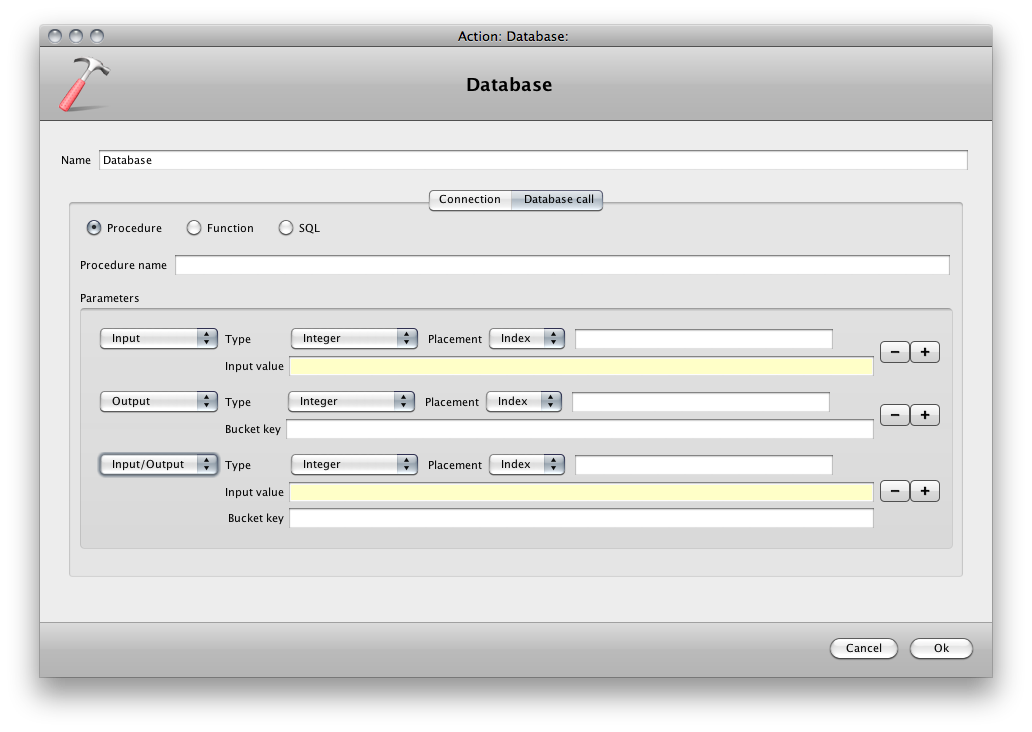
The settings for the database connection action.
Database action preferences. |
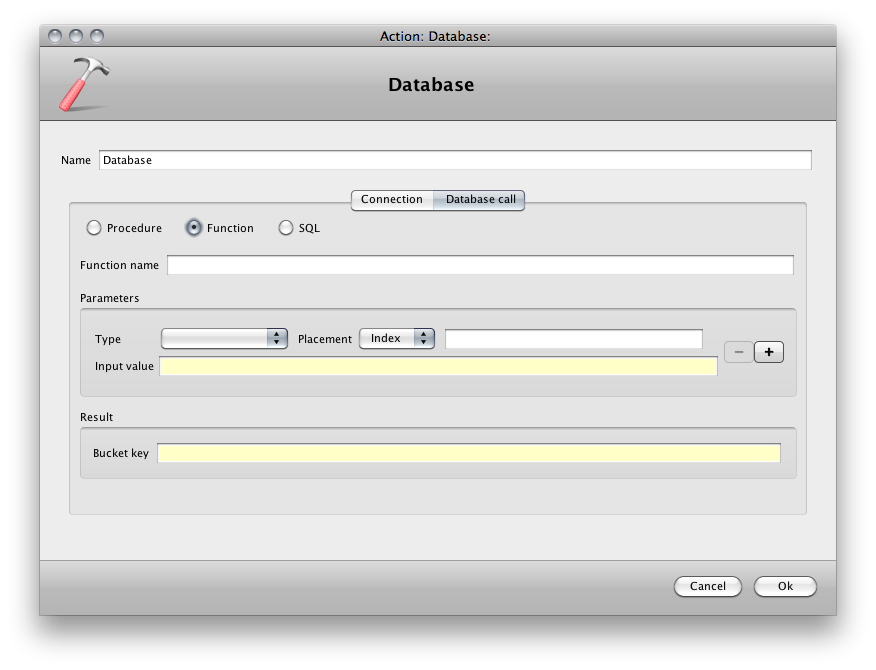
The settings for the database connection action.
Database action preferences. |
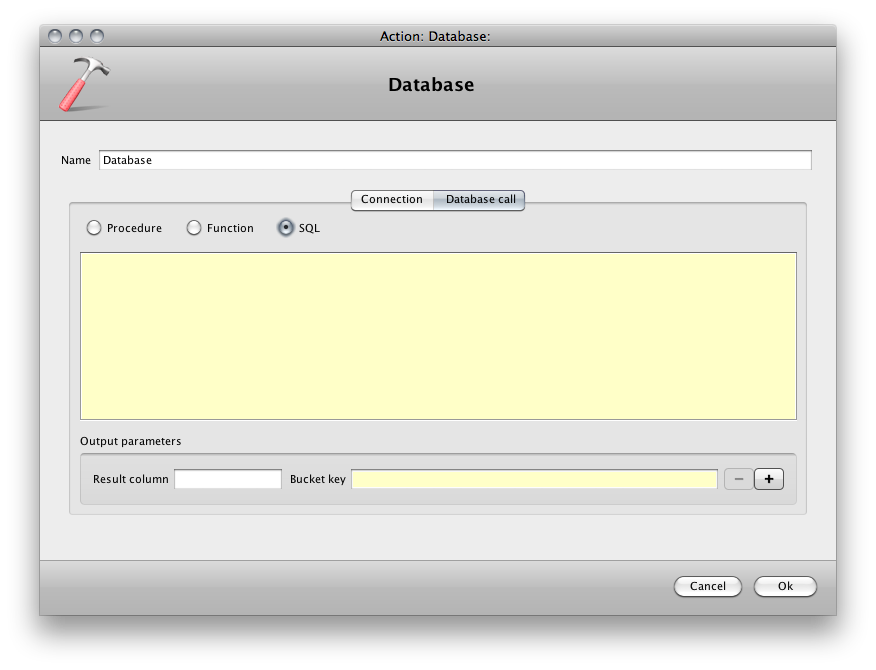
The settings for the database connection action.
Database action preferences. |
Settings for the database action
| Setting |
Description |
| Name |
The name for this component. This name is used throughout the rest of the settings in Corbit and is acting as an identifier for the component. |
| Connection - Type |
The type of database, the default types are Oracle and MySQL. If any other database type is wanted, please contact Laidback Solutions AB. |
| Connection - Server address |
The IP number or DNS host name for the database server. |
| Connection - Port |
The port to use when connecting to the database server. |
| Connection - Database name (SID) |
The SID or database instance name to connect to. |
| Connection - Login |
The user login to use when connecting to the database server. |
| Connection - Password |
The password for the user login. |
| Database call |
The database action supports regular SQL calls, procedure calls and function calls with separate setups. |
| Procedure |
| Procedure name |
The name of the procedure in the database. |
| Parameters |
This is all the parameters to the procedure. Each parameter may be input, output or input/output.
The type of the parameter is the data type. The placement is eitther indexed or key based. If indexed, write the index of the parameter (starting at 1) in the field. If key based, write the key in the field.
For an input parameter there will be a field where the input value may be written. For output parameters there is a field for bucket key which enables to place the returned value in a specific bucket key. |
| Function |
| Function name |
The name of the function in the database. |
| Parameters |
This is all the parameters to the function.
The type of the parameter is the data type. The placement is eitther indexed or key based. If indexed, write the index of the parameter (starting at 1) in the field. If key based, write the key in the field.
The input value is the value to send to the function for this parameter. |
| Result |
The result of the function call may be placed in a special bucket key, specified in this field. |
| SQL |
| SQL |
Write yoru SQL call in the text area. |
| Output parameters |
If your call will return values you may collect these and place them in different bucket keys. Select the result column (please note that the case may be of importance depending on the database) and which bucket key to place the returned value in. |
Delete action
Handles
Email
Files
Folders
This action will delete an object. This action can handle both emails and files.
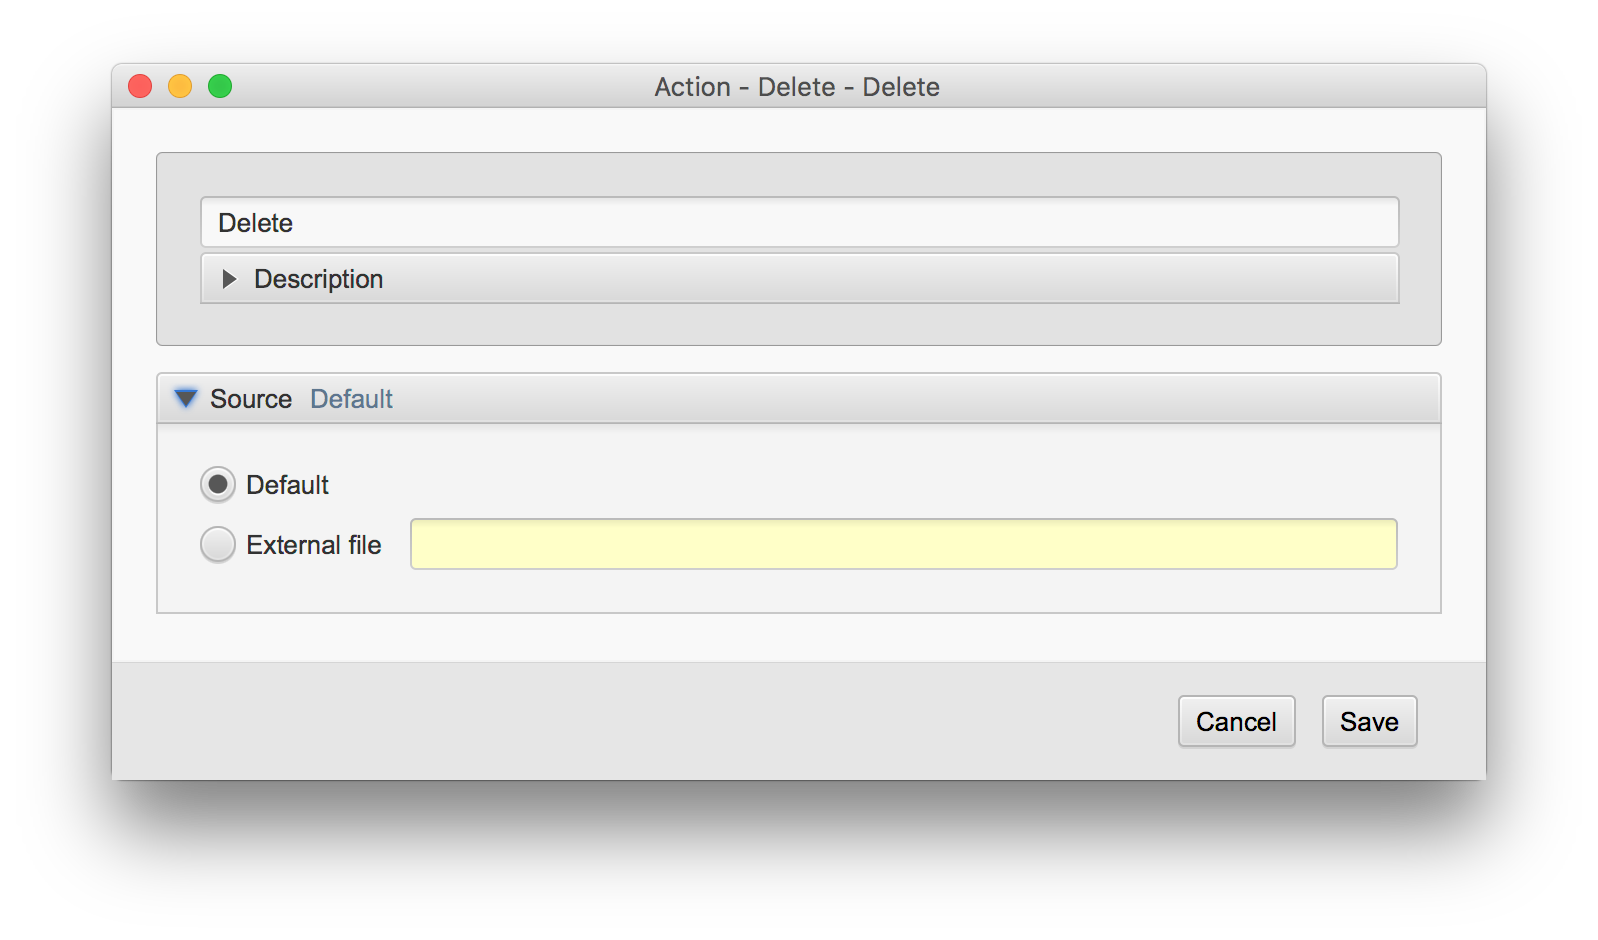
The settings for the delete action.
Settings for the delete action
| Setting |
Description |
| Name |
The name for this component. This name is used throughout the rest of the settings in Corbit and is acting as an identifier for the component. |
| Source - default |
The default source indicates that the action should be invoked on the object that is currently in scope. This is the normal way to use the action. |
| Source - external file |
This option is useful if you would like the action to be applied on another file than the one currently in scope. This is convenient for example if you have a sidecar file that needs to be handled or if the file that should be handled is referenced in a text file. |
Email send action
Handles:
Email
Files
Folders
This action will send an email. Note that there is a special action for sending email based on another email (see the email [email] action). The object that caused this action to execute is not affected by this action.
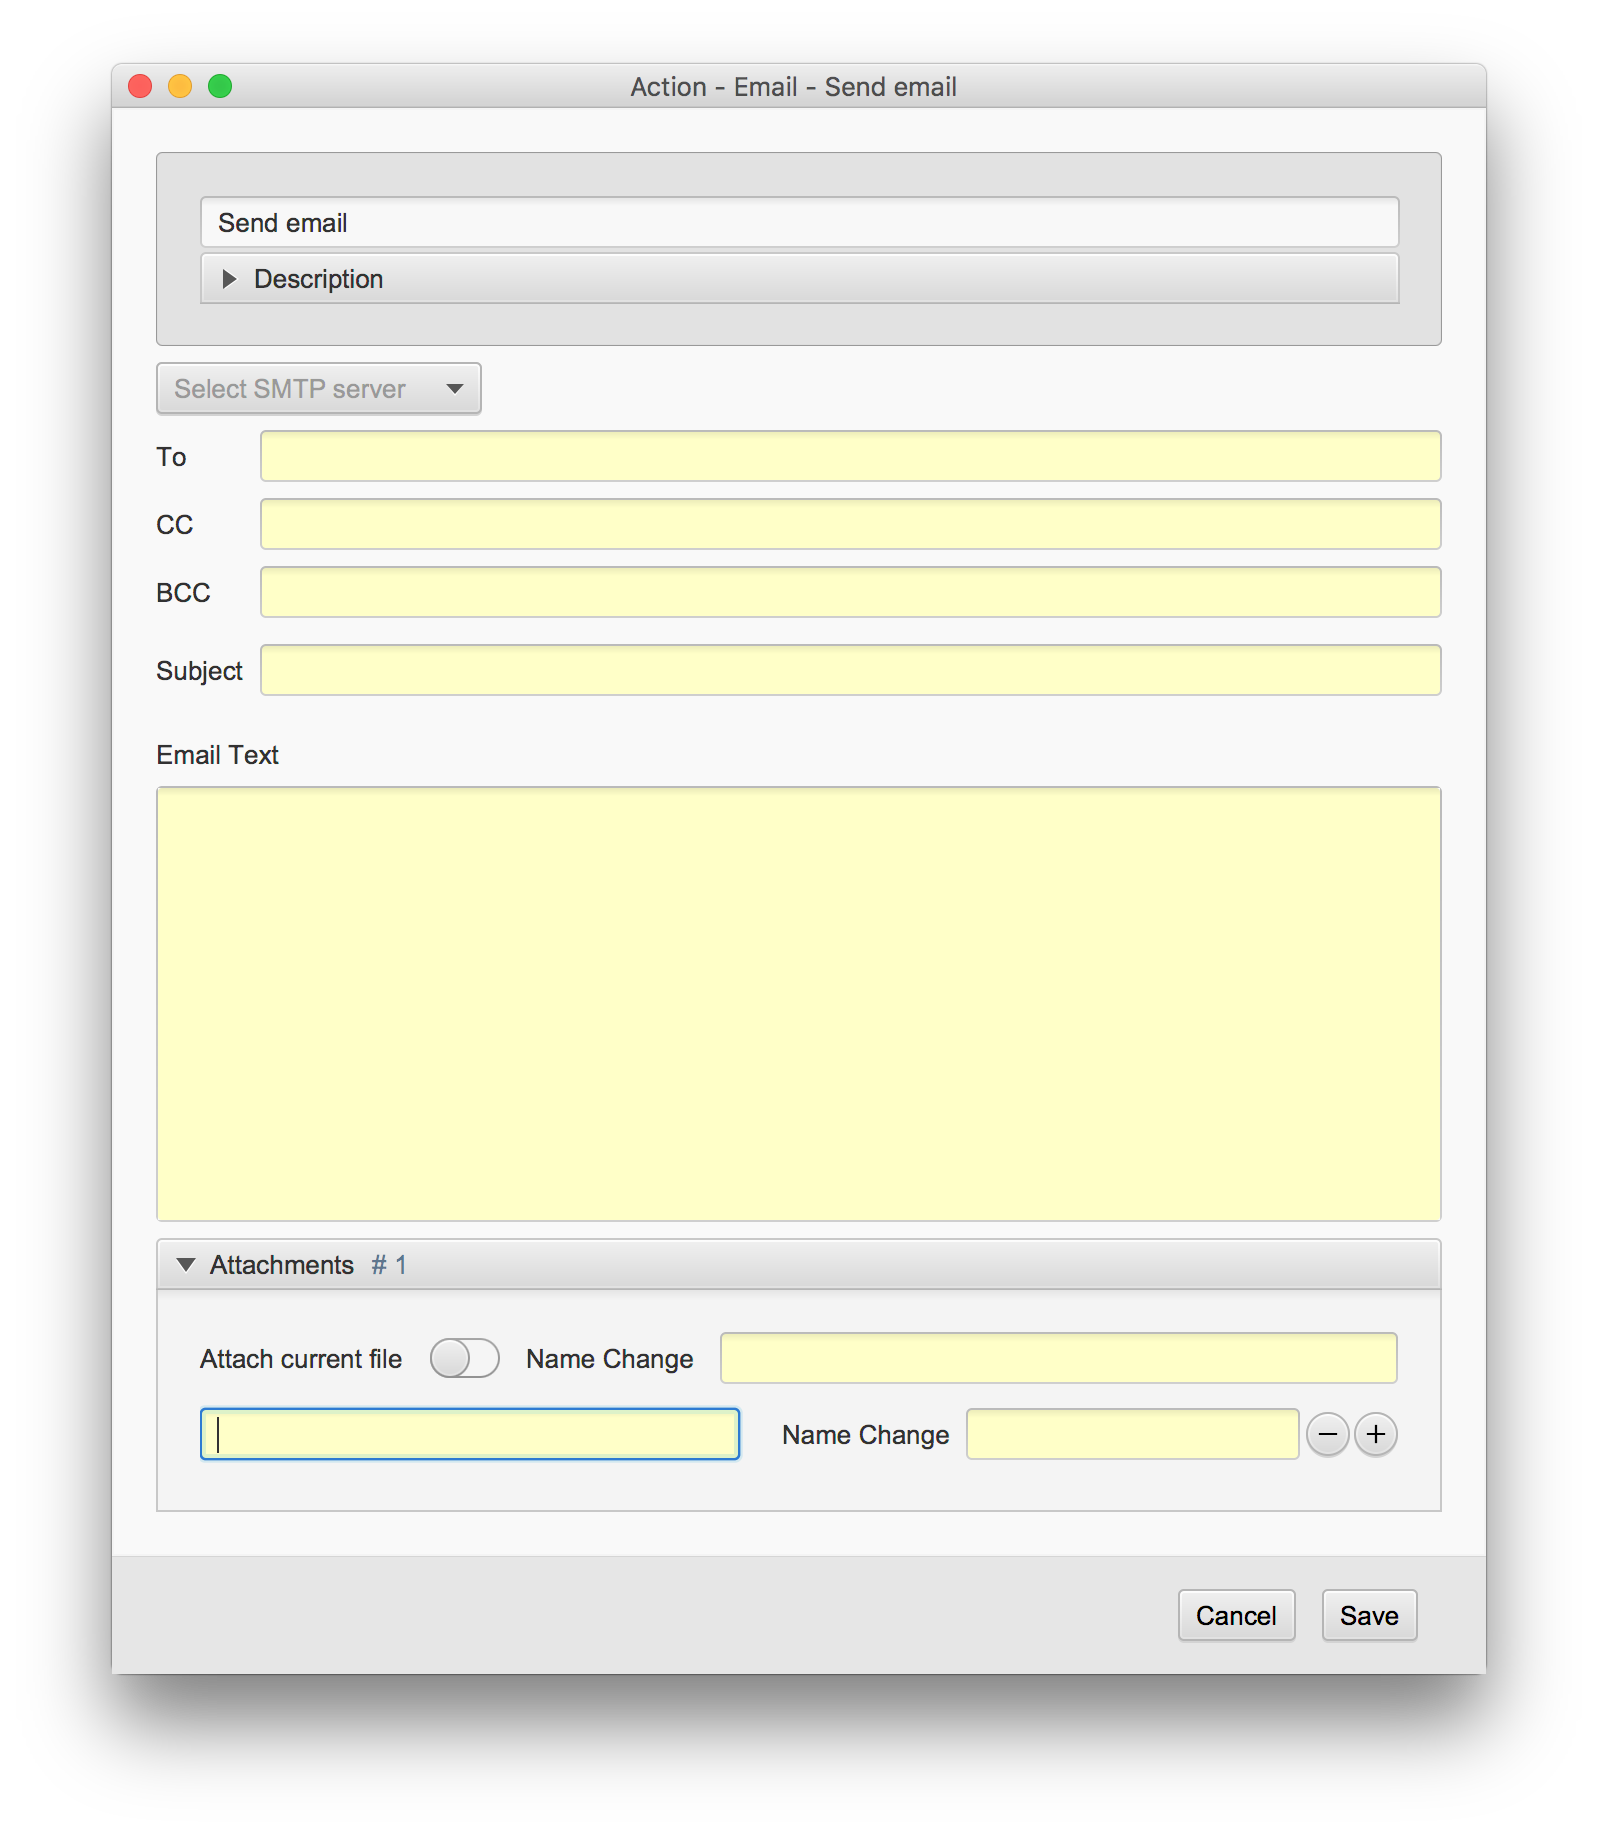
The settings for the email action.
Settings for the email action
| Setting |
Description |
| Name |
The name for this component. This name is used throughout the rest of the settings in Corbit and is acting as an identifier for the component. |
| SMTP host |
The SMTP settings to use when sending the email. If no proper SMTP host has been setup, you may create a new one from the menu SMTP in the main menu. |
| To, CC and BCC |
This is the list of receivers for the email. Comma separate different addresses when using more than one.
|
| Subject |
The email subject line. |
| Email text |
The email body text. This may be HTML formatted if surrounded by <html> and </html> |
| Attachments |
If this checkbox is selected the file that caused the action to be executed will be attached to the email.
The name change field can be used to set a certain name of the file when it is being attached to the email (note that the file anme on disc will not be changed). |
| Other attachments |
Note that the file location is a macro field and may therefor contain a path to a file with the same (or part of) file name as the file that caused the action to execute.
For each attachment a name change may be applied. This name change will only apply to the attachment file and will not change any file name on disc. |
FTP send action
Handles:
Email
Files
Folders
The FTP action sends a file or folder to a certain FTP server using the file transfer protocol. This action will put some values in the Workflow bucket which may be used by other actions. If a folder is being handled the folder itself might be omitted, i.e. the folder itself is not being sent to the FTP server.
The object that caused this action to execute is not affected by this action.
Important note about macro %DUPLICATE_FILE_EXTRA%
Please note that the macro %DUPLICATE_FILE_EXTRA% can not currently be used in this action setup.
Bucket fields affected by the FTP action
| Bucket key |
Value |
Comment |
FTPSendOkList-<name of action> |
List of the files that has been sent to the remote server. May contain both files and folders. |
The <name of action> is the name of the FTP action that is given in the preferences. If you for example has a FTP action that is named 'send images' the file list will be found in the bucket with key 'FTPSendOkList-send images'. |
FTPSendErrorList-<name of action> |
List of files that should have been sent but because of errors has not been able to be sent. May contain both files and folders. |
See above for information about <name of action>. |
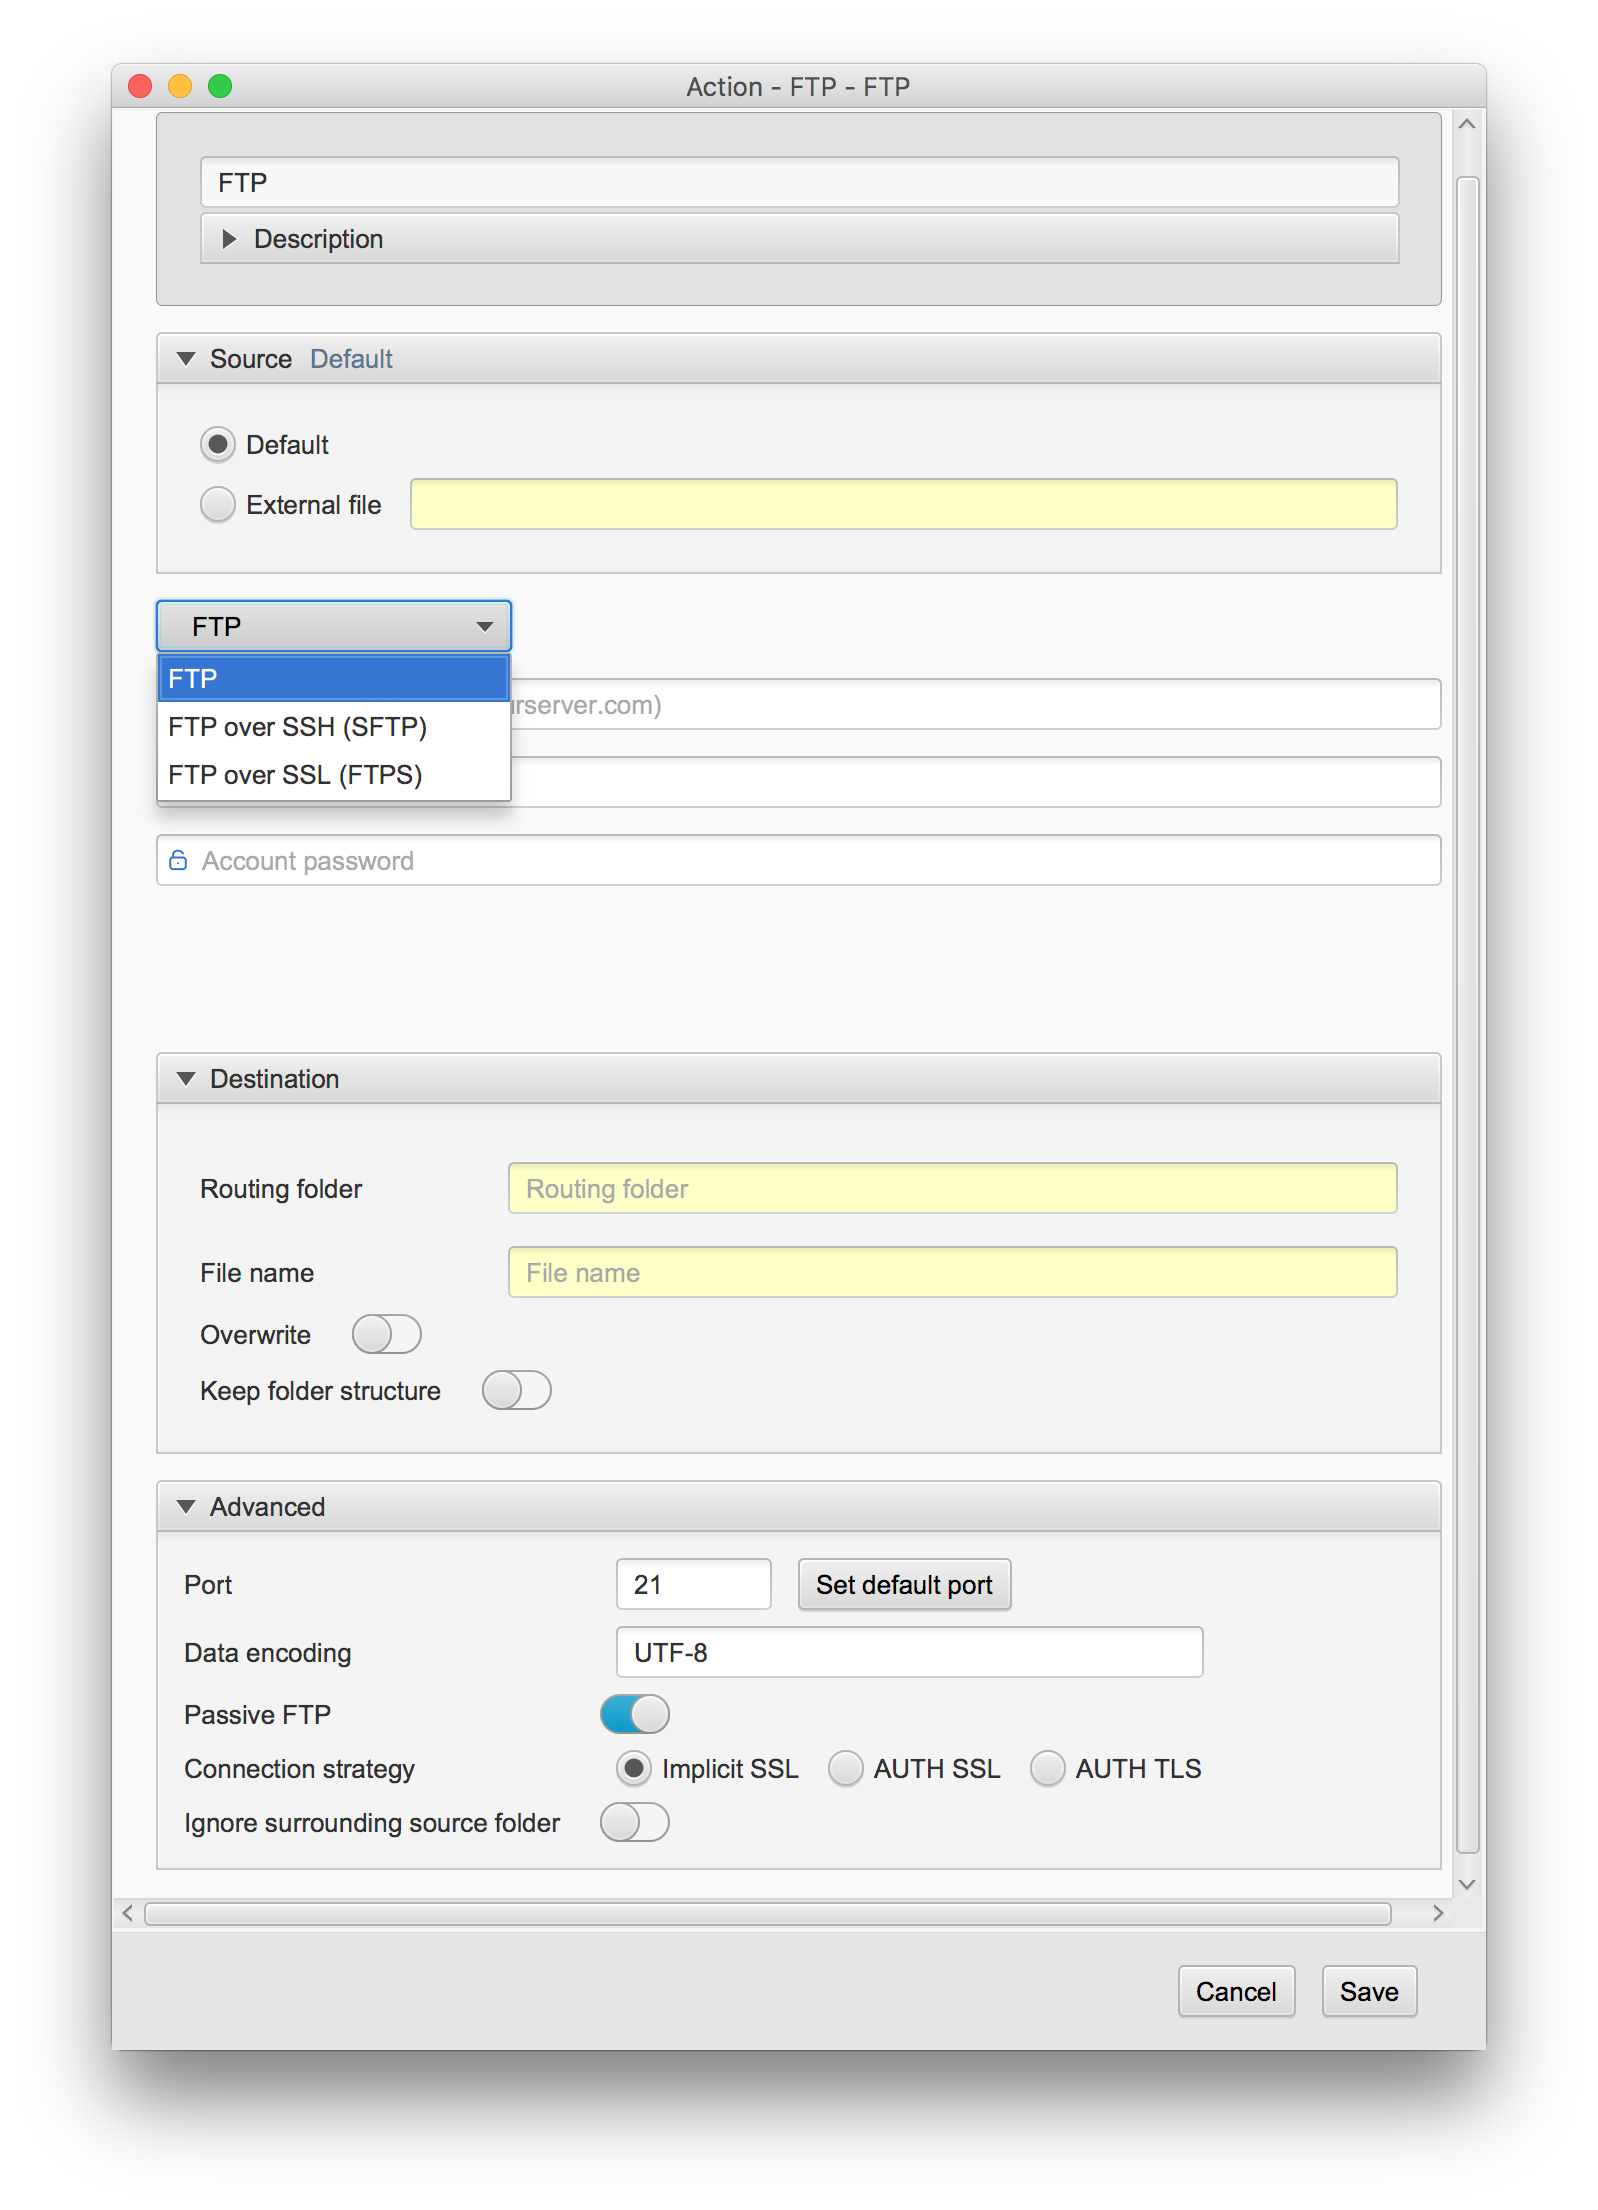
The settings for the FTP action.
Settings for the FTP action
| Setting |
Description |
| Name |
The name for this component. This name is used throughout the rest of the settings in Corbit and is acting as an identifier for the component. |
| Source |
The default source indicates that the action should be invoked on the object that is currently in scope. This is the normal way to use the action. |
| Source external file |
This option is useful if you would like the action to be applied on another file than the one currently in scope. This is convenient for example if you have a sidecar file that needs to
be handled or if the file that should be handled is referenced in a text file.
|
| Type |
Select the type of transfer and individual setup for each type. |
| Server address |
This is the address to the FTP server to send the object to. |
| Account user name |
The user name |
| Account password |
The password |
| Routing |
If the object should be put in any other directory than the default login folder that sub folder path should be entered here. |
| Name change |
Enter a new name if the name of the object should change on the final destination. |
| Overwrite |
This option will first delete the duplicate, then replace it with the new one from this action.
See information of the special macro %DUPLICATE_FILE_EXTRA[...]% for more options regarding duplicate files. |
| Keep folder structure |
The folder structure is the sub folder structure seen from the source main folder where it applies.
Example: A folder source is set to watch folder A and also selected to search subfolders. The pdf file file.pdf is detected in the folder A/B/file.pdf. If the keep folder structure is selected the result file will be placed in the sub folder B also in the end location. |
| Port |
The port on the FTP server to send to. Default FTP port is 21.
|
| Data encoding |
If the FTP server is using a special character encoding you may specify that here. Default, UTF8 is used.
|
| Passive FTP |
On/off. Some FTP-servers are set to be Passive and you will need to activate this box since a Passive FTP-server will communicate differently
from an Active FTP-server.
|
| Ignore surrounding folder |
If selected and the handling object is a folder, that folder itself is not sent to the FTP server, however all the content in the folder is sent. |
Image processing [ImageMagick] action
Handles
Email
Files
Folders
This action is working with image files supported by ImageMagick.
This action may resize images in various ways and also change the format of a image from jpeg to png for example. More advanced color setup and handling of ICC profiles or adding text to an image may also be done.
Image format change
If the source file is in one format but the result file is wanted in another it is as simple as setting the name change to a proper name with the wanted file suffix.
If for example the source file is a jpeg but the result is wanted in png format, just enter %F%.png in the name change field and the result file will in fact be a png with the same name as the original file.
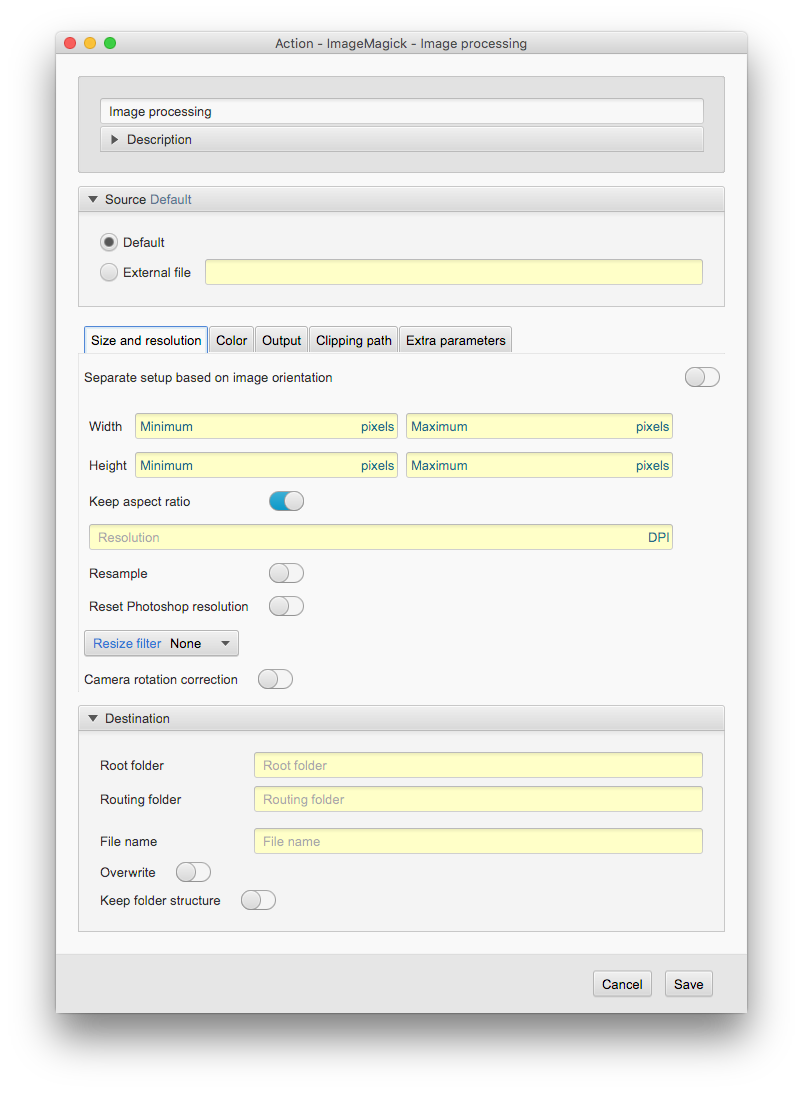
The settings for the image processing [ImageMagick] action.
Image processing [ImageMagick] action preferences.
|
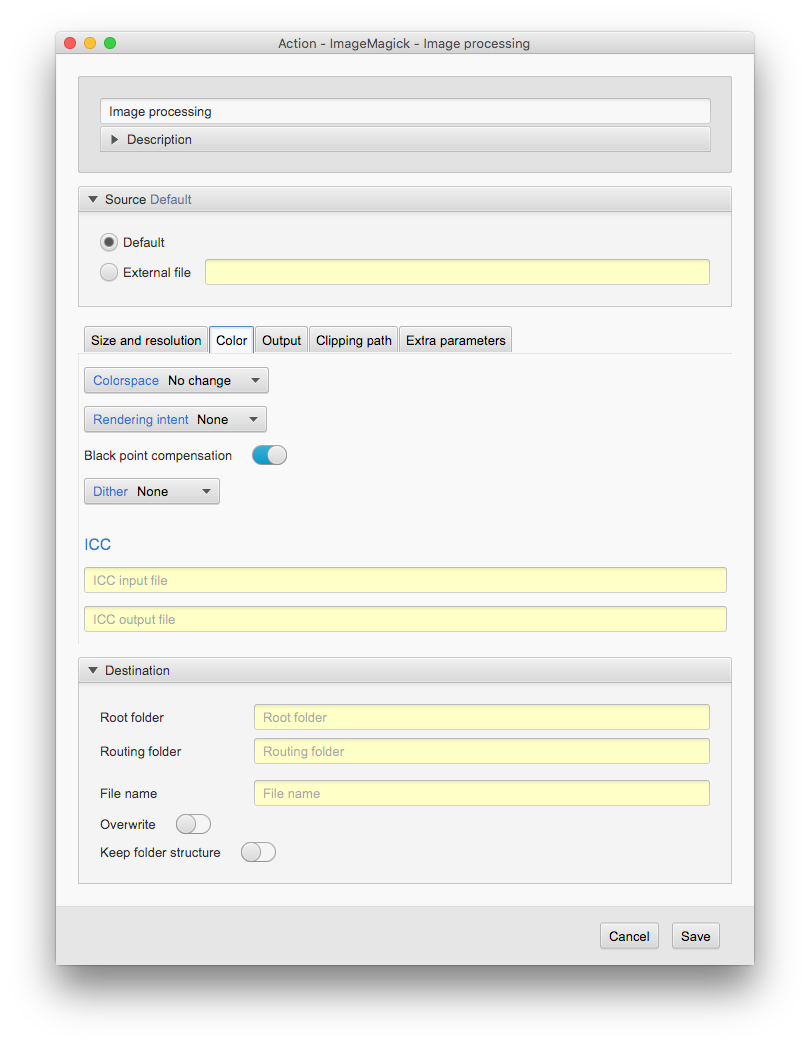
The settings for the image processing [ImageMagick] action.
Image processing [ImageMagick] action preferences. |
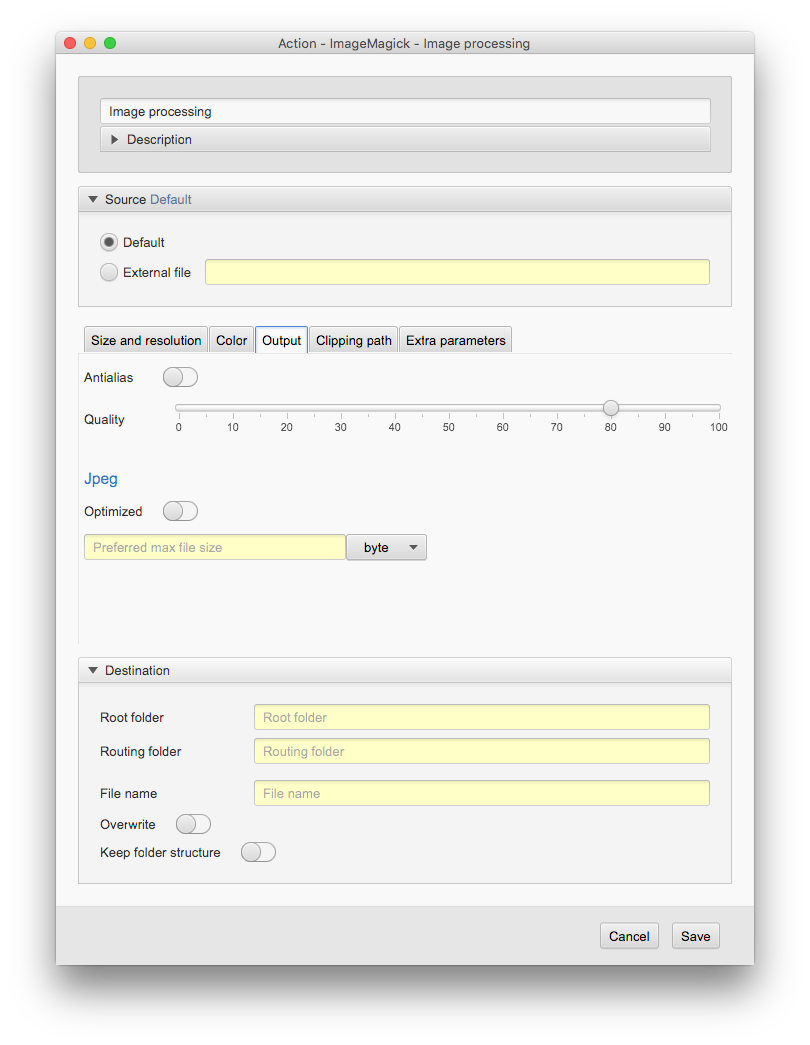
The settings for the image processing [ImageMagick] action.
Image processing [ImageMagick] action preferences. |
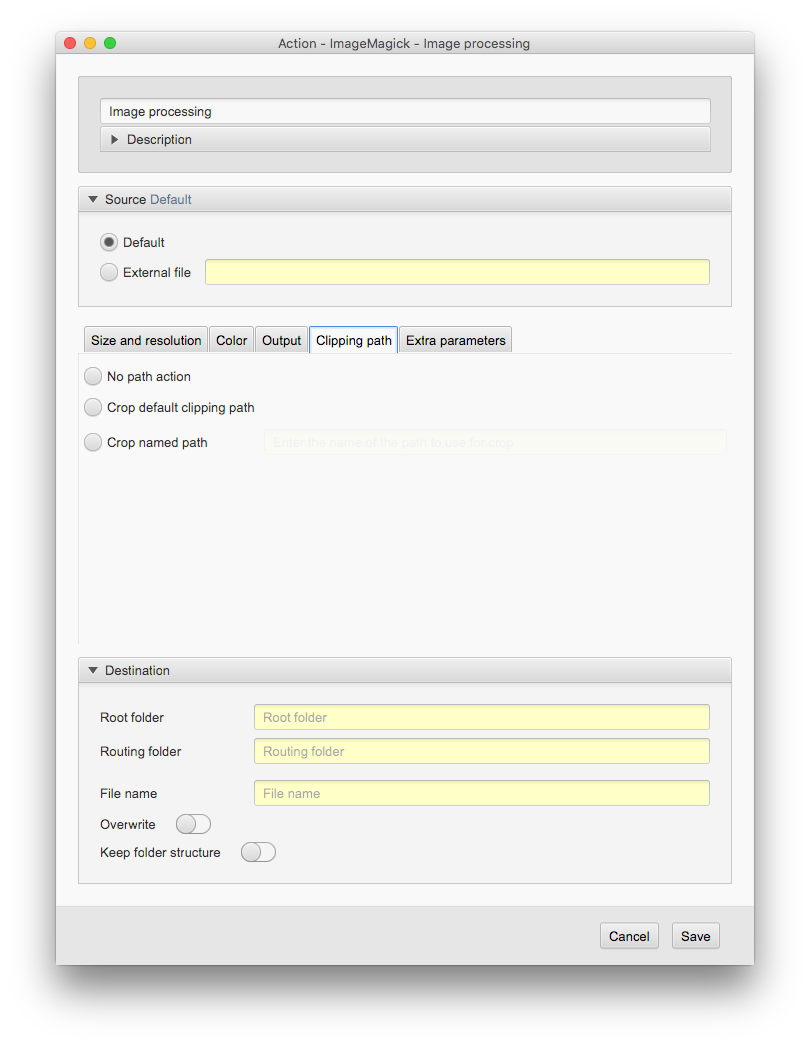
The settings for the image processing [ImageMagick] action.
Image processing [ImageMagick] action preferences. |
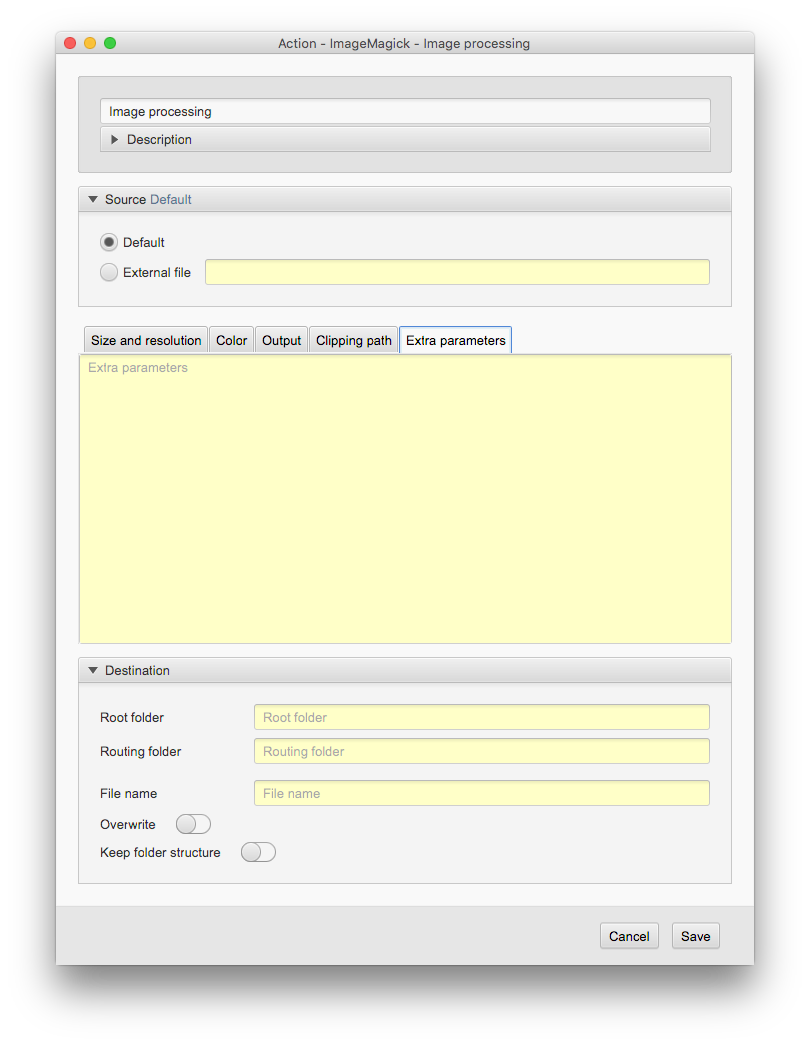
The settings for the image processing [ImageMagick] action.
Image processing [ImageMagick] action preferences. |
Settings for the Image processing [ImageMagick] action
| Setting |
Description |
Size and resolution
This panel shows setup for resizing options. |
| Name |
The name for this component. This name is used throughout the rest of the settings in Corbit and is acting as an identifier for the component. |
| Source - default |
The default source indicates that the action should be invoked on the object that is currently in scope. This is the normal way to use the action. |
| Source - external file |
This option is useful if you would like the action to be applied on another file than the one currently in scope. This is convenient for example if you have a sidecar file that needs to be handled or if the file that should be handled is referenced in a text file. |
| Separate setup based on image oriented |
If this option is selected the resize options are divided into portrait and landscape options which may be setup differently. The different setups regards the source image, if the image is in landscape format (width>height) the landscape settings are applied. Note that the images may be having a rotation which is not applied before calculating the image format. |
| Width |
The min and max may be left empty or have a value (specified in pixels). If the min value is set the result image will at least have this width. If the max value is set the result image will not exceed this value. |
| Height |
This is similar to the width setting but for the height. |
| Keep aspect ratio |
If this selection is checked the proportions of the source image will be kept. |
| Resolution |
The resolution in the result image (specified in dots per inch, DPI). This value may be left out and the resolution will not be changed. If the resample checkbox is selected the image will be resampled with this new resolution. |
| Resample |
The Photoshop application are reading different resolutino flags than those changed in the regular resolution. To get Photoshop to show the new resolution this checkbox must be selected. This alsso require Exiftool to be installed. If this choice is selected and no Exiftool is found by Corbit the user will be asked to install the bundled version of Exiftool that comes with Corbit. |
Reset Photoshop resolution |
Needs Exif Tools to be installed. This resets the specific Photoshop tags used internally in Photoshop. If not used, resolution changes on the image may not be seen by Photoshop. |
| Resize filter |
This is the method to use when resizing the image. |
| Camera rotation correction |
Select on / off. If the camera has been rotated, ImageMagick will rotate to give you a horizontal image. |
| Root folder |
This is the root folder where the action will put the object. If the routing field (see below) is empty the object will be placed in the root destination, otherwise in a sub location
described by the routing field. The location entered in this field must exist, see note for the routing field.
|
| Routing folder |
If the object should be put in any other directory than the default login folder that sub folder path should be entered here. |
| File name |
If this field has a value the object will get this name at the final location. This can for example be used to add a special prefix on the object. If we need to add the prefix 'A-' on the object we will put 'A-%F%%E%' in the name change field (see the section about macros for more information). |
| Overwrite |
This option will first delete the duplicate, then replace it with the new one from this action.
See information of the special macro %DUPLICATE_FILE_EXTRA[...]% for more options regarding duplicate files.
|
| Keep folder structure |
The folder filter handles folders. Please note that some of the restrictions may not work for remotely located folders. See table 3.3-5 for more information about the restrictions for this filter. |
| Color space |
Select the output color space if you like to change it. |
| Rendering intent |
Select the value you want from the list |
| Black point compensation |
Select on or off only |
| Dither |
Select the value you want from the list |
| ICC |
If a file is selected this file will be inserted in the image and used as the ICC profile. |
| Antialias |
Select this box to make the jepg output antialiased. |
| Quality |
The level of compression in the output file. A low compression gives a better quality but also a bigger file size. If the checkbox is not selected the compression level will not change. |
| Optimized |
Select this box to make the jpeg output optimized. |
| Max file size |
You may specify a max file size for the output. Note that this opion is not always that accurate. |
| No path action |
This is the default option and means that no handling of clipping paths will occur. |
| Crop default clipping path |
Select this option if you want the result image to be cropped (rectangularly) according to the default clipping path. |
| Crop named path |
Select this option if you want the result image to be cropped (rectangularly) according to a specificly named clipping path. |
Extra parameters
In this area you specify any extra parameter that you would like to send to ImageMagick. |
| Parameters |
Enter the parameters as they would be in a command line interface. |
IPTC inserter action
Handles:
Email
Files
Folders
The IPTC action is only guaranteed to work on JPG and TIFF files. This action will insert new IPTC information into the files with the possibillity to keep the old values.
To handle the insertion click the add button under the conversion list. This will open a dialog where the IPTC field can be choosen and the insertion text added. There is an option in this dialog to replace, append or precede the old value with the new value.
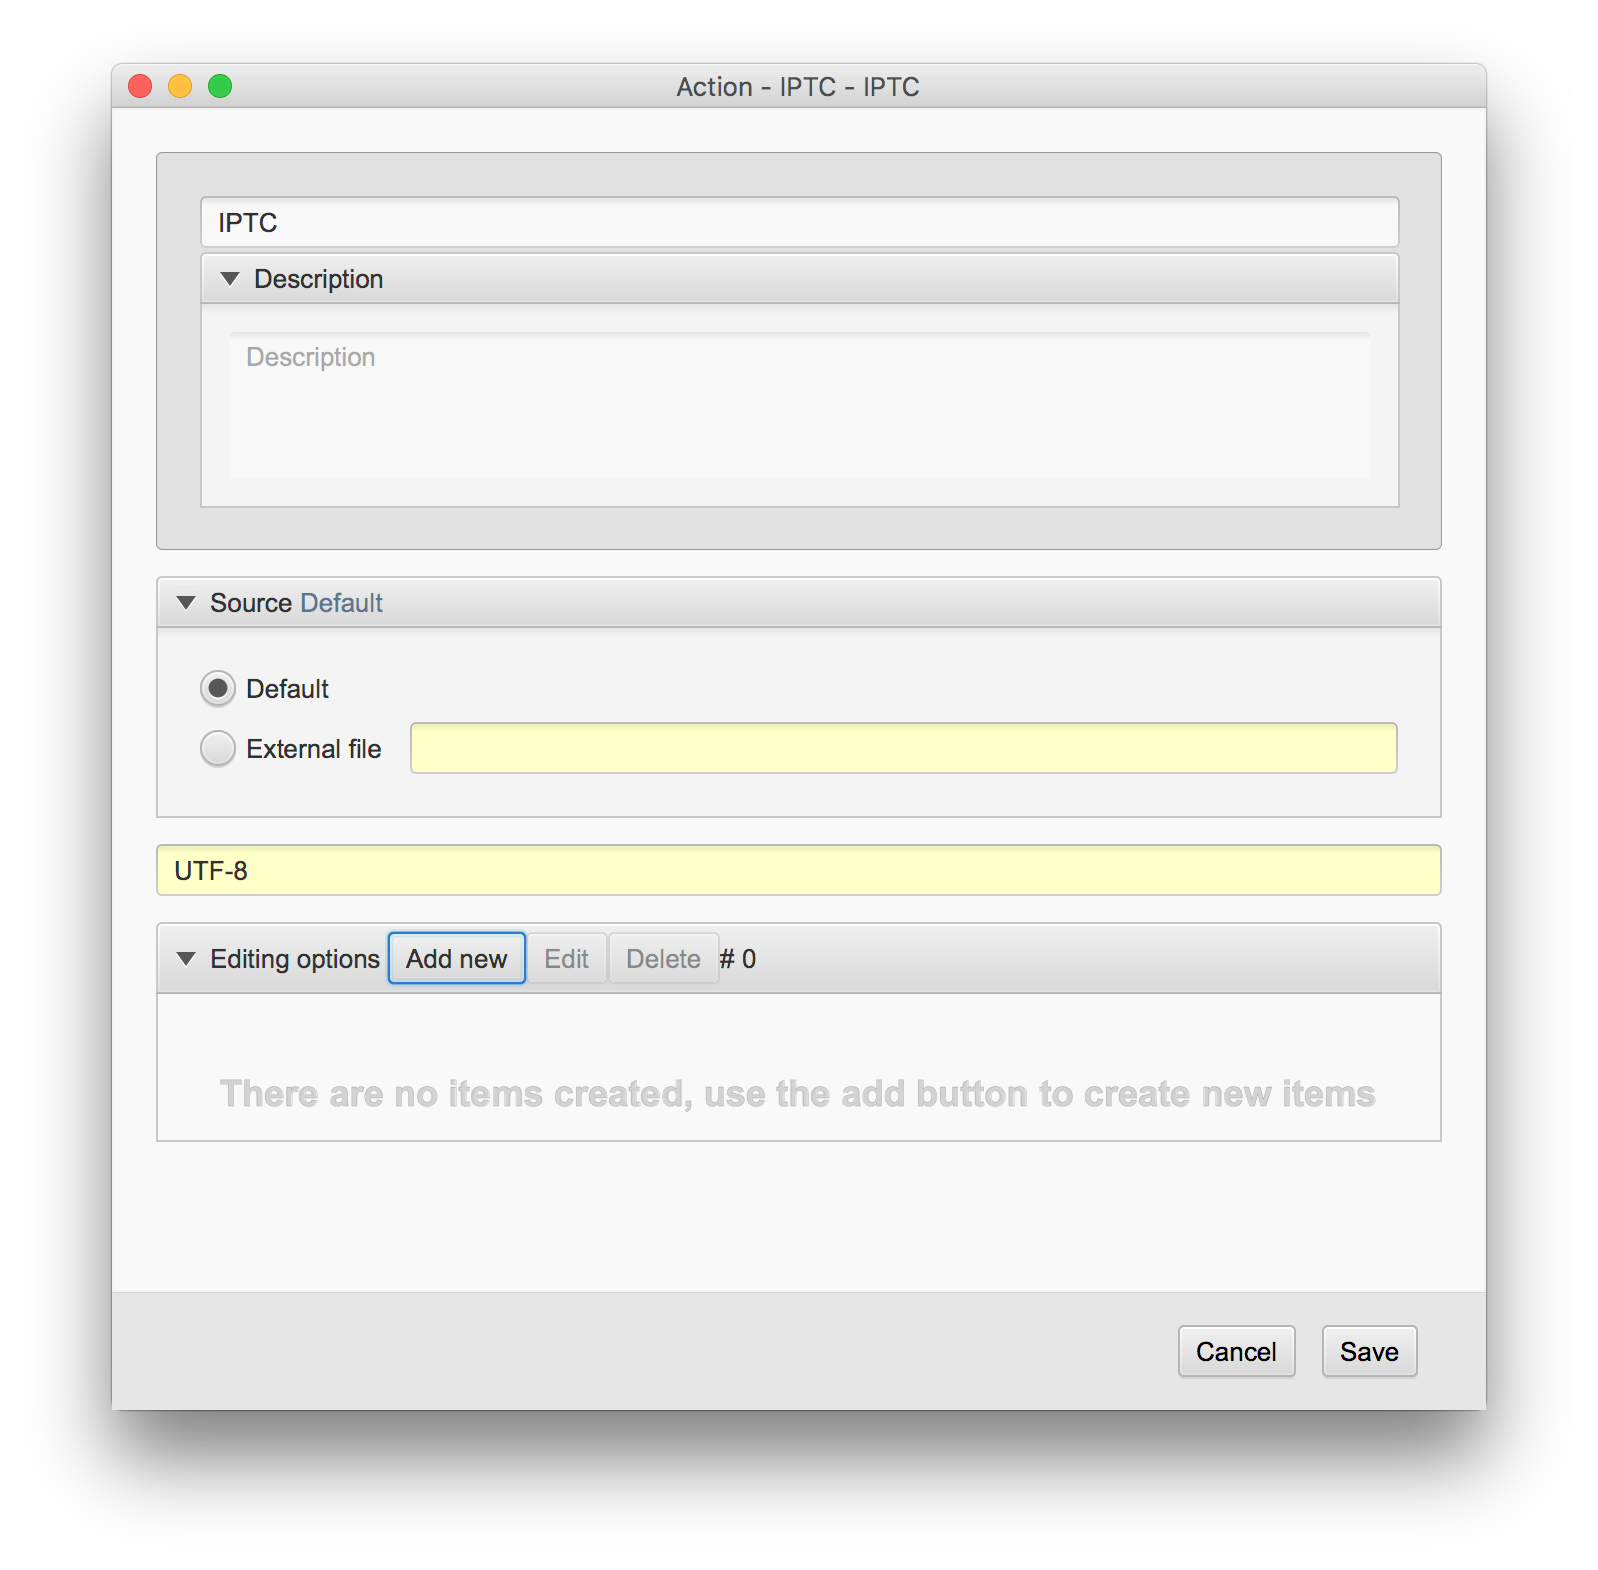
The settings for the IPTC inserter action.
Settings for the IPTC inserter action
| Setting |
Description |
| Name |
The name for this component. This name is used throughout the rest of the settings in Corbit and is acting as an identifier for the component. |
| Source - default |
The default source indicates that the action should be invoked on the object that is currently in scope. This is the normal way to use the action. |
| Source - external file |
This option is useful if you would like the action to be applied on another file than the one currently in scope. This is convenient for example if you have a sidecar file that needs to be handled or if the file that should be handled is referenced in a text file. |
| Character setting |
The format which should be used when writing the file. The default value is UTF-8.
The value generally follows the conventions documented in RFC 2278: IANA Charset Registration Procedures. The value is not case-sensitive.
|
| Conversion |
This list contains all the insertions that should be done. To add a new insertion, click the add button under the list. To remove an existing insertion, select it in the list and click the delete button. To edit an existing insertion, select it and click the edit button. |
| Editing options |
Add new. Select IPTC field. Then select replace/append/precede. |
| Value |
Add the value you want to use for the selected IPTC field. |
Move action
Handles:
Email
Files
Folders
This action will move the object to a new location.
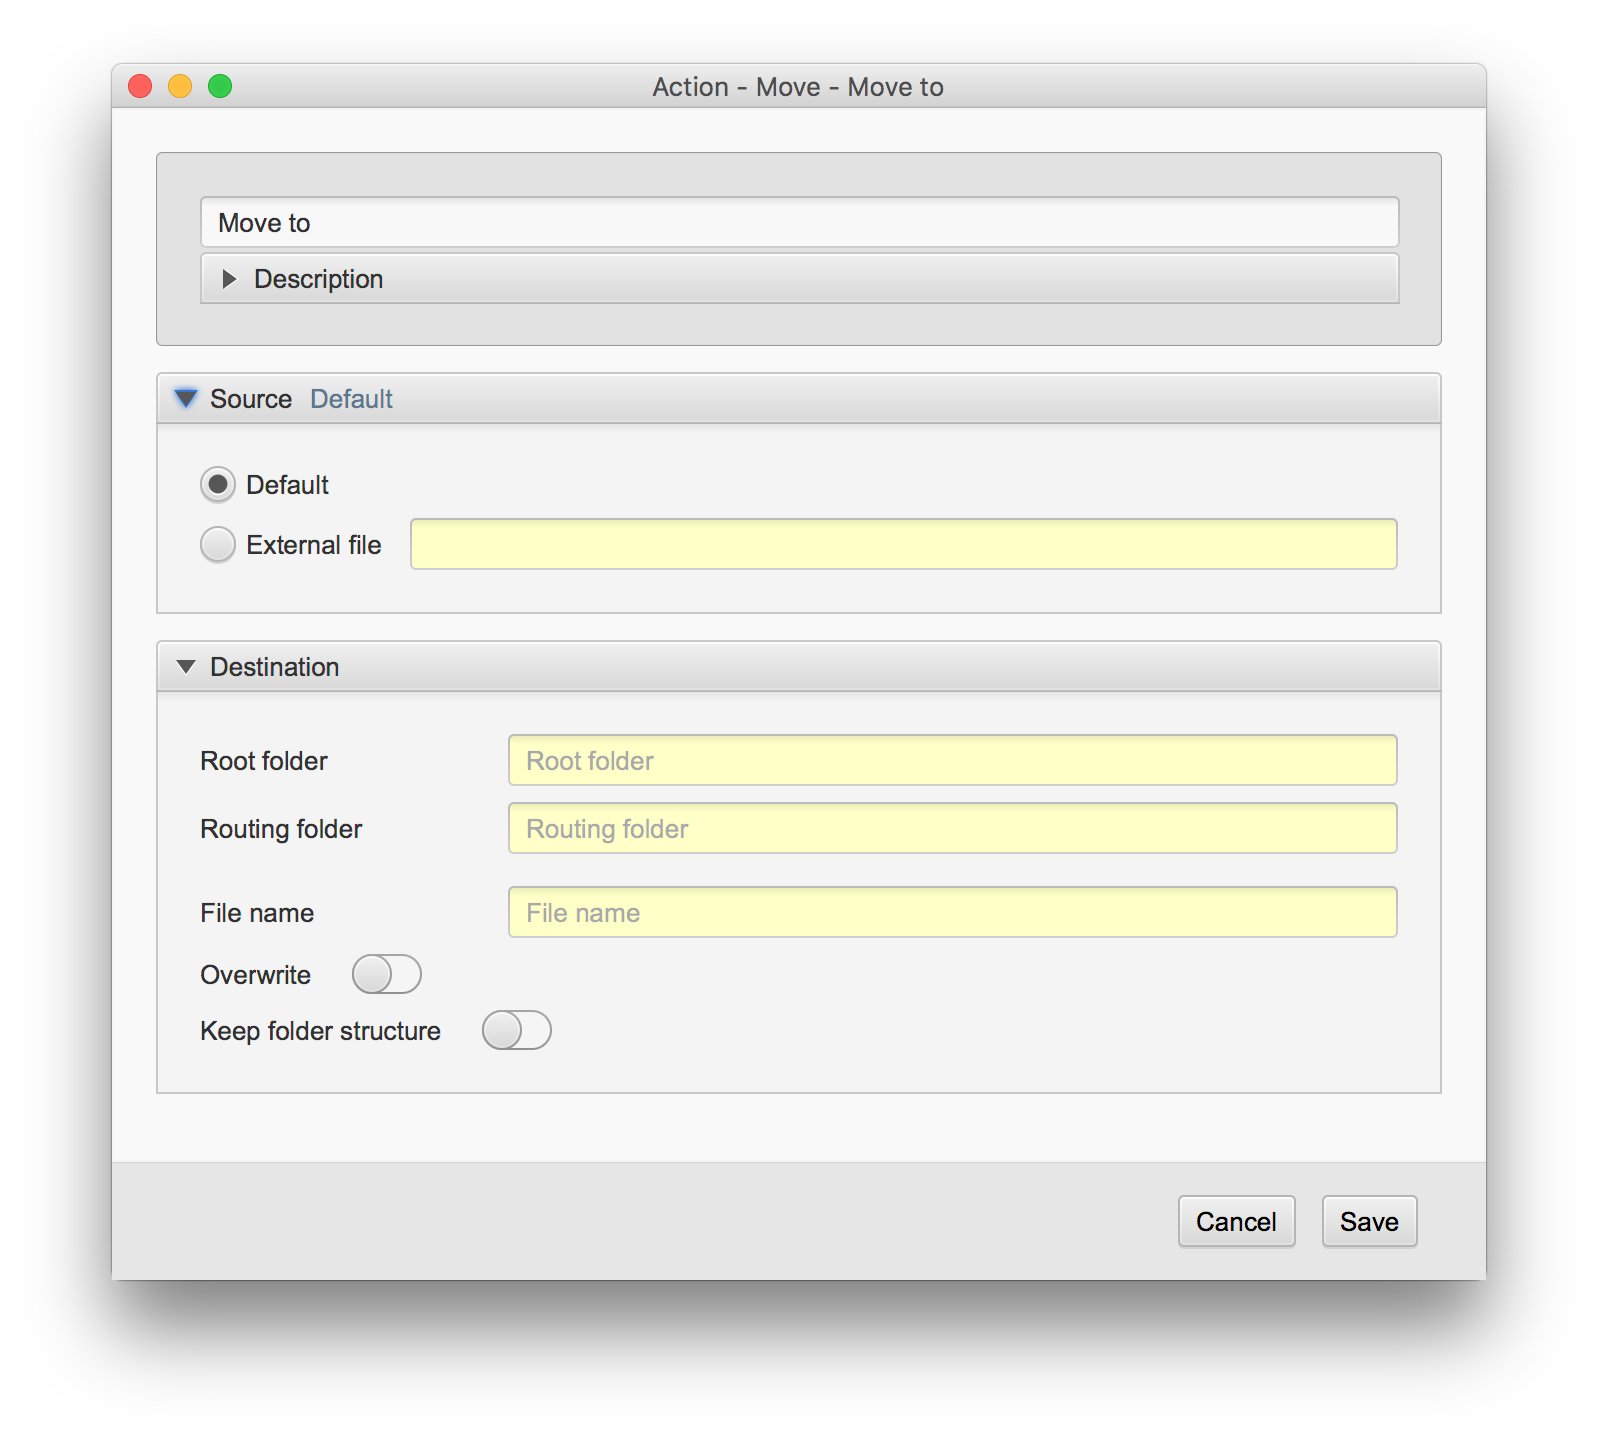
The settings for the move action.
Settings for the move action
| Setting |
Description |
| Name |
The name for this component. This name is used throughout the rest of the settings in Corbit and is acting as an identifier for the component. |
| Source - default |
The default source indicates that the action should be invoked on the object that is currently in scope. This is the normal way to use the action. |
| Source - external file |
This option is useful if you would like the action to be applied on another file than the one currently in scope. This is convenient for example if you have a sidecar file that needs to be handled or if the file that should be handled is referenced in a text file. |
| Root folder |
This is the root folder where the action will put the object. If the routing field (see below) is empty the object will be placed in the root destination, otherwise in a sub location
described by the routing field. The location entered in this field must exist, see note for the routing field.
|
| Routing |
Use this field to enter a sub location to the root destination. This field is a macro field and may contain macros. If you for example enter '%D%' in the routing field the final destination folder will be a sub folder with the current date in the root destination.
Note
The root destination must exist for the action to be executed correctly. The final destination folder created with the routing does not need to exists, it will be created if it is not present.
|
| File name |
If this field is having a value the object will get this name at the final location. This can for example be used to add a special prefix on the object. If we need to add the prefix 'A-' on the object we will put 'A-%F%%E%' in the name change field (see the section about macros for more information). |
| Overwrite if duplicate |
This option will first delete the duplicate, then replace it with the new one from this action.
See information of the special macro %DUPLICATE_FILE_EXTRA[...]% for more options regarding duplicate files. |
| Keep folder structure |
The folder structure is the sub folder structure seen from the source main folder where it applies.
Example: A folder source is set to watch folder A and also selected to search subfolders. The pdf file file.pdf is detected in the folder A/B/file.pdf. If the keep folder structure is selected the result file will be placed in the sub folder B also in the end location. |
Text file action
Handles:
Email
Files
Folders
This action will create a text file in any format. This action will not affect the object that caused this action to execute.
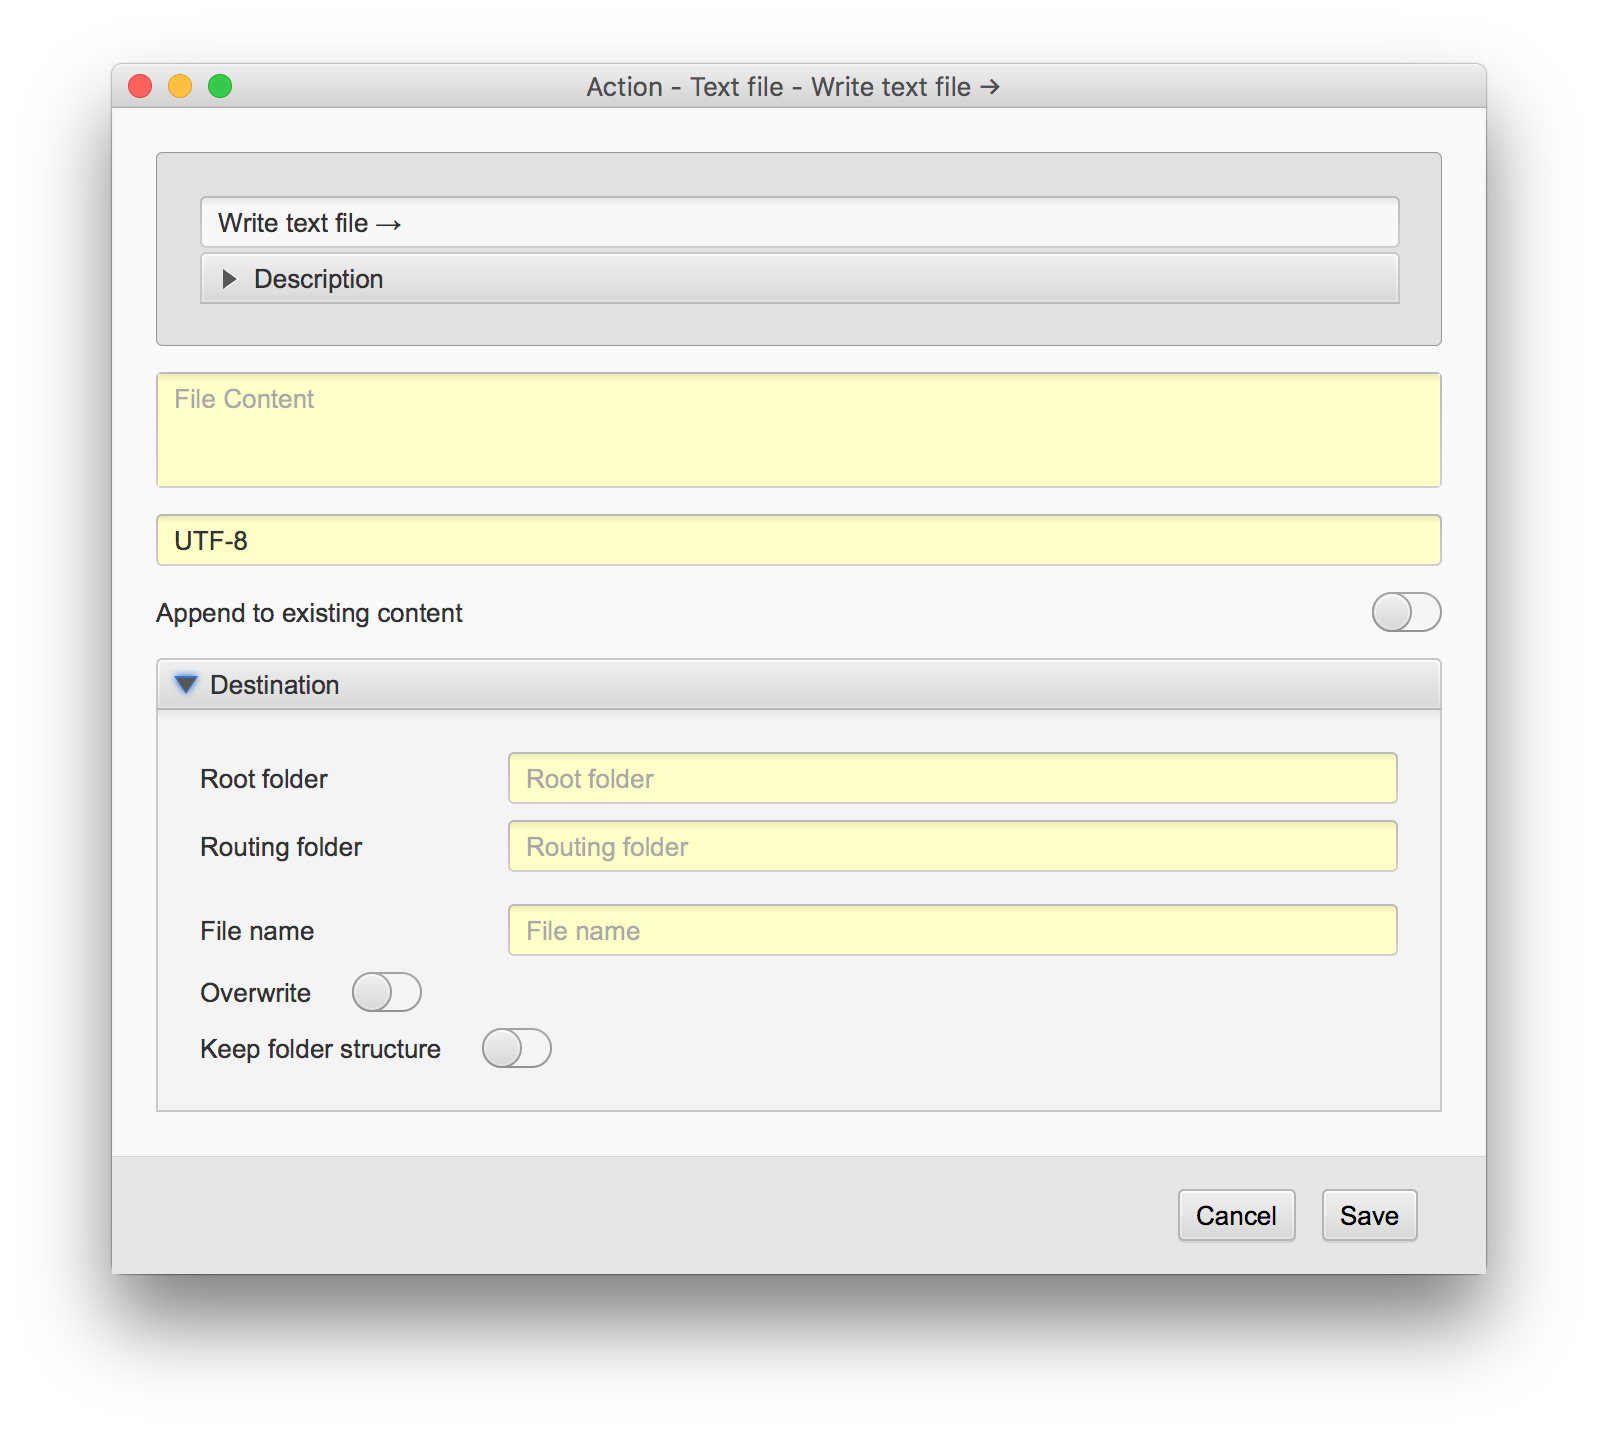
The settings for the text file action.
Settings for the text file action
| Setting |
Description |
| Write text file |
The name for this component. This name is used throughout the rest of the settings in Corbit and is acting as an identifier for the component. |
| File content |
The text that will be created. This text may contain macros and the text can be in any format. |
| Append |
If this option is selected the original file content will be kept and the text will be appended to the current file content. |
| Text format |
The format which should be used when writing the file. The default value is UTF-8.
The value generally follows the conventions documented in RFC 2278: IANA Charset Registration Procedures. The value is not case-sensitive. |
| Append to existing content |
Activating this will leave any existing text intact and add the text of your choise at the end of this text. If not activated the original text will be deleted and only the new text will be
present in the output file.
|
| Root destination |
This is the root folder where the action will put the object. If the routing field (see below) is empty the object will be placed in the root destination, otherwise in a sub location described by the routing field. The location entered in this field must exist, see note for the routing field. |
| Routing folder |
Use this field to enter a sub location to the root destination. This field is a macro field and may contain macros. If you for example enter '%D%' in the routing field the final destination folder will be a sub folder with the current date in the root destination.
Note
The root destination must exist for the action to be executed correctly. The final destination folder created with the routing does not need to exists, it will be created if it is not present.
|
| File name |
The file name of the created text file. If this name is missing the name will be taken from the object being handled but with the file extension .txt. |
| Overwrite if duplicate |
This option will first delete the duplicate, then replace it with the new one from this action.
See information of the special macro %DUPLICATE_FILE_EXTRA[...]% for more options regarding duplicate files. |
| Keep folder structure |
The folder structure is the sub folder structure seen from the source main folder where it applies.
Example: A folder source is set to watch folder A and also selected to search subfolders. The pdf file file.pdf is detected in the folder A/B/file.pdf. If the keep folder structure is selected the result file will be placed in the sub folder B also in the end location. |
Unzip action
Handles:
Email
Files
Folders
This action will unzip a file and put the result files in a final destination.
This action will not affect the source zip file so if the source file is not needed after the unzip a delete action should be set after this action.
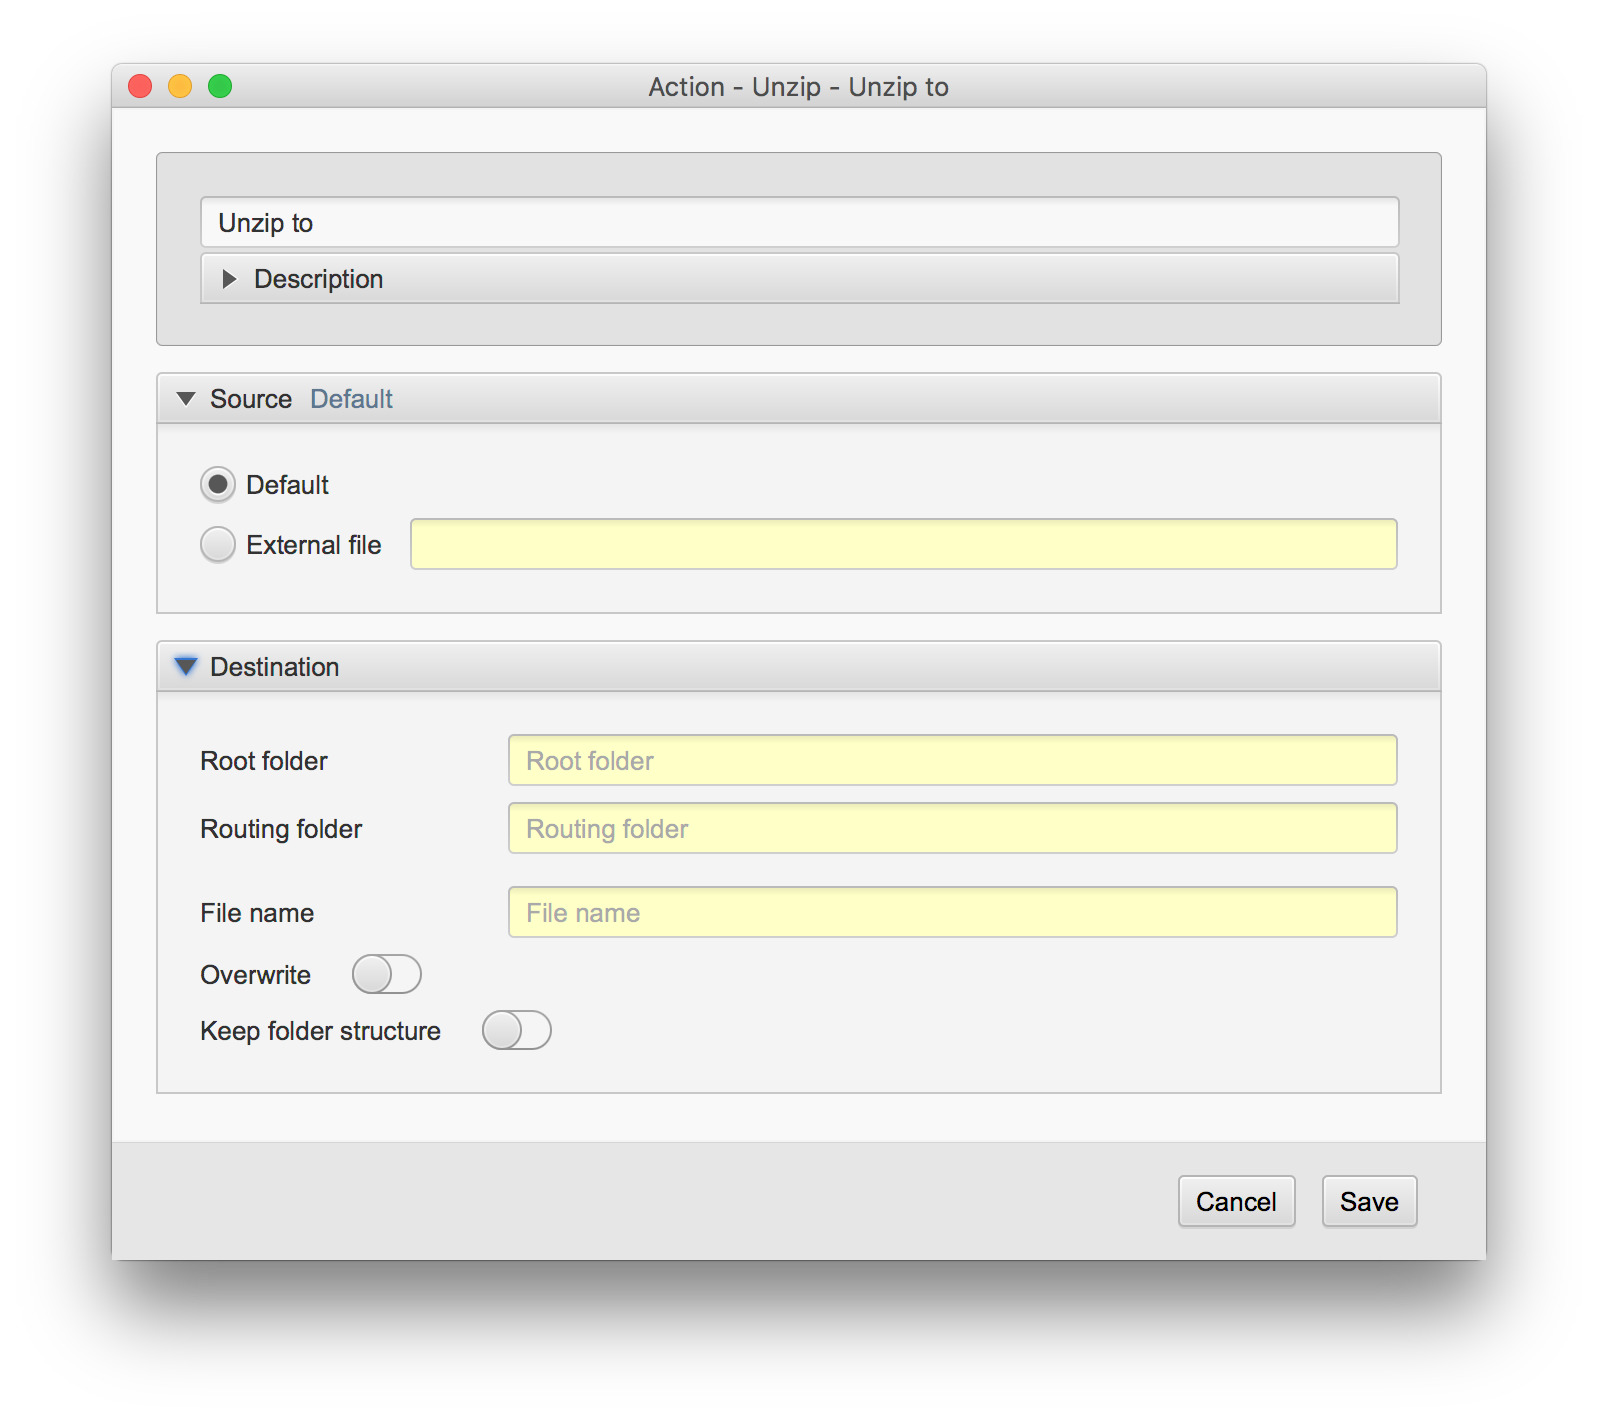
The settings for the unzip action.
Settings for the unzip action
| Setting |
Description |
| Name |
The name for this component. This name is used throughout the rest of the settings in Corbit and is acting as an identifier for the component. |
| Source - default |
The default source indicates that the action should be invoked on the object that is currently in scope. This is the normal way to use the action. |
| Source - external file |
This option is useful if you would like the action to be applied on another file than the one currently in scope. This is convenient for example if you have a sidecar file that needs to be handled or if the file that should be handled is referenced in a text file. |
| Root folder |
This is the root folder where the action will put the unzipped files. If the routing field (see below) is empty the files will be placed in the root destination, otherwise in a sub location described by the routing field. The location entered in this field must exist, see note for the routing field. |
| Routing folder |
Use this field to enter a sub location to the root destination. This field is a macro field and may contain macros. If you for example enter '%D%' in the routing field the final destination folder will be a sub folder with the current date in the root destination.
Note
The root destination must exist for the action to be executed correctly. The final destination folder created with the routing does not need to exists, it will be created if it is not present.
|
| File name |
The name change regards the unzipped files. See the special macro %ZIPF% for information how to use the original zip file's name for the result files. This field may be empty in which case the files will keep their original names. |
| Overwrite if duplicate |
This option will first delete the duplicate, then replace it with the new one from this action.
See information of the special macro %DUPLICATE_FILE_EXTRA[...]% for more options regarding duplicate files. |
| Keep folder structure |
The folder structure is the sub folder structure seen from the source main folder where it applies.
Example: A folder source is set to watch folder A and also selected to search subfolders. The pdf file file.pdf is detected in the folder A/B/file.pdf. If the keep folder structure is selected the result file will be placed in the sub folder B also in the end location. |
XMP inserter action
Handles:
Email
Files
Folders
The XMP action is only tested to work on JPG, TIFF and PDF files. This action will insert new XMP information into the files with the possibillity to keep the old values.
To handle the insertion click the add button under the list. This will open a dialog where the XMP field can be choosen and the insertion text added. There is an option in this dialog to replace, append or precede the old value with the new value.
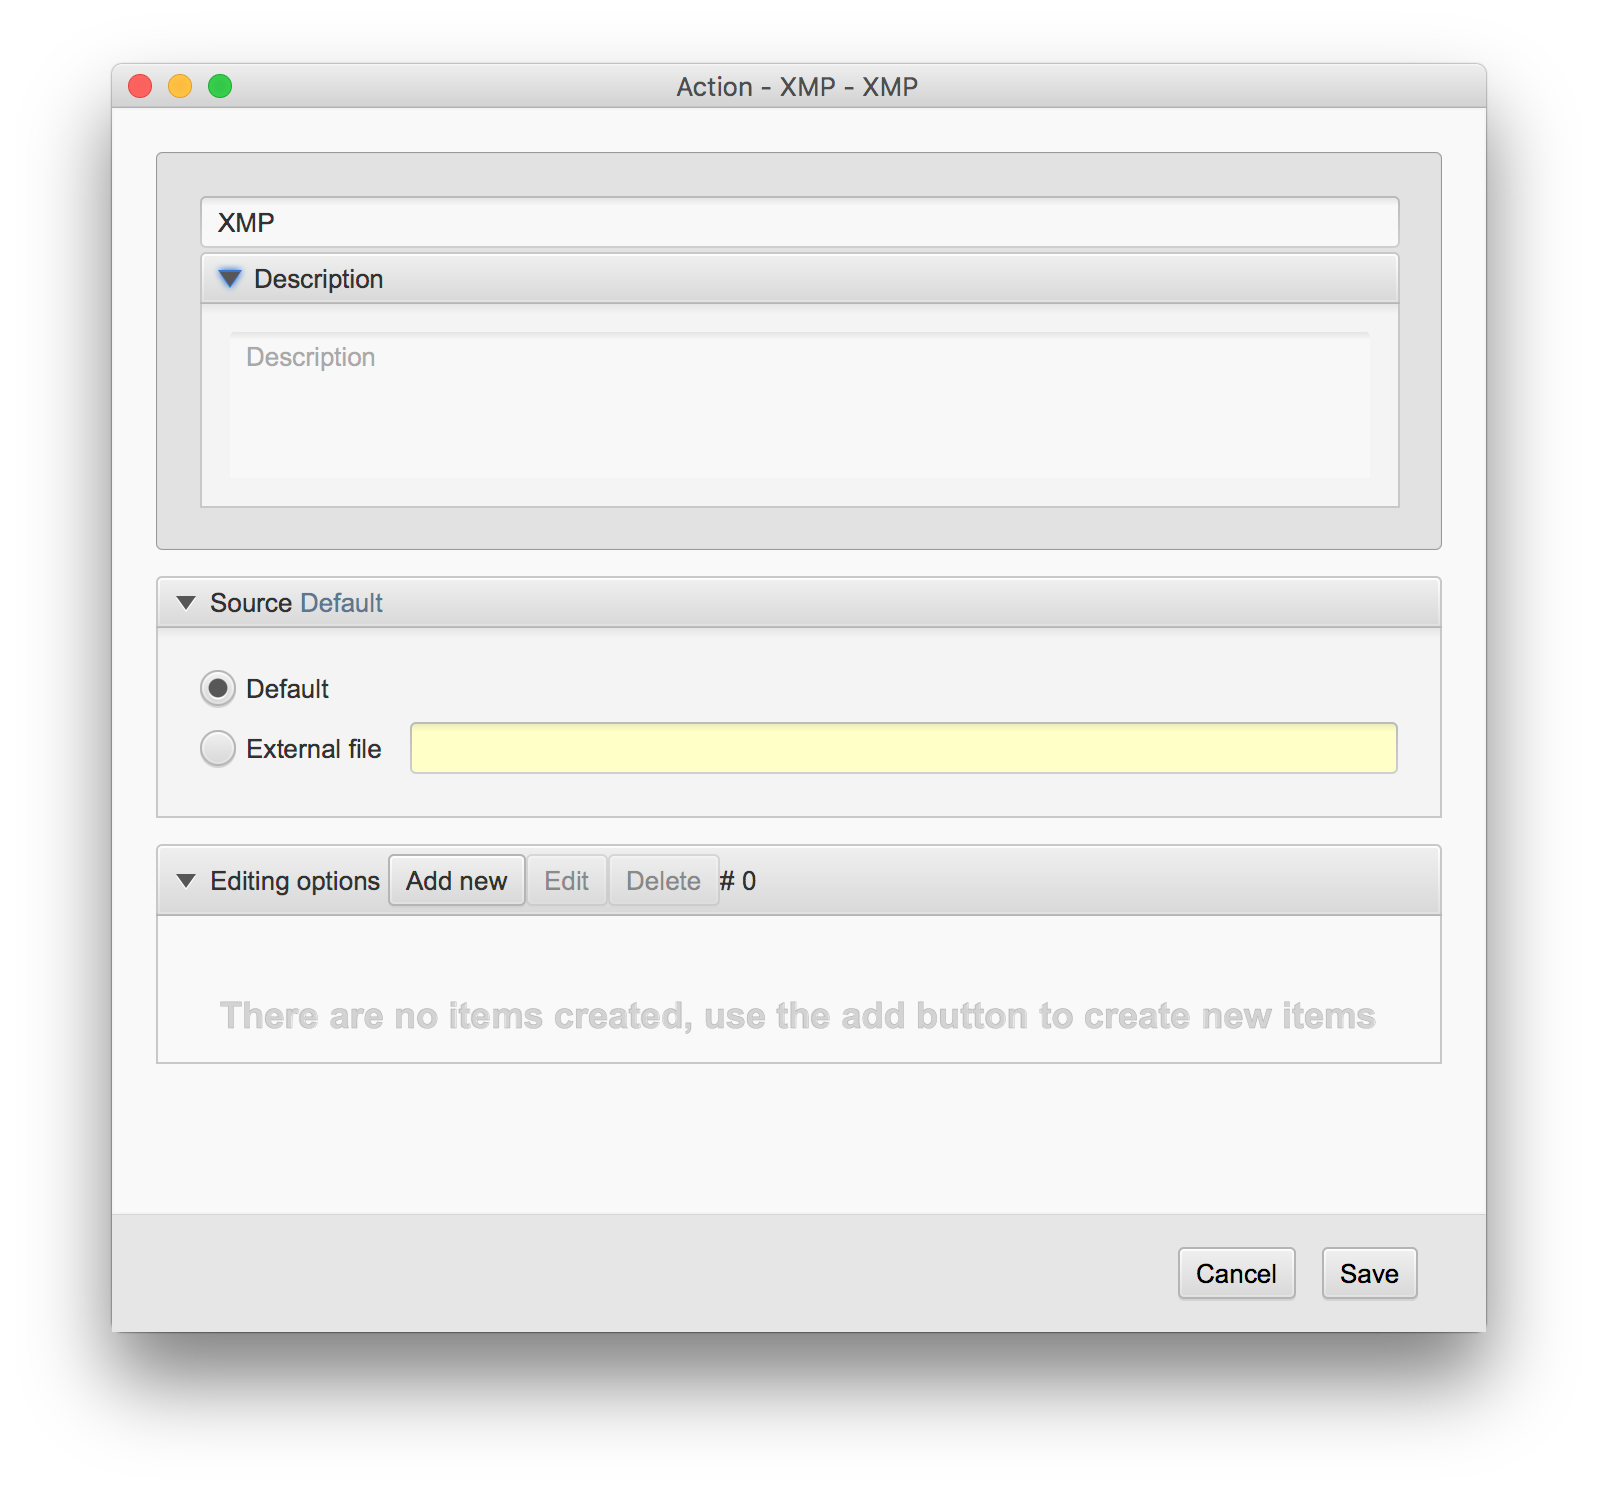
The settings for the XMP inserter action.
Settings for the XMP inserter action
| Setting |
Description |
| Name |
The name for this component. This name is used throughout the rest of the settings in Corbit and is acting as an identifier for the component. |
| Source - default |
The default source indicates that the action should be invoked on the object that is currently in scope. This is the normal way to use the action. |
| Source - external file |
This option is useful if you would like the action to be applied on another file than the one currently in scope. This is convenient for example if you have a sidecar file that needs to be handled or if the file that should be handled is referenced in a text file. |
| Inserter list |
This list contains all the insertions that should be done. To add a new insertion, click the add button under the list. To remove an existing insertion, select it in the list and click the delete button. To edit an existing insertion, select it and click the edit button. |
| Inserting - Select XMP |
Here you find a list of XMP vocabularies. Choose the one you want, e.g. Dublin Core, and the available tags are shown. Select the one you want to use. |
| Value |
Enter the value you would like to use. You may use dynamic values using macros. |
REST-call Action
A nice way of integrating software systems is REST-APIs. From Corbit you may call other systems using REST-calls in the action REST-call.
Enter a name and description of this action. In the popup menu 'Call type' you select the type. Available types are; DELETE, GET, POST and PUT.
If you select the POST type you will have an additional choice of using Multipart or JSON call. If you want to upload files in your call you must select Multipart.
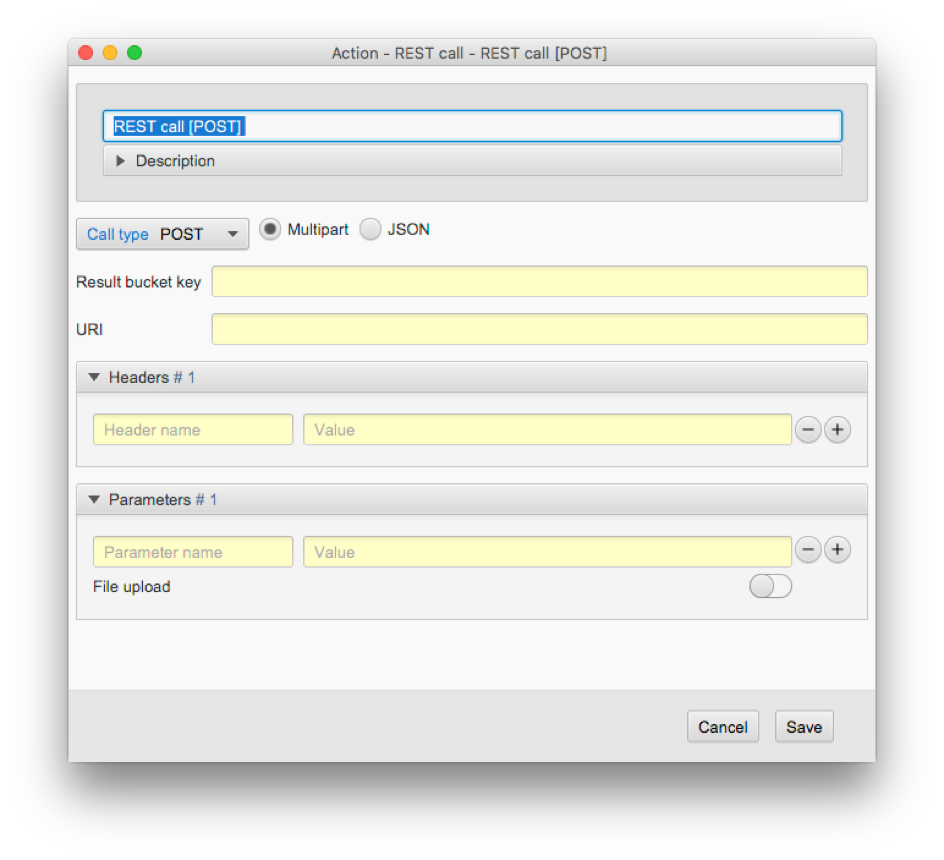
The settings for REST-call action.
The 'Result bucket key' specifies an optional bucket key. In this bucket key the following ucket key/values will be placed after the call;
| Key |
Value |
| <result bucket key> |
The raw response |
| <result bucket key>.response.code |
The response code |
| <result bucket key>.response.reason |
The possible response reason |
| <result bucket key>.response.exception.message |
It there was an internal error this will contain the error message |
The 'URI' is the full URI path of the call, e.g. http://myserver.com/photos.
In the Headers section you may add one or more headers that will be added in the request header of the call.
In the Parameters section you specify all the additional request parameters. The request parameters are specified with a name and value. If you want to upload a file you may select the File upload toggle. If this toggle is selected the value of the parameter should be the full path to the file that you want to upload in the call.
The If you have had an action that performs “get assets”, this action can be useful so that you split up all assets that were retrieved and then perform individual actions on each asset.
This action is a combination of things you can do with an integration to Portfolio explained below.
Get assets derivative
retrieves a copy of an asset. Normally as asset ID you use the macro %ASSET_ID% (as an example, you have had a portfolio source or a previous portfolio action that fetches assets and stores them in a “for each asset” action).
Get asset original
retrieves the original file of an asset.
Get assets
searches for assets and can thus serve in the same way as a source for portfolio. Such an action should then be followed by an “for each asset” action.
List catalogs
List all the catalogs available for the user. A XML representation of the catalogs will be placed in the object bucket key Extensis Portfolio.portfolio.catalogXML. (se info box in the action for more info.)
Update asset
Used for updating data for an asset, such as setting a new status or changing/setting metadata.
Google Ad Manager
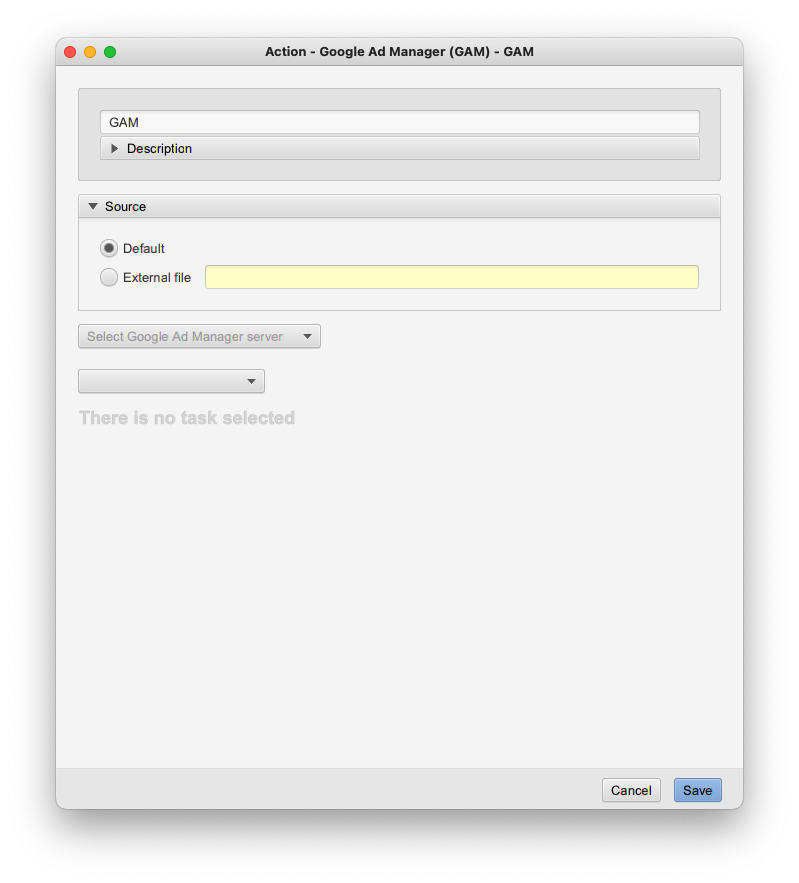 Google Ad Manager Action
This action is a combination of things you can do with an integration with Google Ad Manager (GAM). In Corbit 8.0.1 there is one task available, to upload an asset to a specific line item.
Line Item ID
is the ID we are going to upload assets to.
Preview site
Setup if you want a preview that is embedded in a certain site, for example set this to www.yoursite.com (if the GAM you are connecting to knows this domain)
Bucket key for result preview URL
Given you have entered a preview site, you may enter a key here that will be the “bucket key” where the resulting preview URL will be stored. As an example, you enter “url”, you may then later use %BUCKET[url]% to get the actual URL.
Line item active state
indicates whether to activate the current line item or not.
The available Type in Corbit 8.0.1 is image, then you have to set:
Name is the ”name” that will be displayed In GAM
Ad unit size must match a format expected in the current line item. If width and height are left blank,
the first format Corbit finds for the current line item will be used (with the risk that this format does not match the format of the uploaded image, then an error will occur).
Image file can either be a source file (then the current file in the scope of the action is uploaded, you must specify the density of the current file, if the format for example is 320x320 and the density is set to 2x, then the actual size of the image should be 640x640)
or a remote URL, then this is set to an HTTP address that indicates where the image is located.
Destination
controlled by GAM
Laidback Display Ad
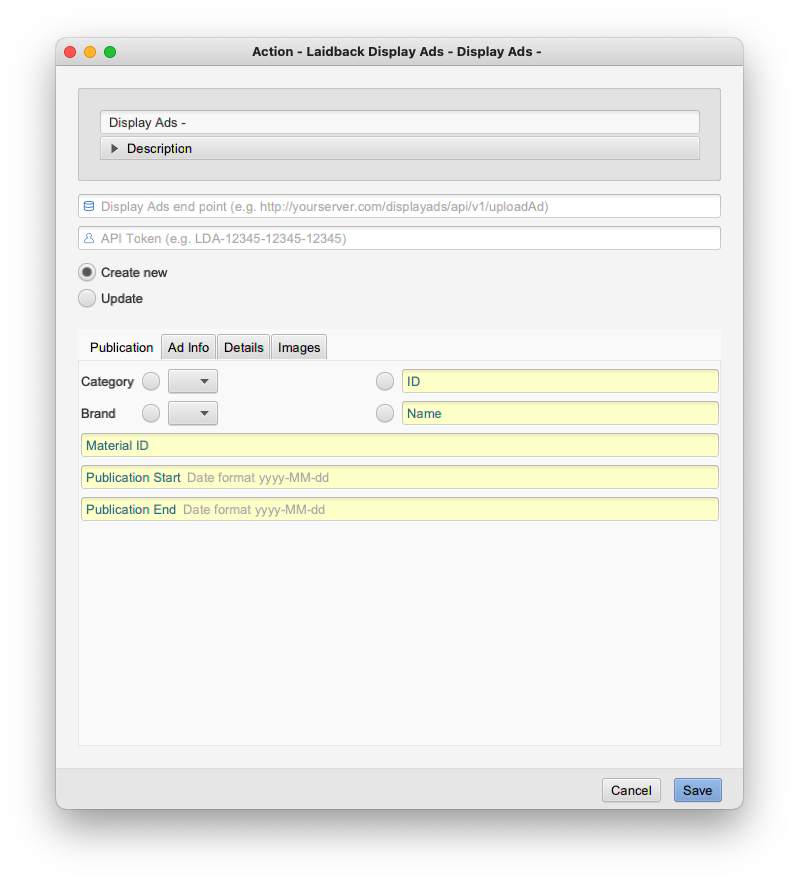 Laidback Display Ad
A special action used for the product “DisplayAds” by Laidback Solutions.(sold separately)
3.5 Common resources
SMTP Servers
In some components in Corbit there are settings involving SMTP servers. These settings will have a popup with all the available SMTP hosts created and the user may also create a new SMTP host from those popups. All the SMTP host settings are collected in the SMTP preferences area.
When testing the connection you may see a warning that a certain certificate is used (if using SSL), you may select to enable this certificate or not.
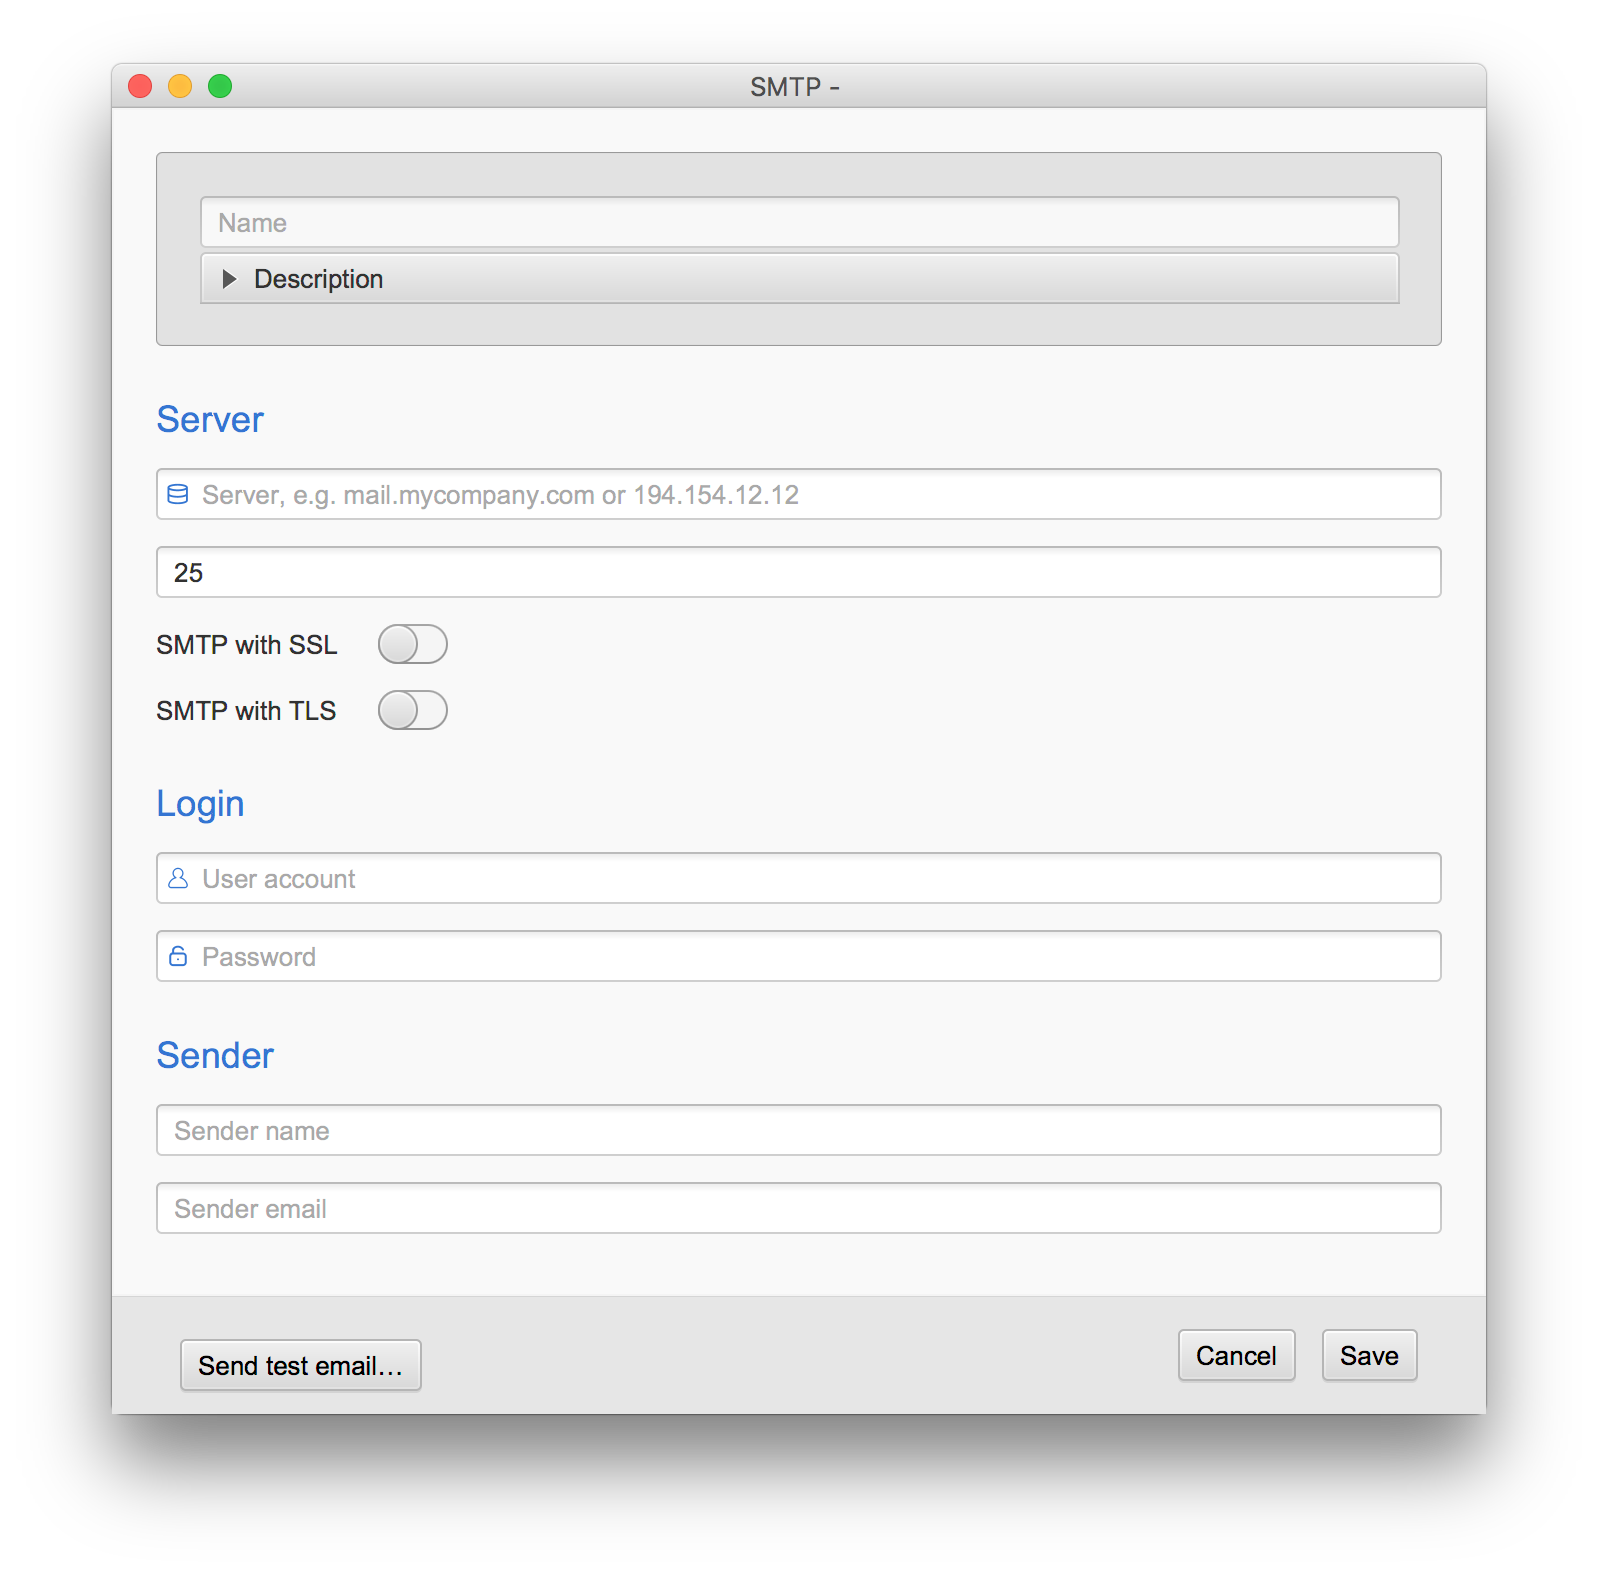 SMTP preferences
Settings for a SMTP host
| Setting |
Description |
| Name |
The name for this component. This name is used throughout the rest of the settings in Corbit and is acting as an identifier for the component. |
| SMTP host |
The SMTP server name as IP number or DNS name, e.g. 192.168.40.3 or smtp.yourserver.com. |
| Port |
The SMTP server port. The default SMTP port is 25. |
| Use SSL |
If this check box is selected Corbit will use the secure socket layer whilst communicating with the SMTP server. |
| Enable TLS |
Enabling TLS communication with the email server |
| User account |
The user login for the SMTP server. |
| Password |
The password for the user account above. |
| From (name) |
The personal name for the 'from' field in the email. |
| From (email) |
The email address which will be the address from which the email is seen sent from. |
Cargo
In some components in Corbit there are settings involving Cargo servers. This settings will have a popup with all available Cargo servers created.
Here you specify The Cargo host address, port, and which account to use (The user is set up in Cargo admin).
(“Cargo is a Licensed Laidback Solutions Software Sold separately”).
Extensis Portfolio
Here you have to specify the Portfolio server address, port and how to login.
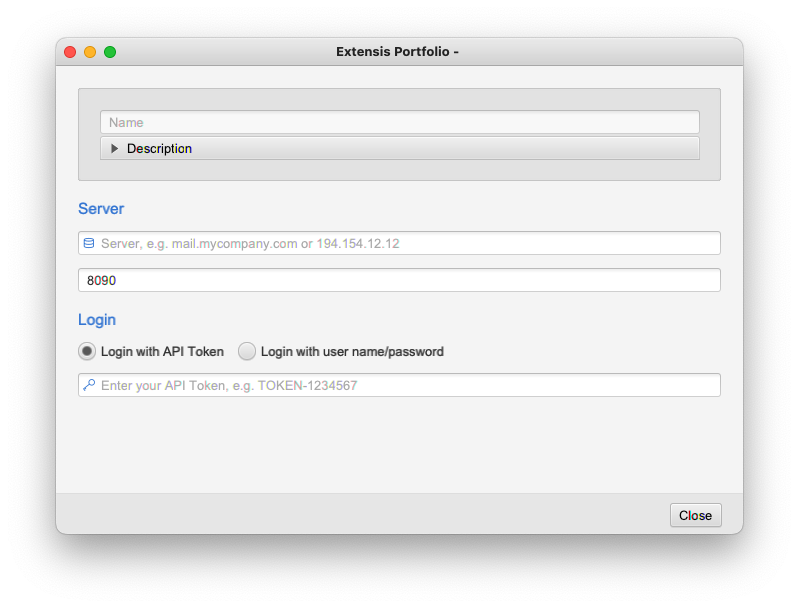
Extensis Portfolio settings
Extensis Portfolio settingsGoogle Ad Manager Server
Your network code is a unique, numeric identifier for your Ad Manager network. This network code is not confidential as it appears in your page's Google Publisher Tags (GPT).
More info: https://support.google.com/admanager/answer/7674889?hl=en
How to make an GAM account available in third party applications. (Like Corbit).
More info: https://developers.google.com/ad-manager/api/start#enable_api
Instructions regarding how to setup a service account i GAM:
https://support.google.com/admanager/answer/6078734?hl=en
The Configuration is set up using a template like the example below.
This configuration template is provided from GAM.
--------------------------------------------------------------------------
	{

		"type": "service_account",

		"project_id": "YOUR PROJECT ID",

  "private_key_id": "YOUR PRIVATE KEY ID",

  "private_key": "-----BEGIN PRIVATE KEY——\nYOUR PRIVATE KEY\n-----END PRIVATE KEY-----\n",

  "client_email": "YOUR SERVICE ACCOUNT EMAIL",

  "client_id": "YOUR CLIENT ID",

  "auth_uri": "https://accounts.google.com/o/oauth2/auth",

  "token_uri": "https://oauth2.googleapis.com/token",

  "auth_provider_x509_cert_url": "https://www.googleapis.com/oauth2/v1/certs",

  "client_x509_cert_url": "https://www.googleapis.com/robot/v1/metadata/x509/YOUR SERVICE ACCOUNT EMAIL WITH %40 instead of @"

}
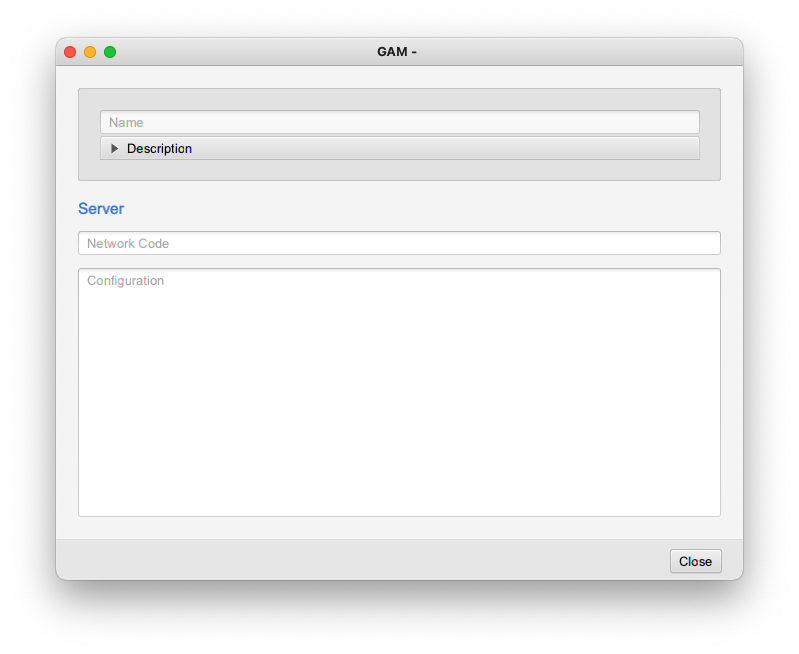 Google Ad Manager
Custom IPTC
The image handling in Corbit includes IPTC reading and writing. Corbit comes with a default set of IPTC fields, the standard fields. Additional to these standard IPTC fields you may add custom IPTC fields in Corbit to read and write to non-standard IPTC values.
In various settings where IPTC fields are required there is a popup menu with all the default and the custom IPTC fields. From this popup it is also possible to create new custom IPTC fields. In the customized IPTC part of the configuration you may view the custom IPTC fields. Here you can add, remove and edit the custom IPTC fields. All the custom IPTC fields which are created with the special IPTC popup will appear in this area.
Custom IPTC
Make sure that all custom IPTC fields that are added in the Corbit setup have unique IPTC field numbers. The numbers used in the custom IPTC must also not collide with any standard IPTC field number.
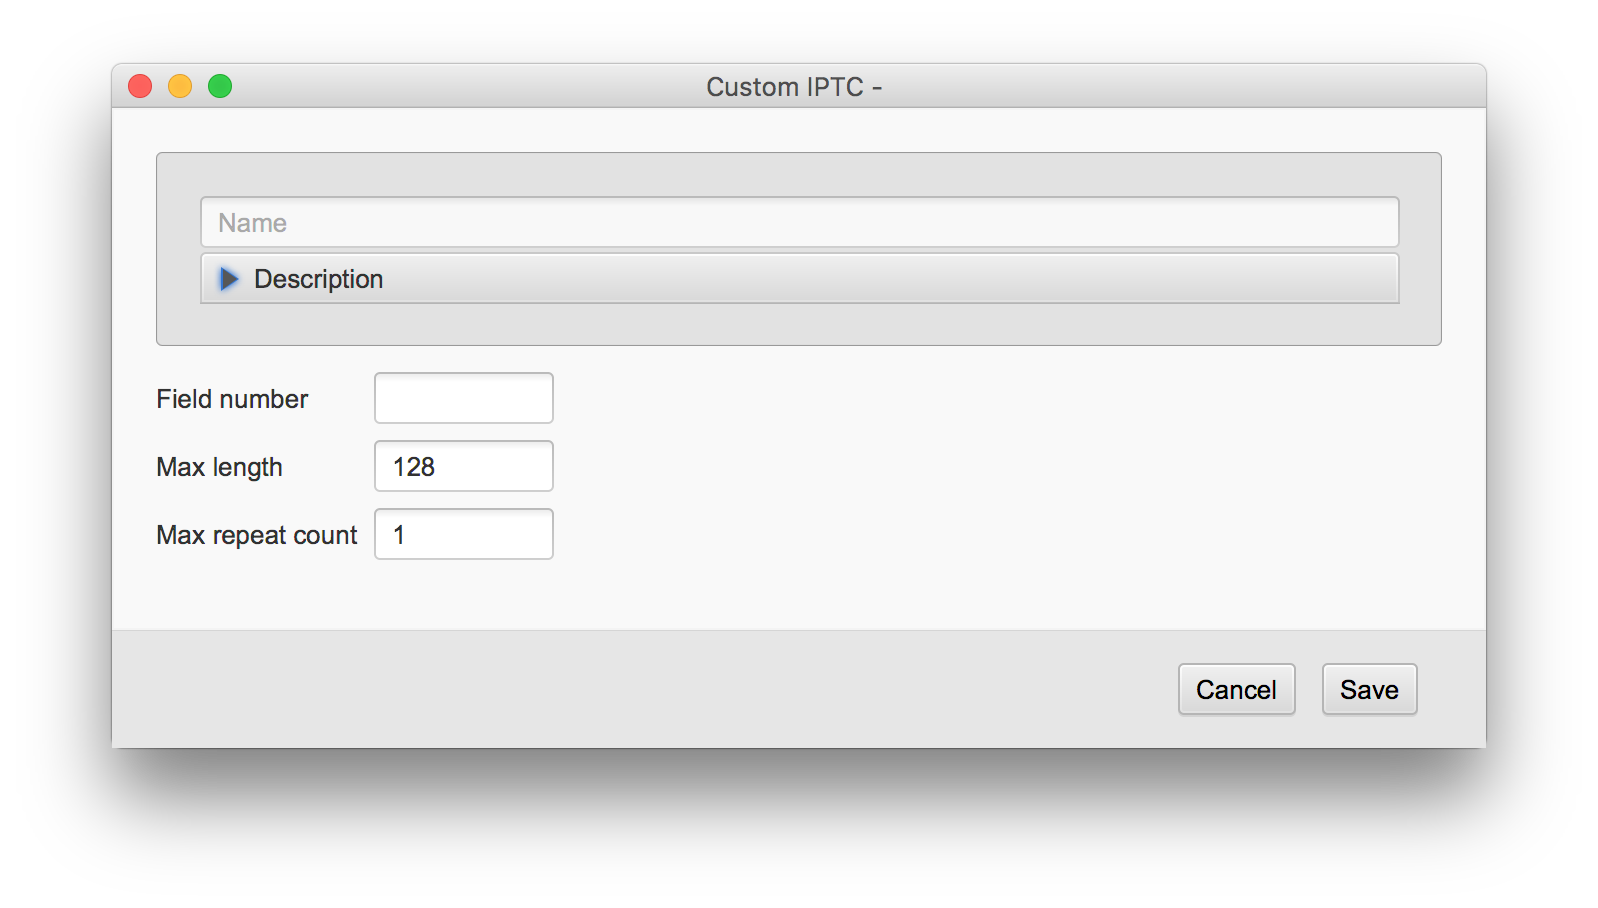 IPTC preferences.
Settings for a custom IPTC field
| Setting |
Description |
| Name |
The name for this component. This name is used throughout the rest of the settings in Corbit and is acting as an identifier for the component. |
| IPTC field |
The IPTC field number. This number must be a unique number and not be the same as another custom IPTC field or any of the standard IPTC fields. |
| Max size |
The maximum number of bytes that this IPTC field should be. Some IPTC fields may only contain 1 byte while others may contain several kB of text. |
| Max repeat count |
This is the maximum number of repeats that this field may occur in the IPTC data. Some IPTC fields may occur only one time while others may have several entries. |
Custom XMP
Corbit has a default set of XMP fields which may be used to get values from or set the values to. There are many more XMP fields available since each company may define their own XMP fields. In Corbit you may add one or more customized XMP fields to comply with such fields that are not in the default list of Corbit.
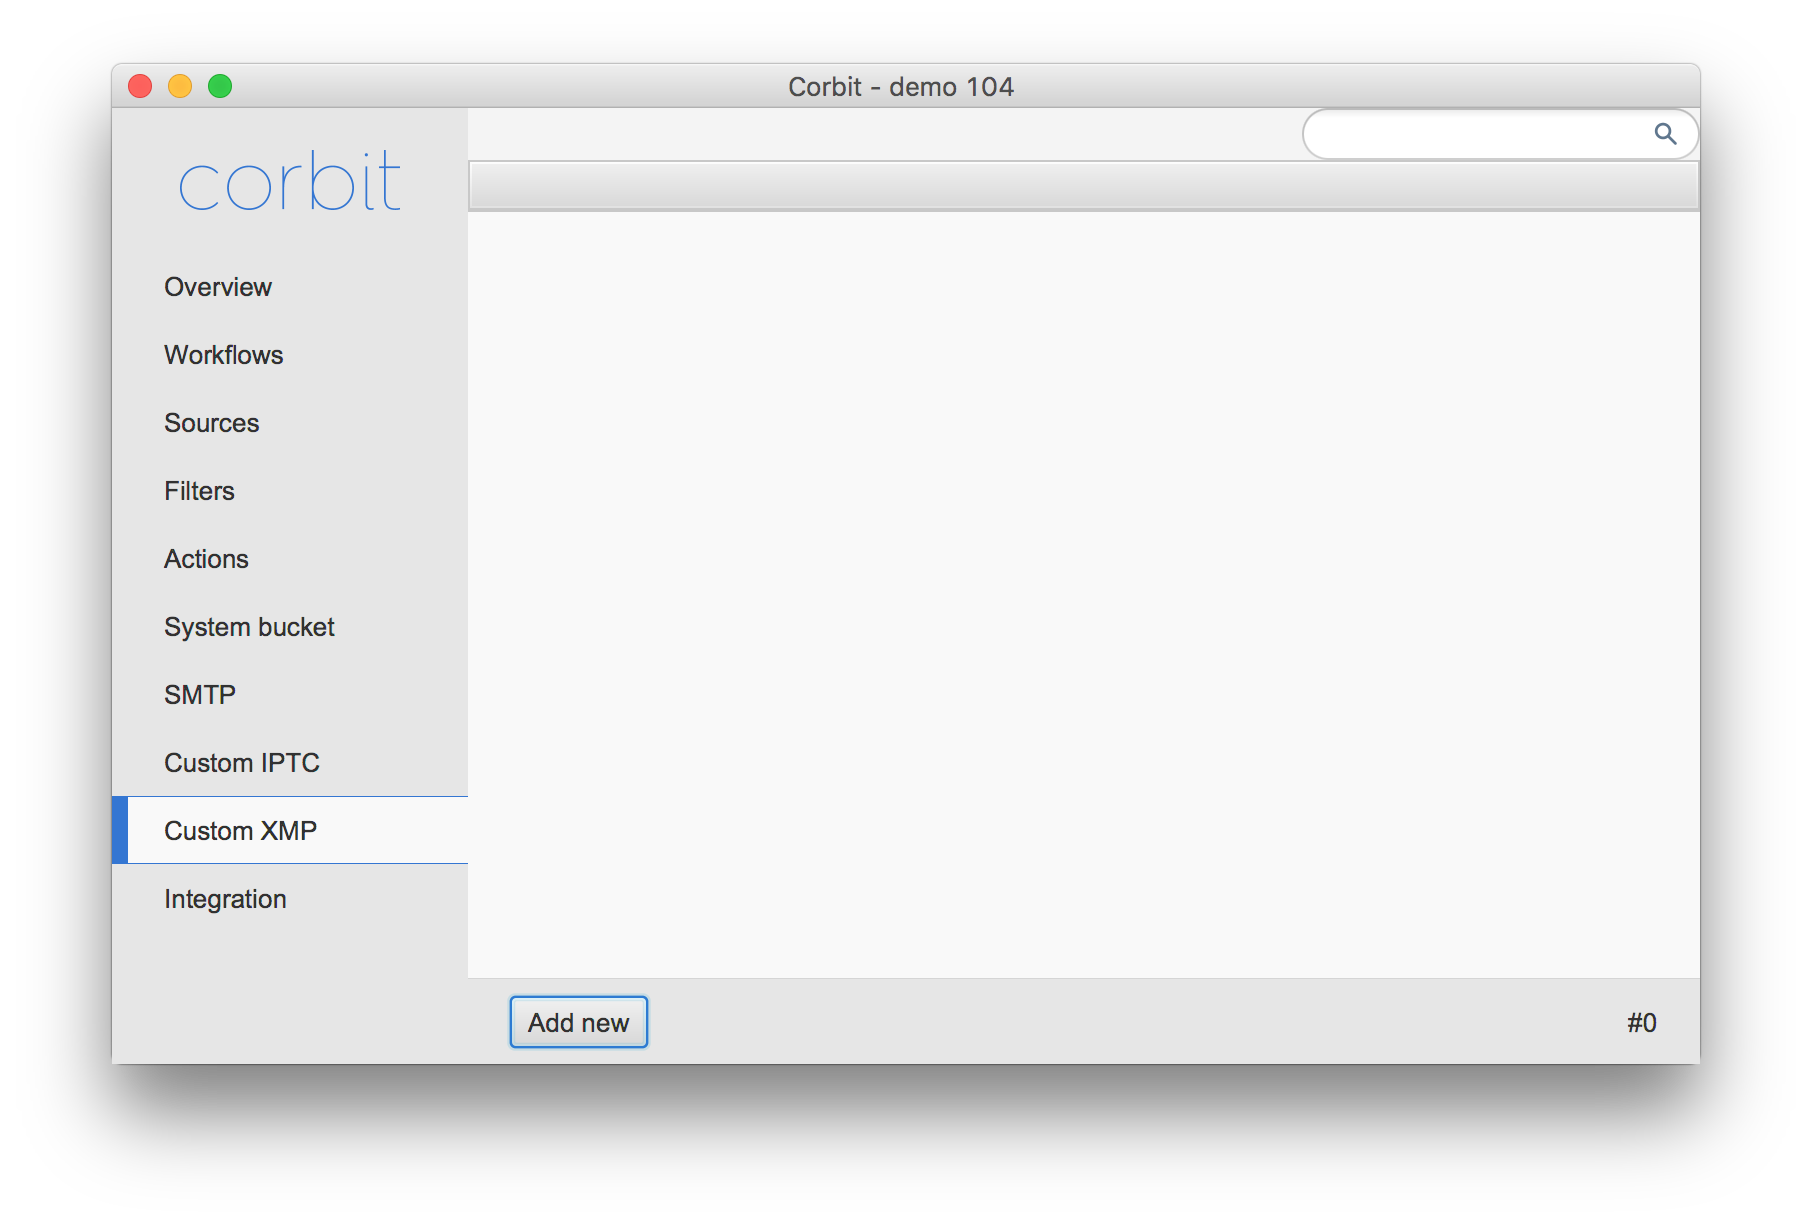
The customized XMP settings.
XMP preferences.When you add or edit a customized XMP field you will get the setup dialog for that XMP field, as seen below.
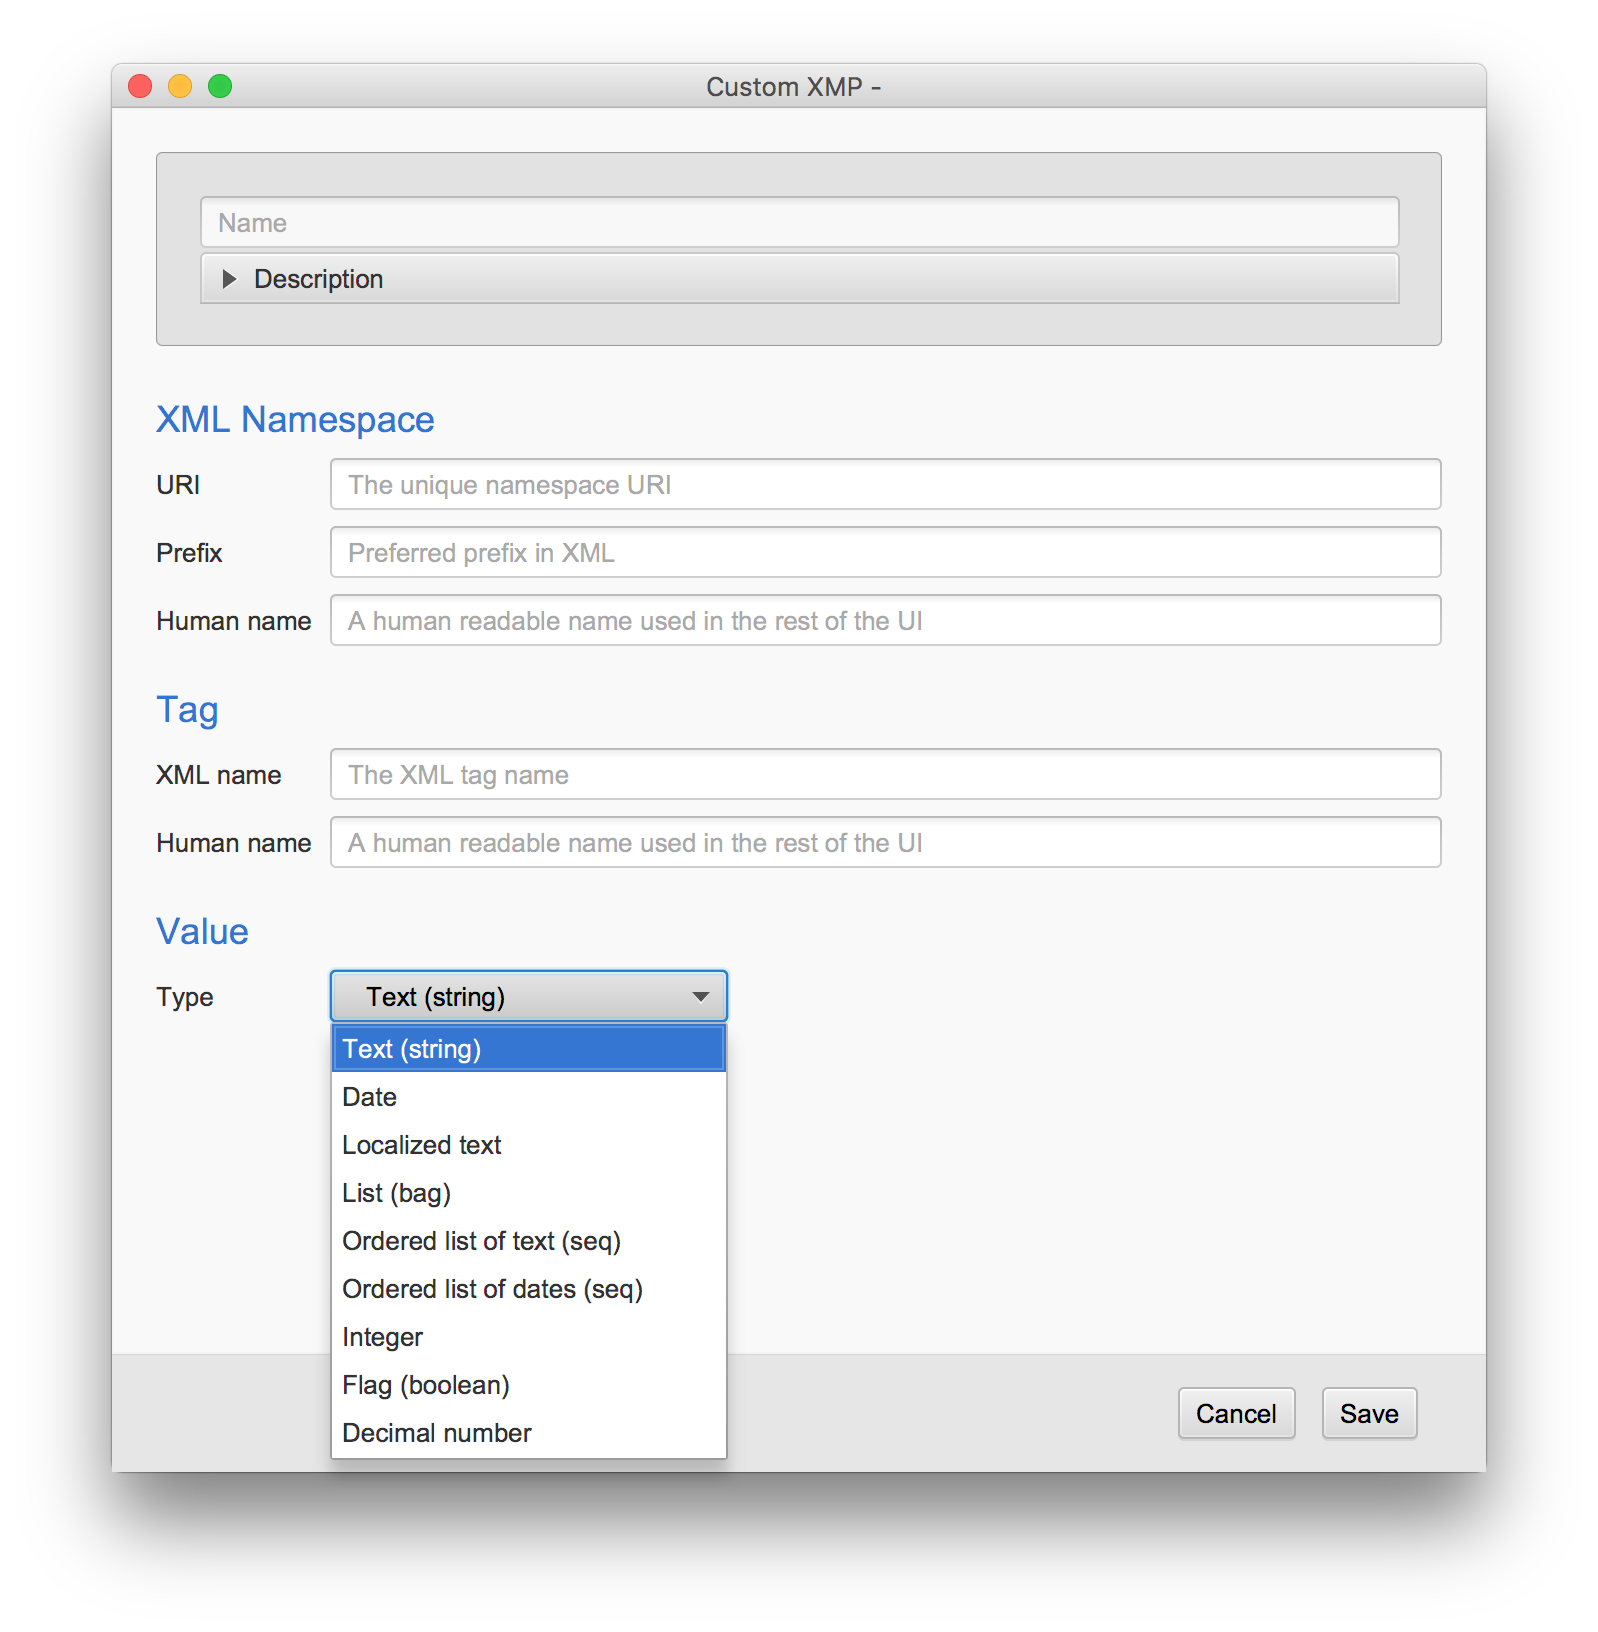
The customized XMP field settings.
XMP field setup.To setup the XMP field you will need to enter all the details.
Settings for a custom IPTC field
| Setting |
Description |
| Name |
The name for this XMP field. This name is only a name to show in the customized XMP field list and has no technical purpose. |
Namespace |
| URI |
The namespace URI is the specific URI to identify the XMP group. See the documentation from the supplier for the URI details.
Example) For the TIFF group this URI is http://ns.adobe.com/tiff/1.0/ |
| Prefix |
The namespace URI is not used when writing the XMP data, instead a prefix is used for this particular namespace, see the documentation from the supplier about the certain prefix used.
Example) For TIFF XMP the prefix is tiff |
| Human name |
This is used in the setup throughout Corbit where this particular XMP field is shown. |
Property |
| XML Name |
The name of the property in the XML. See the documentation from the supplier for the details.
Example) For the TIFF XMP the compression has the property name Compression. |
Value |
| Type |
Select the type of the property, see the documentation from the suppolier for details.
Example) For the TIFF XMP the compression has the type Integer. |
3.6 Integrations
Depending on the setup of your Corbit there may be external tools needed. If you have a setup which uses external tools you will be prompted a warning in the Corbit main window if that tool can not be found by Corbit. This warning will also contain (as a tooltip) where in your setup the tool is used.
Corbit tries to locate all external tools automatically but in some cases you may have to do some manual setup in order to locate the correct tool.
Each external tool may have individual setup which you can see by clicking on the button 'Show more' on the right hand side of each external tool.
If the setup is correct and Corbit is able to locate the tool you will see the version of that tool.
Note that the external tools are not included or shipped with Corbit, they must be downloaded/purchased from external source.
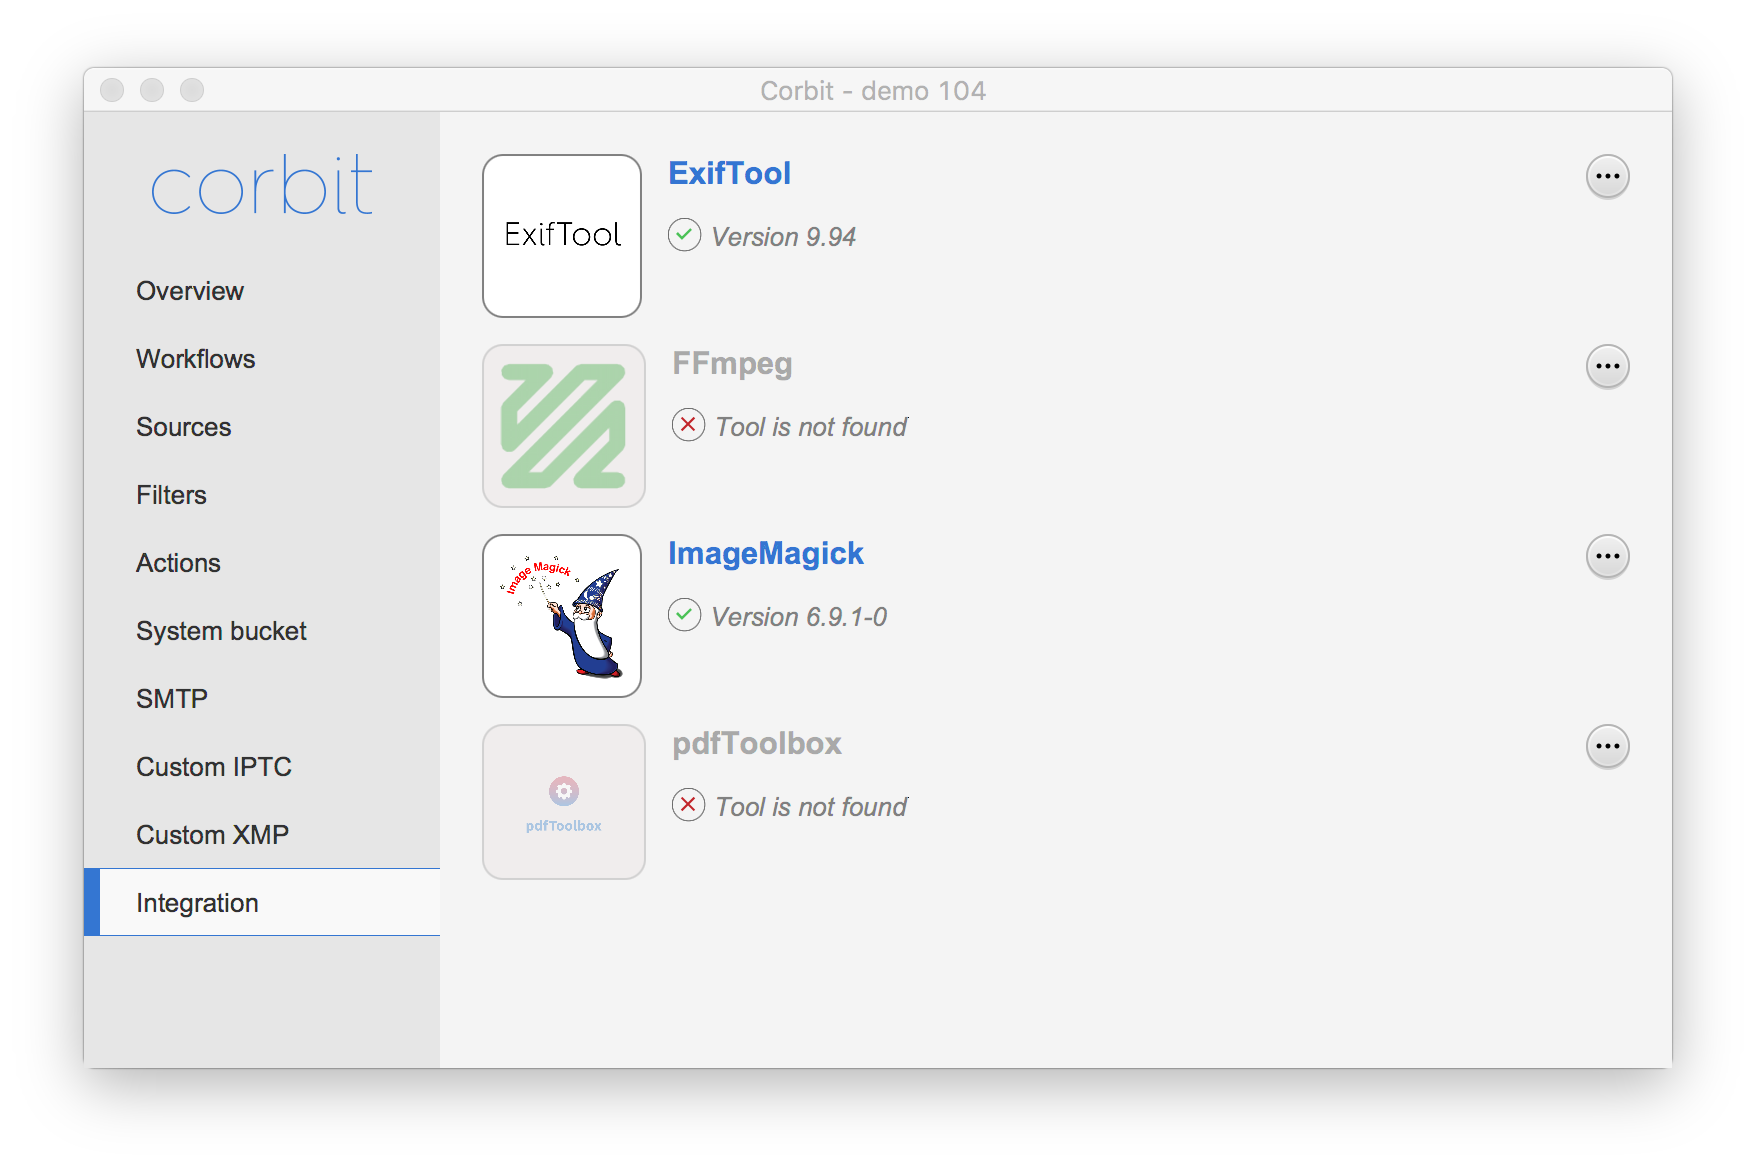 Integrations setup
Settings for external tool - Exiftool
| Setting |
Description |
| Executable |
Here you select the executable file for Exiftool |
Settings for external tool - ImageMagick
| Setting |
Description |
| Executable |
Here you select the executable file for ImageMagick.
NB! On Macintosh OSX you may have to set the executable manually and the path is then most likely the following
/opt/local/bin/convert |
Settings for external tool - FFMPEG
| Setting |
Description |
| Executable |
Here you select the executable file for FFMPEG |
Settings for external tool - pdf Toolbox
| Setting |
Description |
| Executable |
Here you select the executable file for pdf Toolbox |
3.7 XMP
In Corbit there are some standard XMP fields added. The following namespaces are currently supported except for those properties stated below. See the section about customized XMP to add your own XMP fields.
XMP Basic (http://ns.adobe.com/xap/1.0/)
The property thumbnails is not yet supported.
Dublin Core (http://purl.org/dc/elements/1.1/)
EXIF (http://ns.adobe.com/exif/1.0/)
The following propertis are not yet supported: CFAPattern, ComponentsConfiguration, CompressedBitsPerPixel, DeviceSettingDescription, ExifVersion, Flash, FlashEnergy, FlashpixVersion, GPSDestBearing, GPSDestBearingRef, GPSDestDistanceRef, GPSDestLatitude, GPSDestLongitude, GPSImgDirection, GPSImgDirectionRef, GPSLatitude (only as string), GPSLongitude (only as string), GPSMeasureMode, GPSSpeedRef, GPSStatus, GPSTimeStamp, GPSTrack, GPSTrackRef, GPSVersionID, ISOSpeedRatings, OECF, SpatialFrequencyResponse, SubjectArea, SubjectDistance, SubjectDistanceRange, SubjectLocation,
Extended EXIF (http://ns.adobe.com/exif/1.0/aux/)
IPTC (http://iptc.org/std/Iptc4xmpCore/1.0/xmlns/)
PDF (http://ns.adobe.com/pdf/1.3/)
Photoshop (http://ns.adobe.com/photoshop/1.0/)
The following propertis are not yet supported: DocumentAncestors and TextLayers
RAW (http://ns.adobe.com/camera-raw-settings/1.0/)
The following propertis are not yet supported: ToneCurve, ToneCurveName, WhiteBalance
Rights (http://ns.adobe.com/xap/1.0/rights/)
TIFF (http://ns.adobe.com/tiff/1.0/)
The following propertis are not yet supported: BitsPerSample, PrimaryChromaticities, ReferenceBlackWhite, TransferFunction, WhitePoint, YCbCrCoefficients, YCbCrPositioning, YCbCrSubSampling
3.8 Users
When starting Corbit for the first time after installation, a default user is activated for you. You may set these login values in the installer of Corbit.
Log in to your client by using the values from the installer.
User:
Password:
Go to the menu tab Users to add new users. In the bottom of the dialog you find Add Edit and Delete buttons, choose Add.
This will give you the interface for adding new users. Just add Name, description, user name, password and the e-mail address for the user.
Then decide the role this person has, Administrator or Read only.
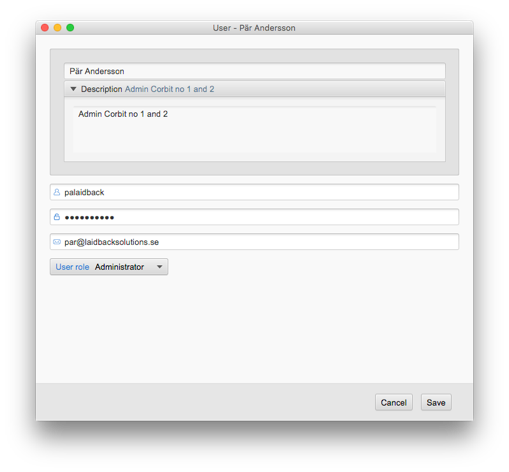 User setup
The users with Read only has no rights for configuration of Corbit. They can only view the statuses and start and stop the workflows.
Once you have saved your user information, add more if you want.
When you come back to Users you will get a list of the users you have set up and an option to edit the information (or delete).
You can always come back to add more users.
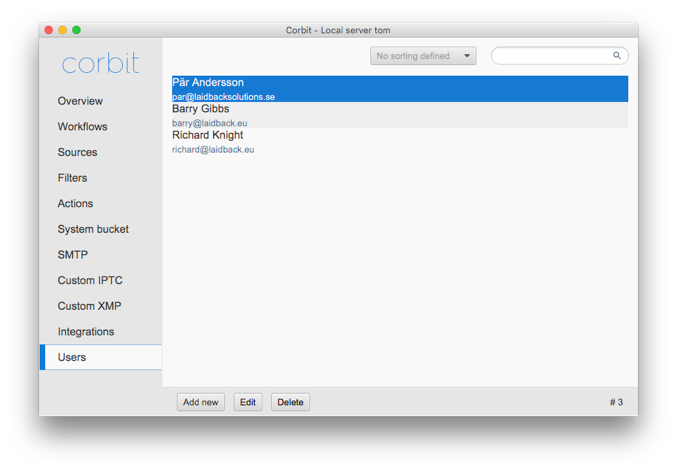 Users view
